HP OmniBook 800 User’s Guide (Windows for Workgroups) HP OMNIBOOK 800 USER’S GUIDE ....................................................... 4 Using This Online Manual ....................................................................................................4 Finding More Information ....................................................................................................4 Notice ..............................................................................................................
To insert a PC card ............................................................................................................24 To remove a PC card .........................................................................................................26 3. MANAGING BATTERY POWER......................................................... 27 Monitoring Battery Power ..................................................................................................27 To get the battery status ..............
6. CHANGING THE CONFIGURATION .................................................. 48 Using OmniBook Tools........................................................................................................50 To run OmniBook Tools ....................................................................................................50 Using the System Configuration Utility ..............................................................................52 To run the SCU .........................................
HP OmniBook 800 User’s Guide This manual describes how to use the OmniBook with the Microsoft® Windows® for Workgroups operating system. It focuses on the special Hewlett-Packard hardware and software, not the Windows operating system itself. For questions about the operating system, refer to the online Windows manual (see the OmniBook Library group in Program Manager). Using This Online Manual This online User’s Guide looks similar to a printed manual—and it works like a printed manual in many ways, too.
This manual and any examples contained herein are provided “as is” and are subject to change without notice. Hewlett-Packard Company makes no warranty of any kind with regard to this manual, including, but not limited to, the implied warranties of merchantability and fitness for a particular purpose. Hewlett-Packard Co. shall not be liable for any errors or for incidental or consequential damages in connection with the furnishing, performance, or use of this manual or the examples herein.
1. Getting Comfortable • Identifying Parts of the OmniBook. • Adjusting the Display. • Using the Mouse. • Using Sound. • Using the OmniBook Keyboard. • Learning About Windows. Congratulations! Your OmniBook sets a new standard in personal computing. Although it’s compact and easy to carry, the OmniBook is equipped with a full-size keyboard, its own built-in mouse, and Microsoft Windows. This chapter introduces the OmniBook and helps you get familiar with your new computer.
14. Infrared port (IrDA) 18. AC adapter socket 15. Serial port connector 19. Reset button 15 14 18 17 16 13 22. Battery 12 22 21 19 20 The floppy drive connects to the OmniBook externally—see "To connect the floppy drive.
Adjusting the Display Your OmniBook display controls are located above the keyboard next to the mouse button. To adjust the display • Press the ∧ and ∨ buttons above the keyboard to adjust the brightness. Hint Brightness affects battery time. Keep in mind that a higher brightness setting gives a shorter battery operating time—because the internal light is using more power. Use these buttons to make the display dimmer or brighter.
Using the Mouse The OmniBook mouse is PS/2-compatible. The mouse is extremely sturdy. Its flexibility allows it to withstand bending and accidental bumps without breaking. You use the OmniBook’s two-button mouse just as you do the mouse on your desktop PC: Move the pointer to the icon or menu you want, and click with the left mouse button for most operations. Or double-click—click twice rather quickly with the left mouse button—for certain operations.
You can customize the operation of the mouse using Windows Control Panel Mouse. To calibrate the mouse Each time you turn on the OmniBook, you might notice that the mouse needs to recalibrate itself—that is, it needs to redefine its margins. • Push or pull the mouse against one vertical and one horizontal limit until the pointer on the screen travels to the edge of the screen. To store the mouse 1.
Using Sound The OmniBook supports Sound Blaster compatible sound. In this section you’ll learn how to • Adjust the speaker volume. • Connect a microphone, speakers, or headphones. • Record and play sound. To adjust the speaker volume • Hold down FN and press UP ARROW or DOWN ARROW as needed to gradually increase or decrease the volume. (The FN key is at the front-left corner of the OmniBook keyboard.) This setting is temporary—it applies only to the current sound file. –or– 1.
Microphone Headphone output Line input Microphone input You can also plug in an external microphone, external speakers or headphones, and a stereo input source, such as a CD player. • Plug the microphone into the microphone jack. The built-in microphone turns off. • Plug the stereo speakers or headphones into the output jack. The built-in speakers turn off. • Plug a stereo input source into the input jack. To record and play sound • Use the Windows Sound Recorder application.
Using the OmniBook Keyboard In the section you’ll learn how to • Use the special features of the keyboard. • Start an application using a hot key. To use special features of the OmniBook keyboard In addition to the standard typing keys, the OmniBook keyboard contains the following special keys and features: FN combination keys The orange FN key is located at the front-left corner of the keyboard.
Press the NUM LOCK (number lock) key to use the numeric keypad. With the keypad active, keys change to the designations shown on their front, slanted faces. ALT GR key If your keyboard has an ALT GR key to the right of the spacebar, hold that key to type the characters printed at the bottom-right corners of keys. For keys that have four characters, hold SHIFT and ALT GR to type the upper-right characters.
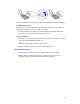
2. Hold down the CTRL key, then move the mouse pointer to the application icon, press and hold the left mouse button while you drag a copy of the icon onto the F1–F12 group icon, then release the mouse button and CTRL key. (See the illustration below.) This puts a copy of the icon at the end of the F1–F12 group and assigns the application to the next available function key.
4. After the label prints, cut it to size as marked. 5. Use your fingernail or a paper clip to pull out the plastic tray from the pocket above the keyboard. Use a small piece of tape to attach the right end of the strip to the right end of the tray. Then reinsert the tray. To access a FN key combination from a keyboard without an FN key If you are using a docking system with an external keyboard, you can set up CTRL+ALT as a substitute for FN.
Learning About Windows To learn about Windows This OmniBook User’s Guide does not discuss the Windows operating system. Rather, it introduces the OmniBook and shows you how to operate it. For information about Windows, see the following sources: • Start the Windows tutorial. In the Program Manager window, press ALT, then H, then W. • In the Program Manager window, double-click the Windows book icon in the OmniBook Library group.
2. Operating the OmniBook • Checking the Status of the OmniBook. • Starting and Stopping the OmniBook. • Using Storage Devices. Your OmniBook has been specifically designed for ease-of-use on the road. It features “instant-on” power that immediately restores your last screen. The Status Panel provides convenient status information. And the OmniBook supports a variety of storage devices.
At any time, you can hide or display the Status Panel. • Press FN+ESC—the panel becomes hidden or visible. You can’t display the Status Panel if you’ve disabled it. See "To configure the Status Panel." To move the Status Panel • Press FN+HOME, FN+END, FN+PAGE UP, or FN+PAGE DOWN to move the Status Panel around the corners of the display. This allows you to view what the Status Panel might be obscuring.
Starting and Stopping the OmniBook You can easily start and stop your OmniBook using the blue On/Off key. But at certain times, you may want to use other methods for starting and stopping your OmniBook, depending on power considerations, types of active connections, and startup time. In this section you’ll learn how to: • Start the OmniBook. • Stop the OmniBook in different ways. • Reset and restart the OmniBook. To start the OmniBook • Press the blue On/Off key.
Preserving connections. If you have active network connections, or if you have any SCSI devices connected, use the ac adapter and press the On/Off key to stop the OmniBook. These connections and devices are disconnected if you stop the OmniBook any other way. However, Windows 95 can restore network connections and SCSI devices when you turn on the OmniBook. For a different operating system, you may have to reboot the OmniBook or restart the operating system to restore them.
Insert a ballpoint pen tip or straightened paperclip into the small hole below the charging light and press the reset button inside the hole. Resetting is more complete than rebooting because it resets even locked-up components. 3. Optional: When the OmniBook displays a list of configurations, press SPACEBAR to stop the 5-second time-out. Then press a number key and ENTER to select a particular configuration. If you do nothing, the OmniBook uses its default configuration.
Using Storage Devices Your OmniBook can access information in the following types of data storage devices. Each device is assigned a drive letter by the operating system. For example, the floppy drive is drive A, and the internal hard disk is drive C. Drive letters for other devices depend on what devices are present. • The floppy disk drive (if present). • The internal hard disk drive. • Data storage cards in one or both PC card slots (if present). The upper slot is the first slot.
Caution Do not insert or remove a floppy disk while the OmniBook is actively reading or writing data. Wait until the floppy drive is done. Otherwise, you could lose data or the OmniBook could stop responding. To insert a PC card The OmniBook PC card slots are available for storing data and expanding the communication capabilities of the OmniBook. The OmniBook supports standard Type I, II, and III PC cards (PCMCIA and CardBus). You can use two thin cards or one thick card.
To insert a card in the lower slot 1. Turn over the OmniBook, release the two latches on the bottom of the slot tray, and pull out the tray. 2. Lift or push the plastic spacer out of the tray. (Save the spacer in case you remove the card later—it keeps dust and dirt from getting inside the case.) 3. Install the new card into the tray with its face up and its connector holes toward the metal tabs at the end of the tray. 4. Slide the tray fully into the slot and secure its latches.
End popup To remove a PC card Caution Never remove an I/O card while an application is open that’s set up to use that card. Exit the application first. If you remove the card, the application (or the OmniBook) might behave unpredictably or stop responding until you restart the OmniBook. Never insert or remove a plug-in card while the PC card drive is actively reading or writing data. Wait until the PC card drive is done. Otherwise, you could lose data or the OmniBook could stop responding. 1.
3. Managing Battery Power • Monitoring Battery Power. • Recharging and Replacing Batteries. • Controlling Battery Power. The primary source of power for the OmniBook is its rechargeable battery. The OmniBook provides several safeguards so that you won’t be surprised by a deadbattery condition. The Status Panel shows the remaining battery charge and built-in warnings are displayed for low-battery conditions.
Recharging and Replacing Batteries You can use the ac adapter to recharge the battery—and to run on ac power to preserve the battery. The OmniBook conserves power by using Advanced Power Management (APM), software that controls power drain. Data on any of the drives is not affected by a low battery. However, the data could be affected if the battery runs down completely while writing data to the drive. In this section you’ll learn how to • Recharge the battery or run on ac power. • Replace the battery.
OmniBook Charging Light Color Meaning for Battery Off AC adapter not connected. Orange Charging. Green Charging 90% - 100%. Red Bad battery or missing battery. Hint Optimum charging. To get the longest battery operating time, wait until the Battery indicator in the Status Panel appears full. The battery normally reaches 100% about 1 hour after the charging light turns green. You can continue working while the battery is charging. The charging rate is not affected by using the computer.
4. Insert the new battery pack so the metal battery contacts on the pack line up with the contacts in the compartment, then latch the cover. If you replace the battery within 1 minute, your current work session will be saved. (Saved files and data are not affected.) 5. If you have changed the battery very quickly, you might need to turn off the computer, then press F4+On/Off to turn it on and update the battery status indicator. Caution Do not mutilate, puncture, or dispose of the battery in fire.
Controlling Battery Power The OmniBook uses Advanced Power Management (APM) to conserve battery power. You can take steps to optimize your battery operating time. In this section you’ll learn how to • Respond to a low-battery warning. • Save battery power. • Change how power is managed. To respond to a low-battery warning When battery power is critically low, the Battery indicator in the Status Panel appears empty and a 2-minute warning appears on the display.
• Plug in the ac adapter, especially while using the floppy drive, a CD-ROM drive, or any external connections. • Turn down the brightness of the display to the lowest comfortable level. This reduces the backlight power, which can increase the battery operating time. • Set power management to an option that emphasizes saving power. See “To change how power is managed.” • If you work with an application that uses the serial port or an I/O card, exit the application when you’re done using it.
4. Protecting Your OmniBook • Attaching a Security Cable. • Setting Up Password Protection. • Protecting Your Data. Your OmniBook provides several ways for you to identify and protect your computer. Attaching a Security Cable Your OmniBook has a built-in connector that allows you to secure the OmniBook with a cable. The Kensington MicroSaver lock system works with this connector and is available at many computer stores. The same lock works with an OmniBook docking system. To attach a security cable 1.
Setting Up Password Protection You can protect your OmniBook against unauthorized use by activating password security. You can create a user password for normal protection against unauthorized use. You can also create an administrator password for a system administrator or as a backup for the user password. Or your system administrator might set up this password. In this section you’ll learn how to • Record your name for identification purposes. • Set up password security. • Delete a password.
• Separate user and administrator passwords. The user password is the general password for most types of protection. The administrator password can serve as a backup for the user password—you can enter it any time the user password is requested. The administrator password can provide setup and PC ID protection, and you can use it to change or delete the user password. Hint Before you type a password, check the status of Num Lock in the Status Panel. Normally, you’d want it off so you can type letters.
• Set the user password of the new OmniBook to match the current password on your hard disk drive. To delete a password 1. Run the System Configuration Utility and use its System menu Password commands (rebooting is not required). 2. Choose to set the user or administrator password, whichever one you want to delete. 3. When prompted, type your old password, but leave the new password empty and exit. Hint Turning off password protection.
Protecting Your Data As you create or add information on your OmniBook, the need to make backup copies of that information becomes more important. By making backup copies of key files, you can reduce the chance of accidentally losing that data. You can back up individual files to floppy disks using the Windows File Manager. For more elaborate backup storage, you might need to obtain one of the many commercially available software packages.
5. Using the Personal Information Applications • Managing Your Time with Appointment Book. • Listing People in Phone Book. • Getting Answers from HP Financial Calculator. This chapter introduces three applications to help you keep track of things— meetings and appointments, addresses and telephone numbers, personal records and finances—to mention just a few. Hint Appointment Book (and Phone Book ) keeps the working file open, and it updates the file for each change you make.
Managing Your Time with Appointment Book Appointment Book in your OmniBook is the perfect replacement for that old pocket calendar or bulky scheduler you may have used in the past. Appointment Book helps allocate your time, and is as easy to use as other Windows applications. Here are some of the ways to put Appointment Book to work: • View your daily, weekly, or monthly calendar at a glance. • Quickly add and delete appointments. • Use your OmniBook to signal the next appointment.
To change to a different day, month, or year • Click the desired day, month, or year in the Calendar. To add a new appointment 1. If necessary, click the day in the Calendar to display the day of your new appointment. 2. Click the mouse on the line next to the desired time in the Appointment area. Double-click to open the Add Appointment/Event box. 3. Type a description of the appointment. 4. Press ENTER or click OK to create the appointment. (Click SAVE to save the appointment and create another one.
When the OmniBook signals an appointment, it displays a dialog box to signal the alarm, even if you have exited Appointment Book or are working in another application. If the OmniBook is off, it turns on to display the box and signal your alarm. To add a new event Events (like holidays and anniversaries) are special days you don’t want to forget. 1. If necessary, click the Day button to display and change to the day of your new event. 2. Click the mouse on the top blank line in the Event area.
To run a program automatically • Create an appointment whose Description field starts with | followed by the command line. For example, to run a batch file called BACKUP (in directory MYFILES) at 1:00 a.m., set an appointment for 1:00 with this Description field: |C:\MYFILES\BACKUP.
Listing People in Phone Book Phone Book is another valuable part of your portable OmniBook. It is actually a personal database containing names, addresses, and—most important—telephone numbers, all ready for handy reference. You can add entries, delete them, search for a specific name, or even search for specific text. This section gives a brief introduction into using Phone Book. To start Phone Book • In Program Manager, double-click the Phone Book icon (in the OmniBook group).
4. Click OK or press ENTER to enter the item into the list. –or– Click Save to enter the item into the list and open a new, blank item. This is a good way to add several items to the list, one after another. When you add new persons to the list, they’re automatically placed in alphabetical order. Hints • For ease of typing, you can use the TAB key to tab between fields. (SHIFT+TAB tabs backwards.
Getting Answers from HP Financial Calculator HP Financial Calculator gives you all the power and convenience of a full-fledged Hewlett-Packard handheld calculator. It lets you quickly perform mathematical operations, as well as sophisticated financial and scientific calculations. Here’s a sample of what you can do with this handy OmniBook application: • Perform general arithmetic problems involving addition, subtraction, multiplication, and division.
HP Calculator “takes over” part of your OmniBook’s keyboard and reassigns functions to it. You can see these functions and the applicable keys on the display of calculator buttons—for example, pressing the Q key takes the square root of the number in the Calc line. Hints Use BACKSPACE to correct a single keystroke on the Calc line. Use DEL to erase the entire Calc line and reset it to zero. To do simple arithmetic 1. Type the calculation in the Calc line. 2. Press ENTER (or the = key).
If you are entering a multi-step problem, intermediate results are calculated when you type the next arithmetic operator. You can also type parentheses to group different parts of a calculation.
6. Changing the Configuration • Using OmniBook Tools. • Using the System Configuration Utility. • System Resources. You can use the System Configuration Utility (SCU) or the Tools application to change OmniBook configuration settings. The SCU provides more options for certain settings. The following chart summarizes the OmniBook settings you can change. See the sections of this chapter for details. To change any settings not accessible using this software, try using Windows Control Panel.
PC identification x Hard disk security x Other Date and time x x Sound volume x x Boot setup x Cache setup x Memory size x x BIOS version x x 49
Using OmniBook Tools OmniBook Tools give you a convenient way in Windows for Workgroups to change the way your OmniBook looks and operates. For many settings, it’s an alternative to using the System Configuration Utility. To run OmniBook Tools 1. In Program Manager, double-click the OmniBook Tools icon (in the Main group). 2. Click the buttons for the changes you want to make. You’re prompted if you need to reboot the computer. Click Help or see the table below for more information. 3.
Printers Sets printer options. Card Slots Starts the CardWizard application for managing PC cards. Infrared Communications Starts IrMonitor or sets when it starts. IrMonitor provides IrDA communications. Input Devices “Enable External FN Key” lets you press CTRL+ALT instead of FN on an external keyboard with no FN key. “Ignore External Pointing Device” activates the built-in mouse when an external mouse is connected. Pointing Devices Sets pointing device or mouse settings.
Using the System Configuration Utility The System Configuration Utility (SCU) provides access to basic configuration settings. It is independent of the operating system. To run the SCU 1. Close all applications, then shut down Windows and reboot the OmniBook. If necessary, you can press CTRL+ALT+DEL to reboot. 2. During reboot, at the message “ to enter System Configuration Utility,” press F2 to start the SCU. 3. The mouse is not active in the SCU.
Passwords Password options “User Password required” sets whether a user password is required when the computer turns on, or before undocking. “Administrator Password required” sets whether PC ID changes are protected by the administrator password. “Disable hard disk drive lock” sets whether a user password with turnon security can secure data on the hard disk if the disk is moved to another computer.
an external mouse is connected. Audio Port Basic Audio “Disable internal” turns off the internal sound chip, such as when using an external sound card. Sets the volumes for the beeper signal and the sound speaker. Advanced Audio Sets system resources used by audio devices. Video Stretched On or Off. Expands video so a VGA-size image fills the entire screen. (You can press FN+TAB at any time to change this.) Enable IrDA IR On or Off. Makes the infrared port compatible with the IrDA standard.
System Resources Below are default values for system resources. To see other, non-default possibilities, use the System Configuration Utility, which lists port and audio device configurations in the Input/Output menu. The tables in this section show typical resource usage as set up by the OmniBook BIOS. Plug-and-play operating systems, drivers, and SCU settings may change some of the entries.
7 Free System Memory C000-C7FF VGA BIOS C800-CFFF Free D000-D1FF PC Card memory for Windows 3.
7. Troubleshooting • Solving Problems. If you run into problems using your OmniBook, you can use the suggestions in this chapter for getting back on track. You can also check the contents and index for pointers to related information. If you have questions that this manual doesn’t answer, you can • See the troubleshooting chapter in the OmniBook Installation and Setup Guide if you have problems that interfere with turning on or starting the OmniBook.
• For infrared printing from an MS-DOS program, run the program in an MS-DOS window instead of in MS-DOS mode. • Make sure the infrared light path is not blocked. • Move the devices to within about 1/2 meter (1.5 feet). • Make sure Windows is running—infrared printing is supported only while Windows is running. • Make sure the infrared printer is IrDA compatible. • Make sure you have not disabled IrDA support on your OmniBook.
• Check the OmniBook serial port assignments in OmniBook Tools. Click Connections, then COM Ports. For a serial mouse, the serial port must be assigned to COM1. • Check whether the serial mouse is compatible with the OmniBook—the mouse must be compatible with the 9-pin serial Microsoft Mouse. File, Drive, and PC Card Problems If a PC card doesn’t work properly in a card slot For information about compatible cards, visit our Web site at http://www.hp.com/go/omnibook.
To turn on DriveSpace for only removable drives: Exit Windows, run dscopy, then press CTRL+ALT+DEL. To turn off DriveSpace: Exit Windows, run dsdel, then press CTRL+ALT+DEL. Communications Problems If you have problems with serial communications • If you cannot make a serial connection at high speed (115K baud), try changing the Power Management setting in the System Configuration Utility to “Moderate” (from “Maximum”).
• Its bus speed might be too slow for the OmniBook. You can decrease the OmniBook’s bus speed by pressing FN+HYPHEN (minus). To restore the normal speed, press FN+EQUAL (plus). Sound Problems If sounds aren’t audible • Check the playback or recording sound levels, channels, and muting. See "Using Sound." • Check the configuration of the sound card for system-resource conflicts.
If you have power problems that interfere with turning on or starting the OmniBook, see the troubleshooting chapter in the OmniBook Installation and Setup Guide, which came with the OmniBook. If the battery runs down too fast • Make sure you charge the battery until the Status Panel shows a full battery. The charging light changes from orange to green when the battery is only about 90% charged.
• If you replaced the battery after the OmniBook turned off due to a low battery, either plug in the ac adapter or press F4+ON to turn on the OmniBook. • If the new battery pack is low, plug in the ac adapter. If the OmniBook doesn’t suspend immediately • If the OmniBook is performing an operation, it normally waits for the operation to finish. • If you’re using MS-DOS Prompt in the full screen (not inside a window), it may take up to 10 to 15 seconds to suspend.
• Press CTRL+ALT+DEL, then stop the application. • Reboot the OmniBook. If a screen saver causes lockup • If you’ve previously set up an OmniBook password, you should delete the OmniBook password. Screen savers conflict with password protection, and together they can lock up the OmniBook. If you can’t start Windows • In the System Configuration Utility, set Factory Default Settings in the Defaults menu.
—A— ac adapter charging battery, 28 connecting, 28 preserves connections, 20 socket for, 6 status, 18 type, 28 adding appointments, 40 events, 41 phone entries, 43 address resources, 55 adjusting brightness, 8 volume, 11 admin password deleting, 36 options, 52 setting up, 34 status, 50 Advanced Power Management, 27 alarms, 41 ALT GR key, 14 APM (Advanced Power Management), 27 application FN keys, 14 Appointment Book, 39 appointments, 39, 40 audio system compatibility, 11 connections, 11 external jacks, 6 mi
displaying appointments, 39 Status Panel, 18 DMA channels, 55 docking messages, 52 docking port, 6 drive A booting from, 22 location, 23 drive C booting from, 21 location, 23 repairing, 37 security, 34 status, 18 drive letters, 23 drive lock, 34, 52 drives compressed, 59 connecting floppy drive, 23 repairing, 37 security, 34, 52 swapping, 37 troubleshooting, 59 types, 23 DriveSpace, 59 —E— events (Appointment Book), 41 —F— F1044 ac adapter, 28 F1-F12 group, 14 F1-F12 keys, 14 F4+ON, 62 F4+On/Off, 27 files
numeric keypad, 13 shifted keys, 14 status, 18 —L— latch (cover), 6 learning Windows, 17 light (orange charging), 6, 28 lockup problems, 63 low battery charging, 28 replacing, 29 warning, 31, 52 —M— math, 45 memory addresses, 55 amount, 50, 52, 58 troubleshooting, 58 memory-expansion slot, 6 microphone, 11 MicroSaver lock, 33, 35 mouse calibrating, 10 customizing, 10 external, 50, 52 location, 6 PS/2 compatible, 9 replacing, 10 storing, 10 troubleshooting, 58 using, 9 mouse-eject button, 6, 9 moving the p
protection identification, 34 passwords, 34 security cable, 33, 35 types, 34 PS/2 compatibility, 9 —R— raising the mouse, 9 RAM cards, 25 rebooting configuration, 52 from drive C, 21 from floppy drive, 22 recharging battery, 28 recording sound, 12 removing appointments and events, 41 battery, 29 passwords, 36 PC cards, 26 replacing battery, 29 mouse, 10 reset button location, 6 using, 21 resources, 55 —S— saving battery power, 31 scanning disks, 37 Scroll Lock indicator, 18 SCSI devices at turn-off, 20 da
—U— undocking security, 34 updates, 4 user password deleting, 36 options, 52 setting up, 34 status, 50 —V— VGA output, 6 viewing appointments, 39 volume adjusting, 11, 52 muting, 11 —W— warning (low battery), 31, 52 Web site, 4 Windows installing, 4 learning about, 17 —Z— Zoomed Video, 24 69