
Setup Guide


HP OfficeJet R Series Setup Guide 1-19
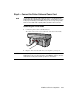
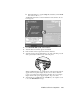
Step 7 — Align Your Print Cartridges
Before you start using your HP OfficeJet, you need to align the print
cartridges to ensure the best copy and print quality.
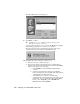
When you turn on your HP OfficeJet for the first time, you will see the
message “Initializing,” followed by the message “Press Resume to Align
Cartridges” on the front-panel display.
NOTE
If the messages are not in your language, you can change the language before
aligning your cartridges. Follow the instructions provided later under “Changing the
Front-Panel Language.”
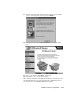
1
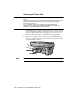
If “Press Resume to Align Cartridges” or “Align Cartridges” appears on
the front-panel display of your HP OfficeJet, press the Select/Resume
button on the front panel of the unit.
The HP OfficeJet prints a page with three sets of paired lines on it. A set
of numbered, horizontal lines appears at the top of the page, and two sets
of vertical lines, each with a unique letter, appear in the middle and at the
bottom of the page.
2
Follow the instructions on the page above each set of paired lines.
Congratulations! You have finished setting up your HP OfficeJet. Now you
are ready to start using it.
Changing the Front-Panel Language
To switch to a different language, do the following:
1
While holding down the Select/Resume button, press the Color
Intensity button, and then release both buttons.
2
Press Select/Resume.
The current language appears on the front-panel display.
3
Press the minus (–) or plus (+) button to scroll through the available
languages until the language you need appears on the display.
The available languages include: English, Español, Deutsch, Français,
Italiano, Portugués, Nederlands, Dansk, Norsk, Svenska, and Suomi.
4
Press Select/Resume to choose the displayed language.
The current paper size appears on the front-panel display.
5
Press the minus (–) or plus (+) button until the desired paper size
appears on the display.
6
Press Select/Resume to choose the displayed paper size.