
Reference Guide
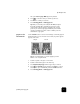
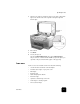

print from a photo card
41
hp officejet d series
1
Do one of the following:
– If your card is already in the slot, press Menu, press 0, then
press 4.
This selects Photo Card Functions, then selects Print Photos.
– If your card is not in the slot, insert the photo card, and press 2
when Save Photos to PC? appears.
2
When Print What? appears, press until Photos on Card appears,
then press Enter.
3
Press to select Custom, then press Enter.
4
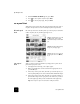
Use the keypad to enter the photo numbers for the photos you want to
print.
5
Press or Enter to enter the next photo number.
A comma is inserted automatically as the cursor advances to the right.
Tip! You can specify a range using a dash, which you enter
by pressing the Symbols button (*) on the keypad.
6
Press Enter when you have typed all the photo numbers for the photos
you want to print.
7
Press to select a photo size, then press Enter.
8
Press to select a paper type, then press Enter.
9
Press to select the number of copies, then press Enter.
The selected photos are printed.
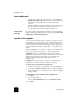
print a DPOF file The Digital Print Order Format (DPOF) is an industry-standard print file
request that can be created by some digital cameras. Consult your digital
camera documentation to see if it supports Digital Print Order Format
(DPOF).
The DPOF file is stored by the digital camera on a photo card and specifies
the following information:
• Which photos to print
• The quantity of each photo to be printed
1
Do one of the following:
– If your card is already in the slot, press Menu, press 0, then
press 4.
This selects Photo Card Functions, then selects Print Photos.
– If your card is not in the slot, insert the photo card, and press 2
when Save Photos to PC? appears.
You can erase entries by pressing . As the bottom
line is filled, the data entry field scrolls left to show
the number as it is entered.