
Reference Guide

use a photo card
38
hp officejet d series
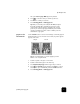
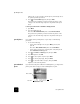
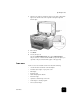
insert a photo card
! Insert the photo card into the appropriate slot on your HP OfficeJet.
Reading camera photo card... appears on the front-panel display. The
light next to the card slot blinks green when the card is being
accessed.
When the HP OfficeJet is finished reading the card, another message
appears showing the number of files found on the photo card.
You can safely remove the card only when the light is off.
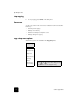
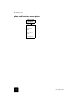
cards inserted
incorrectly
If you insert a photo card backwards, the light next to the card slot blinks
amber and the front panel displays an error message such as Photo card is
in backwards or Gold side should face left.
save files to the computer
You can save files directly from a photo card to your computer. If you are
using Windows, you can save photos to your computer and view them in
the HP Photo View Center. For the Macintosh, you can save the photos to
your computer, then view them in the HP Workplace. Once saved, you can
edit them, create photo collages or album pages — the possibilities are
endless.
When your HP OfficeJet is connected to a computer, you should save all the
photos to your computer. This allows you to reuse your photo card.
For Windows: files are saved by default in month and year folders
depending on when the photos were taken. The folders are created under
the C:\My Documents\My Pictures\ folder, or C:\Documents and
Settings\<username>\My Documents\My Pictures\ folder for
Windows 2000.
For Macintosh: files are saved to the computer in the default location
HardDrive\Documents\HP All-in-One Data\Photos\ directory.
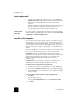
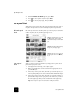
to save files to the computer when inserting the card
1
Insert the photo card into the appropriate slot on your HP OfficeJet.
2
Press 1 when Save Photos to PC? appears on the front-panel display.
3
If your HP OfficeJet is on a network, you are also asked to identify the
desired computer.
to save files to the computer when the card is already inserted
1
Press Menu.
2
Press 0, and then press 1.
This selects Photo Card Functions, then selects Save Photos to PC.
3
Press Enter.