HP Database Manager (HPDM) User Guide HP Part Number: 546008-001 Published: April 2009 Edition: HP Neoview Release 2.
© Copyright 2009 Hewlett-Packard Development Company, L.P.
Table of Contents About This Document.........................................................................................................7 Intended Audience.................................................................................................................................7 Related Documentation..........................................................................................................................7 Neoview Customer Library...................................................
Primary Key Tab..............................................................................................................................27 Hash Key Tab...................................................................................................................................27 Unique ConstraintsTab....................................................................................................................27 Foreign Keys Tab..................................................................
Displaying Table Statistics and Their Properties..................................................................................56 Displaying Table Column Statistics.................................................................................................56 Viewing Sampled Statistics.............................................................................................................56 5 Using the SQL Whiteboard................................................................................
About This Document This guide describes how to use the HP Database Manager (HPDM) to connect and manage a Neoview Data Warehousing Platform for Business Intelligence. Intended Audience This guide is intended for those who perform standard database administration tasks. It provides basic concepts and task information to get you started quickly and easily. Related Documentation This manual is part of the HP Neoview customer library.
Neoview Management Dashboard Context-sensitive help topics that describe how to use the Neoview Online Help Management Dashboard Client. Neoview Performance Analyzer Online Help Context-sensitive help topics that describe how to use the Neoview Performance Analyzer to analyze and troubleshoot query-related issues on the Neoview data warehousing platform. Neoview Reports Online Help Help topics that describe how to use the HP Neoview Reports Tool.
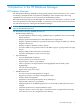
1 Introduction to the HP Database Manager HP Database Manager The HP Database Manager (HPDM) is an integrated graphical client that allows you to connect and manage multiple HP Neoview platforms. HPDM provides database-object browsing capabilities that are superior to the current Neoview DB Admin product. HP Database Manager requires the HP ODBC 2.0 client driver for Windows to connect to an HP Neoview platform. Download the HP ODBC 2.
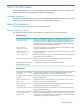
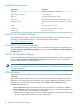
Installation Requirements Requirement Description Computer Windows compatible PC workstation Monitor screen resolution 1024 x 768 pixels Memory Recommended minimum 512 MB Disk space Minimum 10 MB for installation and 64 MB free space Operating system Microsoft Windows XP/Microsoft Windows Vista 32/64 bit ODBC Neoview version 2.0 or later Additional Microsoft .NET Framework 2.0 or later HP Neoview Neoview version R2.
NOTE: All of the current settings are replaced by the settings in the file being imported. Customizing HPDM Windows HPDM allows you to customize and resize areas that are displayed. HPDM scrolls continuously in any direction, when the appropriate scroll arrow is clicked and held. The relative position of the window is changed by selecting and moving the scroll box along the scroll bar. HPDM retains area settings between sessions. HPDM windows can be resized by dragging the window corner or border.
2 The Systems Tool Systems Tool The Systems Tool contains the components used to define, add, edit, remove, duplicate, test, and open existing systems on the Neoview platform. Select the Tools->Systems Tool menu in HPDM and you can create a system definition for each system you want to manage, see “Add System” (page 13).
NOTE: Once a system is added, the system definition persists from session to session unless it is removed. In the Add System window, these fields define a Neoview system: • • • • • • • • Your Name for System — enter an alias name to identify this Neoview system. The name can be up to 32 characters in length, and consist of letters, digits, and the underscore character. Server Data Source — enter the name of the data source on the Neoview system.
Edit System NOTE: The Systems Tool window shows the active system definitions. Editing an active system definition causes all previously configured system definitions to be lost. To edit a system: • Select a system in the Systems Tool window and click the Edit button. This brings up the Edit System window. In the Edit System window the title bar displays the system being edited.
Add System Like This To add a system like the selected system’s current settings: • Select the system definition you want to duplicate in the Systems Tool window. • Click [Add Like]. This opens the Add Like System window. • In the Add Like System window: — A new name has to be specified in the field “Your name for the system.” — Validate the system information specified for the selected system. The title bar displays the system whose settings are being used as a template for the new system. — Select [OK].
3 Navigating HPDM Navigation Tree Pane The navigation tree pane in HPDM displays a tree of the database objects in hierarchical form. The navigation tree pane is the left pane of HPDM. The navigation tree pane allows you to select a system and display the associated database objects in the right pane. Through the use of displays, you can switch between different systems and manage multiple Neoview platforms.
To display the My Other Systems folder options, right-click on the My Other Systems folder and the options are: • • • Add to Favorites creates a shortcut for the object under “My Favorites.” The New Favorite dialog box is launched to provide an alias for the object Refresh refreshes the object and all children for the object in the navigation tree. Add System creates a new system, see “Add System” (page 13).
• • [Data to Spreadsheet] opens the Excel application and displays the data. [Data to File] exports the data to a file in CSV format.
4 Managing Database Objects This section describes how to display schemas, tables, table indexes, views, materialized views, materialized view indexes, materialized view groups, procedures, synonyms, and triggers in HPDM.
Displaying Schemas and Their Objects To display the schema names and attributes for the schema: 1. 2. 3. 4. Start the HP Database Manager and log on using any user ID. Click the Database area. HPDM displays a list of existing schemas and their owners. Select a system in My Active Systems in the navigation tree. Navigate to a Schema folder and click on the name of the schema to see information about the schema and its objects.
• • • Name: Name of the schema. Owner: The owner of the schema. Version: Specfies the version of the schema. Tables Tab To display the table names that belong to the schema: 1. 2. Select a Schema in the navigation tree. Click on the Tables tab in the right pane, or open the Tables folder. In the right pane, these attributes are displayed: • Name: Name of the table. Each table name is hyperlinked and detailed information about the table is displayed.
• • • Name: Name of the view. Each view is hyperlinked and detailed information about the view is displayed. Creation Time: Time and date when the view was created. Timestamp is in the format (yyyy-MM-dd HH:mm:ss.FFFFFF local time). Redefinition Time: Time and date when the view was last redefined. Timestamp is in the format (yyyy-MM-dd HH:mm:ss.FFFFFF local time). Procedures Tab To display the procedures that belong to the schema: 1. 2. Select a Schema in the navigation tree.
• • • • • Grantee: The name of a user whose privilege is being described. Grantor: The name of the user who granted the privileges and the special SQL user names “PUBLIC” and “SYSTEM.” With Grant: Specifies an ‘X’ to indicate if the user has grant privileges. Grant Level: The level at which the permissions are visible. The values displayed in this column are: Schema, Object, or Column. — Schema indicates permissions have been applied to the schema.
Displaying Tables and Their Properties To display the table columns, primary key information, attributes, and usage information: 1. 2. 3. 4. Start the HP Database Manager and log on using any user ID. Click the Database area. Select a system in My Active Systems in the navigation tree. Select a Schema and click the table name in the right pane, or open the Tables folder. HPDM displays the tables in the schema.
Columns Tab To display the table columns: 1. 2. Select a Schema and table and click the table name in the right pane, or open the Tables folder and select a table name in the tree. Click on the Columns tab in the right pane. In the right pane, these attributes are displayed: • Primary Key: Specifies the icon or special symbol to indicate column is part of the primary key. • Column Name: Name of the column (string). • Data Type: SQL datatype of the column.
• • Constraint Name: Name of the unique constraint. Columns: The name of the columns that are constrained. Foreign Keys Tab To display the foreign keys information on the table: 1. 2. Select a Schema in the navigation tree and click the table name in the right pane, or open the Tables folder and select a table name in the tree. Click on the Foreign Key tab in the right pane. In the right pane, these attributes are displayed: • Name: Name of the foreign key constraint.
Usage Tab To display usage information defined on the table: 1. 2. Select a Schema in the navigation tree and click the table name in the right pane, or open the Tables folder and select a table name in the tree. Click on the Usage tab in the right pane. The Usage tab displays the usage relationships of the table with other objects, if any. The attributes displayed are : • Relationship: Specifies the relationship of the table with the object specified. The values are: “Uses”, “Used By”, “Has.
• • With Grant: Specifies an ‘X’ to indicate if the user has grant privileges. Grant Level: The level at which the permissions are visible. The values displayed in this column are: Schema, Object, or Column. — Schema indicates permissions have been applied to the schema. — Object indicates permissions were applied directly to the object whose permissions are being displayed. — Column indicates the permissions applied to the column.
Displaying Table Indexes and Their Properties To display the indexes for tables, columns, and attributes: 1. 2. 3. 4. 5. Start the HP Database Manager and log on using any user ID. Click the Database area. Select a system in My Active Systems in the navigation tree. Select a Schema in the navigation tree. Click the Tables folder and open the Indexes folder and select an index name.
Attributes Tab To display the table index attributes: 1. 2. 3. Select a Schema in the navigation tree. Click the Tables folder and open the Indexes folder and select an index name. Click on the Attributes tab in the right pane. In the right pane, these attributes are displayed: • Name: Name of the index. • Unique: Specifies if the index is unique, the value is “Yes” or “No.” • Populated: Specifies if the index has been populated, the value is “Yes” or “No.
• Total Current Size: The total current size of the index (in bytes). • Percent Allocated: The percent full of the index. The detailed summary is a snapshot of the indexes (tables indexes and materialized view indexes) in the schema at the timestamp shown at the top of the table display. If you select [Refresh] the summary is refreshed. A row is highlighted in red if the partition is equal to or greater than 80%.
Displaying Views and Their Properties To display the view information: 1. 2. 3. 4. 5. Start the HP Database Manager and log on using any user ID. Click the Database area. Select a system in My Active Systems in the navigation tree. Select a Schema in the navigation tree. Select the Views tab in the right pane, or open the Views folder and select a view. HPDM displays the views in this schema.
• • • Data Type: SQL datatype of the column. Nullable: If column is NOT NULL NOT DROPPABLE, the value displayed is “Not Nullable.” If the column is NOT NULL, the displayed value is “Not Nullable.” If the column is NULL, the value is blank. Default: The default of the column. Usage Tab To display the usage information for a view: 1. 2. 3. Select a Schema in the navigation tree. Click the Views tab, or open the Views folder and select a view. Click on the Usage tab in the right pane.
— — — • 36 Schema indicates permissions have been applied to the schema. Object indicates permissions were applied directly to the object whose permissions are being displayed. Column indicates the permissions applied to the column. When an object level privilege applies to all columns, the individual column privileges are not displayed, otherwise the individual column level permissions are listed. Privileges: Describes the privilege of the user.
Displaying Materialized Views and Their Properties To display the materialized view information: 1. 2. 3. 4. 5. Start the HP Database Manager and log on using any user ID. Click the Database area. Select a system in My Active Systems in the navigation tree. Select a Schema in the navigation tree. Click on the Materialized Views tab in the right pane and select a materialized view name, or open the Materialized Views folder and select a materialized view name in the tree.
• • Name: External name of the materialized view. Refresh Type: Refresh policy displayed is (Recompute | On Refresh | On Statement). — Recompute Derives the materialized view from scratch. This is used on the initial refresh of the materialized view and also to re-derive the materialized view if it is in an inconsistent state (for example, if the previous refresh was aborted abnormally). — On Request Updates the materialized view at a time that you schedule.
• • • • • Partition Number: The index number of the partition. Percent Allocated: The percentage full of the partition. Row Count: The current total number of rows in the partition. Max Size: The maximum size in bytes of the partition. Current EOF: The current data size of the partition in bytes. Usage Tab To display materialized view usage information: 1. 2. 3.
• • With Grant: Specifies an ‘X’ to indicate if the user has grant privileges. Grant Level: The level at which the permissions are visible. The values displayed in this column are: Schema, Object, or Column. — Schema indicates permissions have been applied to the schema. — Object indicates permissions were applied directly to the object whose permissions are being displayed. — Column indicates the permissions applied to the column.
Displaying Materialized View Indexes and Their Properties To display the materialized view index information: 1. 2. 3. 4. 5. 6. Start the HP Database Manager and log on using any user ID. Click the Database area. Select a system in My Active Systems in the navigation tree. Select a Schema in the navigation tree. Open the Materialized Views folder, select and open a Materialized View. Open the Indexes folder and select a materialized view index in the tree.
Attributes Tab To display the materialized view attributes: 1. 2. 3. 4. Select a Schema in the navigation tree. Open the Materialized Views folder, select and open a materialized view. Open the Indexes folder and select a materialized view index in the tree. Click on the Attributes tab in the right pane. In the right pane, these attributes are displayed: • Name: Name of the materialized view index. • Unique: Specifies if the materialized view index is unique, the value is “Yes” or “No.
Displaying Materialized View Indexes Summary To display a detailed summary of the materialized views: 1. Select a Schema and right-click on the Materialized View folder and select Show Summary Details. Clicking on Show Summary Details displays a separate window with a summary of the materialized views. The materialized views partition summary displays: • Name: The name of the materialized view. • Total Current Row Count: The total number of rows in each materialized view.
Displaying Materialized View Groups and Their Properties When you create a materialized view, a materialized view group is created automatically. It has the same name as the table that the materialized view references. To display the materialized view group information: 1. 2. 3. 4. 5. Start the HP Database Manager and log on using any user ID. Click the Database area. Select a system in My Active Systems in the navigation tree. Select a Schema in the navigation tree.
• • • Name: Name of the materialized view group. Creation Time: Time and date when the materialized view group was created. Timestamp is in the format (yyyy-MM-dd HH:mm:ss.FFFFFF local time). Redefinition Time: Time and date when the materialized view group was last redefined. Timestamp is in the format (yyyy-MM-dd HH:mm:ss.FFFFFF local time). Members Tab To display the names of the members of the materialized view group: 1. 2. 3. Select a Schema in the navigation tree.
Displaying Procedures and Their Properties To display the procedures names in the schema: 1. 2. 3. 4. 5. Start the HP Database Manager and log on using any user ID. Click the Database area. Select a system in My Active Systems in the navigation tree. Select a Schema in the navigation tree. Click on the Procedures tab in the right pane and select a procedure name, or open the Procedures folder and select a procedure name in the tree. HPDM displays the procedures for this table.
• • • • SQL Access: Specifies the way this procedure interacts with SQL Database. The values displayed are: CONTAINS SQL | MODIFIES SQL DATA | READS SQL DATA | NO SQL. For more information, see the HP Neoview Guide to Stored Procedures in Java. Signature: The parameter signature. For information on data types, see the Neoview SQL Reference Manual. Creation Time: Time and date when the procedure was created. Timestamp is in the format (yyyy-MM-dd HH:mm:ss.FFFFFF local time).
1. 2. 3. Select a Schema in the navigation tree. Click on the Procedures tab in the right pane and select a procedure name, or open the Procedures folder and select a procedure name in the tree. Click on the Privileges tab in the right pane. The Privileges tab displays a table showing the access privileges. • • • • • 48 Grantee: The name of a user whose privilege is being described. Grantor: The name of the user who granted the privileges and the special SQL user names “PUBLIC” and “SYSTEM.
Displaying Synonyms and Their Properties To display the synonym names in the schema: 1. 2. 3. 4. 5. Start the HP Database Manager and log on using any user ID. Click the Database area. Select a system in My Active Systems in the navigation tree. Select a Schema in the navigation tree. Click on the Synonyms tab in the right pane and select a synonym name, or open the Synonyms folder and select a synonym name in the tree.
Usage Tab To display the synonym usage information: 1. 2. 3. Select a Schema in the navigation tree. Click on the Synonyms tab in the right pane and select a synonym name, or open the Synonyms folder and select a synonym name in the tree. Click on the Usage tab in the right pane. The Usage tab displays the usage relationships of the synonym with other objects, if any. These attributes displayed are: • Relationship: Specifies the relationship of the synonym with the object specified.
Displaying Triggers and Their Properties A trigger is a mechanism that resides in the database and specifies that when a particular action—an insert, delete, or update occurs on a table, SQL should automatically perform one or more additional actions. To display the triggers: 1. 2. 3. 4. Start the HP Database Manager and log on using any user ID. Click the Database area. Select a system in My Active Systems in the navigation tree.
• • • • • Activation Time: Specifies when the trigger is activated. Used in combination with an operation. The value is “Before” or “After.” Operation: Specifies operation that causes the trigger to be activated. The values are (Insert | Delete | Update). Granularity: Specifies “Row” or “Statement” trigger. Row triggers are allowed for all Time/Event combinations. Statement triggers are allowed AFTER events. For more information, see the Neoview SQL Reference Manual.
Displaying Schema DDL and Their Properties To display schema DDL information, a DDL tab appears in the right pane when these objects are selected in the navigation tree: • • • • • • • • • • Schema Table Table Index View Materialized View Materialized View Index Materialized View Group Procedure Synonym Trigger DDL Tab The DDL tab displays DDL output from the Show DDL command in the right pane. You can highlight and copy contents, but you cannot edit the contents.
• • • • 54 In the Show DDL dialog box, the Select Objects pane displays a “Selection Tree” that displays a navigation tree. The “Selection Tree” has check boxes in front of the node names and you can select or deselect specific objects. If the Show DDL dialog box is invoked on a folder node in the main navigation tree, the Select Objects pane displays (by default) the selection tree with the corresponding folder node and all its child nodes’ with check boxes selected.
• • The DDL Output pane has a text box with scroll bars and the DDL output is displayed in the text box. The Show DDL dialog box options are: — [Load] loads the Show DDL output of the selected objects (with check boxes selected) and replaces the contents in the DDL Output pane. — — — — — [Append] appends the selected objects to the existing contents in the DDL Output pane. [Clear All] clears selected objects (with check boxes selected) in the Selected Objects pane.
Displaying Table Statistics and Their Properties HPDM allows you to display table profile or statistics information. The table profile or statistics information can be used to troubleshoot problem queries or to create additional indexes for help with query performance. Displaying Table Column Statistics To display table profile or statistics information: 1. 2. 3. 4. Start the HP Database Manager and log on using any user ID. Click the Database area. Select a Schema in the navigation tree.
The bottom pane displays the histogram intervals for the column data boundaries. For each boundary it displays the data from the stats table and the result from the sample. The pane displays a side-by-side comparison of the histogram data to the sampled data. • Interval Number: Name of the column. • Min Boundary: The minimum value of the histograms table for this column. • Max Boundary: The maximum value of the histograms table for this column.
5 Using the SQL Whiteboard The SQL Whiteboard allows you to enter and execute SQL statements from within HPDM and provides execution information for each of the SQL statements. The list of SQL statements is persisted between HPDM sessions the same way that system configuration and favorites are persisted in HPDM. Currently, HPDM supports only one instance of the SQL Whiteboard. SQL statements can be parameterized by embedding parameter names surrounded by double dollar signs ($$).
Statement List Pane The Statement List pane provides a list of SQL statements that you added in a current session or earlier sessions of the SQL Whiteboard tool. The list of SQL statements is persisted between HPDM sessions the same way that connection information and favorites are persisted. From the Statement List pane, you can: • • • View the name and statement that was previously added in the Statement.
all parameters in that statement and allows you to easily re-use recent values for those parameters. The feature is compatible with Neoview Reports. Cut, Copy, Paste, Undo, and Redo In the Statement pane, if you right-click on the text box these options are displayed: cut, copy, paste, undo, redo, and select all. Execute Highlighted Text If you highlight text, you can execute part of a statement. Cancelling an SQL Query There may be times when you want to cancel a running SQL query.
a single session using the same connection. A good example is when you are using volatile tables. You create the volatile table first and then run queries on it. The volatile table is available only until the session ends. Loading and Saving in SQL Using the SQL Whiteboard, you can load and save SQL queries to a file. To load or save SQL queries to a file, from the windows menu, select File->Load SQL or the File->Save SQL menu.
6 Launching the Neoview Command Interface (NCI) The Neoview platform supports a client-based utility, Neoview Command Interface (NCI), which enables you to enter SQL statements interactively or from script files in its command-line interface. You can also pass an SQL statement to NCI from a Perl or Python command line or from a Perl or Python program.
7 Performing HPDM Operations The HPDM application allows you to perform various database operations: • • “Exporting Data” (page 65) “Communicating System Messages” (page 66) Exporting Data Data to Clipboard [Data to Clipboard] saves the data to the clipboard. Each value is a double-quoted string. The clipboard can then be pasted to any Windows document (for example, Excel, Notepad, or Word). Data to File [Data to File] (if enabled) pops up a window to export the contents to a file.
Communicating System Messages If you are an administrator for a Neoview platform, you may need communicate information to users of HPDM (for example, current software configuration or maintenance notifications). HPDM provides a single location in the Overview area (in the bottom left pane) where HPDM users can obtain the latest information provided by system administrators.
Cloning If you double-click on the System Message tab, the control is cloned into a new window. When the contents of the system message is modified in any window (the main HPDM window or any cloned window), the change is immediately visible in all copies. Therefore, if the user types in one window, all of the other windows show the updated text. In addition, applying and refreshing any window affects the behavior in all other copies.
8 Glossary Glossary Clear Password Since connections are transient, there is no concept of logging on or logging off. The analog of logon is making a system usable by entering the correct settings. The analog of logoff is making a system unusable by clearing its password (or invalidating any of its other settings). Clear Password is used when you want the GUI running, but deny continued access to that system without having to remove the system.