ODBCLink/SE Version F.00 November 2000 Head Office: 82 Main Street South Chesterville, Ontario K0C 1H0 Canada Telephone: (613) 448-2333 Fax: (613) 448-2588 www.mbfoster.
NOTICE The information in this manual is subject to change without notice. LIMITATIONS ON WARRANTIES AND LIABILITY M.B. Foster Software Labs makes no warranties, either express or implied, regarding this manual or the computer software package described in this manual, its merchantability or its fitness for any particular purpose. The exclusion of implied warranties is not permitted by some states. COPYRIGHT This manual is copyrighted by M.B. Foster Associates Limited, with all rights reserved.
ODBCLink/SE offers the following features: ⊗ ⊗ ⊗ ⊗ ⊗ ODBC Level 3 compliance (except SQLBrowseConnect, SQLExtendedFetch and SQLSetPos) Access to IMAGE/SQL database environments (DBE) Access to ALLBASE/SQL DBE Access to a single DBE DSN and DSNless connections The additional features of DataExpress for Client-Server are: ⊗ ⊗ ⊗ ⊗ ⊗ ⊗ ⊗ ⊗ ⊗ ⊗ Connectivity to TurboIMAGE and Oracle databases Serial/Modem connection Create a mini-dictionary for access to Image data sets, KSAM or MPE files.
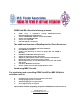
If you require any of the following features: •Support for Serial and/or Modem connections •Read/Write access to KSAM files •Read/Write access to MPE files •Native read/write access to TurboIMAGE databases •Read/Write access to Suprtool files •Support for PowerHouse dictionaries including PDL and PowerHouse subfiles support •Support for TPI keyword indexes used by Omnidex and Superdex •Access to Oracle databases on HP3000 and HP9000 platforms •Access to Multiple DBE’s •Access to HP intrinsics and procedures
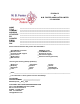
FAX BACK to M. B.
Notes
DataExpress Administration Guide Table of Contents Table of Contents Chapter 1 Overview and Specifications ODBC Compliancy Level . . . . . . . . . . . . . . . . . . . . . . . . . . . . . . . . . . . . . . . . . . . . . . . . . . . . . . 2 Client Environment . . . . . . . . . . . . . . . . . . . . . . . . . . . . . . . . . . . . . . . . . . . . . . . . . . . . . . . . . . . 2 Server Environment . . . . . . . . . . . . . . . . . . . . . . . . . . . . . . . . . . . . . . . . . . . . . . . . . . . . . . . . .
Table of Contents DataExpress Administration Guide Note on Using BLOBs . . . . . . . . . . . . . . . . . . . . . . . . . . . . . . . . . . . . . . . . . . . . . . . . . . . . . . . 35 Chapter 6 Using ODBCLink/SE With ODBC Applications Updating Data . . . . . . . . . . . . . . . . . . . . . . . . . . . . . . . . . . . . . . . . . . . . . . . . . . . . . . . . . . . . . . 37 Using Cognos Impromptu . . . . . . . . . . . . . . . . . . . . . . . . . . . . . . . . . . . . . . . . . . . . . . . . . . . .
DataExpress Administration Guide Table of Contents Using the ANSI Character Set . . . . . . . . . . . . . . . . . . . . . . . . . . . . . . . . . . . . . . . . . . . . . . . . . 68 Unsupported ALLBASE/SQL and IMAGE/SQL Statements . . . . . . . . . . . . . . . . . . . . . . . . . . 69 ALLBASE/SQL and IMAGE/SQL Statements That Work Only with Embedded SQL . . . . . 70 ALLBASE/SQL and IMAGE/SQL Statements Replaced by Functions on the PC Client . . .
Table of Contents DataExpress Administration Guide Notes iv DataExpress ©M.B.
ODBCLink/SE Reference Manual Overview and Specifications Overview and Specifications ODBCLink/SE is an implementation of Microsoft's Open Database Connectivity (ODBC) interface that enables Microsoft Windows based applications and tools to access IMAGE/SQL on the HP3000 and ALLBASE/SQL on the HP3000 and HP9000, in a client/server environment.
Overview and Specifications ODBCLink/SE Reference Manual ODBC Compliancy Level ODBCLink/SE is ODBC Level 3 with the following exceptions: SQLBrowseConnect, SQLExtendedFetch, SQLSetPos are not supported. Scalar Functions are not support. SQL_BIT, SQL_TINYINT and SQL_BIGINT data types are not supported. Client Environment ODBCLink/SE and application software reside on the PC client.
ODBCLink/SE Reference Manual Overview and Specifications Microsoft ODBC Overview ODBC applications make functions calls into ODBC32.DLL, the Microsoft driver manager. Since a single application can make calls to more than one ODBC database (e.g. Sybase, Microsoft SQL server) the driver manager is in charge of routing ODBC calls to the appropriate driver. The ODBC.INI file contains a list of drivers and associated data sources (one driver may have several data-sources).
Overview and Specifications ODBCLink/SE Reference Manual ODBCLink/SE System Requirements HP3000 Server Requirements: Operating System Requirements: MPE/iX Version 5.0 or greater Database Requirements : IMAGE/SQL Version B.G1.10 ALLBASE/SQL Version A.G1.15 Network Requirements: ThinLANLink/XL must be configured and turned on. HP9000 Server Requirements: Operating Systems Requirements HP-UX Version 9.0 or greater Database Requirements: ALLBASE/SQL Version A.G1.
ODBCLink/SE Reference Manual Overview and Specifications Field types supported: All data types supported by Allbase and Image/SQL. SQL Commands supported: ODBCLink/SE supports the complete ALLBASE/SQL and IMAGE/SQL syntax dynamic SQL. ODBCLink/SE ©M.B.
Overview and Specifications ODBCLink/SE Reference Manual Notes 6 ODBCLink/SE ©M.B.
ODBCLink/SE Reference Manual Preparing the Database Server Preparing the Database Server Before you install ODBCLink/SE on the PC client, perform the following steps to prepare the database server: ⊗ ⊗ ⊗ ⊗ ⊗ Verify the software version numbers. Verify the Connection Assurance Parameters. Starting and Stopping the listener. Gather information. Create the DBEnvironment Verify Software Version Numbers Note: If you are using ALLBASE/SQL, version A.G1.15 or higher is required.
Preparing the Database Server ODBCLink/SE Reference Manual To change the network assurance parameters, you must bring the network down. The sequence of commands used to set network assurance parameters are as follows: :HELLO MANAGER.SYS :NMMGR Next, press the function keys in the sequence shown in the following example (these function key labels are for MPE/ iX 5.0): F1 Open Config F2 NS F2 Unguided Config F1 Go To Netxport F2 Go To GPROT F2 Go To TCP : Modify values for Connection Assurance Interval (e.
ODBCLink/SE Reference Manual Preparing the Database Server To determine whether or not the listener job is running: On the HP3000 database server, enter: SHOWJOB JOB=@J The resulting display will besimilar to the following: JOBNUM STATE IPRI JIN #Jnnn SCHED 8 JLIST 10S LP SCHEDULED-INTRO JOB NAME 12/ 6/00 ODBCLNSE,MANAGER.
Preparing the Database Server ODBCLink/SE Reference Manual In the example above, if the “pid” was 7223" then “kill -16 7223" would stop the server. Using a “kill -16" is less dangerous than using “kill (pid)”. If you issue a kill command without the -16 and enter the wrong “pid” number then you may stop a server process that does not belong to you. Using “kill -16" will prevent this from happening.
ODBCLink/SE Reference Manual Installing ODBCLink/SE on the Client PC Installing ODBCLink/SE on the Client PC ODBCLink/SE is contained in a self-extracting archive files. Installing ODBCLink/SE requires: ⊗ ⊗ ⊗ Downloading the ODBCLink/SE file to a temporary sub-directory. Extracting the files on your Client PC. Running the SETUP program to install the driver. Once the driver has been successfully installed, the sub-directories created as part of the install may be deleted.
Installing ODBCLink/SE on the Client PC ODBCLink/SE Reference Manual For HP-UX Version 10.x: receive\odbcsenn\odbcclnn.exe from \opt\allbase\bin\odbcse\odbcclnn binary Using ARPA Services (FTP): From your Client PC: ⊗ Create a directory: •ODBCSEnn ⊗ Copy the appropriate ODBCLink/SE self-extracting file to your Client PC For the HP3000 server, use MANAGER.SYS,ODBCSE as the Username. In ODBCSEnn, nn refers to 16 or 32 bit. C:\ODBCSEnn> ftp Server binary get odbcclnn odbcclnn.
ODBCLink/SE Reference Manual Installing ODBCLink/SE on the Client PC Extracting the ODBCLink/SE file From your Client PC, double click the self-extracting file. Note: If you are installing ODBCLink/SE on a number of Client PC’s, after extracting the files you might wish to create installation disks by copying the extracted files onto a diskette. Running the SETUP program Note: A problem associated with Microsoft ODBC 2.10 setup causes the setup on a WindowsNT 4.
Installing ODBCLink/SE on the Client PC ODBCLink/SE Reference Manual The Driver Setup Program will display this window. Select NEXT 14 ODBCLink/SE ©M.B.
ODBCLink/SE Reference Manual Installing ODBCLink/SE on the Client PC Select NEXT to accept the default folder or Browse to select an anternate ODBCLink/SE ©M.B.
Installing ODBCLink/SE on the Client PC ODBCLink/SE Reference Manual Select NEXT to accept the MBFoster Program Folder or select an alternate Program Folder. Select NEXT 16 ODBCLink/SE ©M.B.
ODBCLink/SE Reference Manual Installing ODBCLink/SE on the Client PC The Progress Bar Is Displayed Click Finish ODBCLink/SE ©M.B.
Installing ODBCLink/SE on the Client PC ODBCLink/SE Reference Manual The driver has been successfully installed. You may now create data sources for use in applications that use this driver. See Section 4 for a complete description of creating data sources. Notes on 32-bit Access 32-bit data-source information is kept in the registry, and maintained by the 32-bit ODBC control panel application ODBCAD32.EXE. You do not normally make entries manually into either the registry or the ODBC.INI file.
ODBCLink/SE Reference Manual Configuring Data Sources Configuring Data Sources Before you access data defined to ALLBASE/SQL or IMAGE/SQL you must configure one or more data sources for each Client PC you wish to access your server. A data source includes the name you wish to give for a database environment and the information necessary to find it. You configure data sources with the "ODBC" application in the Windows Control Panel. ⊗ In Windows95 or greater and WindowsNT 4.
Configuring Data Sources ODBCLink/SE Reference Manual Scroll down to ODBCLink/SE-32 Driver ODBC3. Click Finish Note: 20 The ODBCLink/SE-32 Driver ODBC3 driver is ODBC 3 compliant. The previously installed driver, which is ODBC 2 compliant is still available. ODBCLink/SE ©M.B.
ODBCLink/SE Reference Manual Configuring Data Sources On this screen you give the database environment a name and indicate where it is located. The Data Source Name may be any combination of alphanumeric characters including blanks. The maximum length is 30 characters. The Description is optional and may contain any string of characters you wish. It may be longer than the display window. The Database Name is the name of the ALLBASE/SQL Database Environment you want to access with this data source.
Configuring Data Sources ODBCLink/SE Reference Manual Setup for MPE/iX The SessionID, User Name, Acct Name, Group Name, User Password, Acct Password and Group Password entries correspond to those used if you were manually connecting to the HP3000 or HP9000. If you don't know this information, contact your System Manager. If you want the client application to prompt for the passwords at run-time, enter a “?” in the password field.
ODBCLink/SE Reference Manual Configuring Data Sources Setup for HP-UX Note: On HP-UX, the Login name and password are case sensitive. If you want the client application to prompt for the passwords at run-time, enter a “?” in the password field. If you put a question mark in any password field, you will get a dialogue box and be prompted to enter the password every time you run your application and request a connection.
Configuring Data Sources ODBCLink/SE Reference Manual Setup Options Encoded passwords: Check this box to encrypt the connection passwords in the ODBC.INI file or system registry. For security reasons once the passwords are encoded if you decide to un-click the box you must DELETE the current passwords first. AutoCommit transactions: Check this box to have UPDATE and INSERT transactions committed as soon as they are executed.
ODBCLink/SE Reference Manual Configuring Data Sources Select Translator ODBC Translator Select “Roman8 to PC-ANSI Translator” if you want extended characters on your HP3000 (such as foreign accented characters) to appear correctly on your Client PC. The translation goes both ways. For example; extended characters are entered on the Client PC and sent to the host in an SQL update or Insert operation will be translated.
Configuring Data Sources ODBCLink/SE Reference Manual Migrating HP PCAPI Data Sources Data sources created in the HP ALLBASE/SQL PCAPI can be migrated to ODBCLink/SE by running the data set migration tool DXNMIG16.EXE either from the RUN window or in an MS-DOS prompt window. Click on all the data source names you wish to migrate and then click OK. Data sources will be migrated to ODBCLink/SE data sources with the same name.
ODBCLink/SE Reference Manual Application Development Application Development If you are developing applications that use the ODBC interface, you may want to order the Microsoft Developer Network (MSDN) Professional (Level 2) from Microsoft. The MSDN contains the ODBC Software Developers Kit (SDK), which includes the ODBC API Reference, sample ODBC applications, and other technical information to assist you in developing your applications. There are also many good books written on the use of ODBC.
Application Development ODBCLink/SE Reference Manual Using Stored Procedures ODBCLink/SE implements all types of ALLBASE/SQL stored procedures, including those which return multipleformat results sets. You can list the stored procedures available to your ODBC session by calling SQLProcedures and you can get parameter information for stored procedures by calling SQLProcedureColumns. Stored procedures return data either through bound parameters or through one or more results sets.
ODBCLink/SE Reference Manual Application Development Performance Considerations Many users find ODBC access to their server very fast. You should however be aware of the following: ⊗ If you are reading and sorting a large table, the host may not return control to the client until the entire data-base has been read and sorted.
Application Development ODBCLink/SE Reference Manual Turning AutoCommit On/Off AutoCommit “on” is the default value for all ODBC drivers. Turning AutoCommit on/off is normally accomplished by the application calling SQLSetConnectOption. The AutoCommit on/off setting in ODBC Administrator is there for historical reasons only and should not be used. Setting AutoCommit “off:” in the ODBC Administrator is not a good idea as the application can get confused.
ODBCLink/SE Reference Manual Application Development Supported Functions The ODBC functions are listed here for application software developers. These functions are supported by the ODBCLink/SE driver at the time of publication of this manual. Refer to the README.HLP file included with ODBCLink/SE for further developments. You can use the ODBC SQLGetFunctions call for a list of the supported ODBCLink/SE driver functions.
Application Development ODBCLink/SE Reference Manual SQL_COLUMN_COUNT SQL_COLUMN_NAME SQL_COLUMN_TYPE SQL_COLUMN_LENGTH SQL_COLUMN_PRECISION SQL_COLUMN_SCALE SQL_COLUMN_DISPLAY_SIZE SQL_COLUMN_NULLABLE ⊗ R2: The following SQLSetConnectOptions are supported. All other will return a “Driver not Capable (SQLState S1C00)”.
ODBCLink/SE Reference Manual Application Development Isolation Levels Isolation levels allow you to control the degree of concurrency by regulating the extent to which operations performed by one user in a multi-user environment can be affected by operations performed by another user. ALLBASE/SQL allows four different isolation levels: ⊗ ⊗ ⊗ ⊗ Repeatable Read (RR) Cursor Stability (CS) Read Committed (RC) Read Uncommitted (RU) ODBCLink/SE uses the isolation level specified in the ODBC setup screen.
Application Development ODBCLink/SE Reference Manual Supported Data Types The following is a table of correspondence between HP data types and ODBC data types.
ODBCLink/SE Reference Manual Application Development DATE SQL_DATE 6-byte with year, month, day in 2-byte binary fields TIME SQL_TIME 6-byte with hour, minute, second in 2-byte binary fields DATETIME SQL_TIMESTAMP 16-byte made up of year(2), month(2), day (2), hour (2), minute (2), second (2), fraction (4) INTERVAL SQL_CHAR Format is “ddddddd hh:mm:ss.
Application Development ODBCLink/SE Reference Manual Notes 36 ODBCLink/SE ©M.B.
ODBCLink/SE Reference Manual Using ODBCLink/SE With ODBC Applications Using ODBCLink/SE With ODBC Applications To access your host through ODBCLink/SE, you will first have to set up one or more data sources via the ODBC Control Panel. Updating Data Most ODBC applications require a unique primary key, existing on a table or data set, to be able to update the table.
Using ODBCLink/SE With ODBC Applications ODBCLink/SE Reference Manual Using Cognos Impromptu Select Catalog, Database, Add. Enter HP3000-1 as the logical database name, ODBC Gateway as the Gateway, and the name of your data source, e.g. HP3000. Enter your User ID and password, and click OK. 38 ODBCLink/SE ©M.B.
ODBCLink/SE Reference Manual Using ODBCLink/SE With ODBC Applications Select Catalog, New. Enter a catalog name and your logical database name (HP3000-1). Impromptu should then establish the connection and put you into the Edit Tables Screen. The left side of the Edit Tables screen is a list of table owners. In ALLBASE/SQL, a table owner is the owner name assigned by the database administrator (default is UserAccount). For a TurboIMAGE dataset, the owner name is the database name.
Using ODBCLink/SE With ODBC Applications ODBCLink/SE Reference Manual Joins ODBCLink/SE supports two kinds of joins: inner joins, sometimes called natural joins, and Left Outer joins. An inner join will return no records if any of the secondary records are not found; a left outer joins will still return the primary record and give nulls (or zeros) on the secondary table. To add or modify a join definition, select Catalog, Joins.
ODBCLink/SE Reference Manual Using ODBCLink/SE With ODBC Applications Creating Joins Using Calculated Columns It is possible in Impromptu to create a join using a column that is calculated from two or more fields in one or more tables. To do this, select Catalog, Edit joins; select your primary table and the table you want to join in the upper left part of the screen; click AView as Expression@; and then enter an equation such as: Table3.Column3 = Table1.column1 + Table2.Column2 ....
Using ODBCLink/SE With ODBC Applications ODBCLink/SE Reference Manual Using Lotus 123 Release 5.0 To enable Lotus123 to use ODBC, you will have to add the following line to the file \LOTUSAPP\DATALENS\LOTUS.BCF. (Note: The following information is summarized from the file \123R5W\readme.txt): DN=@ODBC@ DL=@DLODBC@ DD=@All ODBC Sources@; Once you have done this, you may access ODBC data sources. 42 ⊗ Select Tools, Database, New Query, External, ODBC. ⊗ Select a data-source from the list box.
ODBCLink/SE Reference Manual Using ODBCLink/SE With ODBC Applications Using Microsoft Access To access data using MSAccess , open a blank database and click Create, New, Link Table, on the associated screens that are presented, and select ODBC Databases from the Afiles of type:@ pull down list. The Data Sources Window is displayed. If the data source you require is not in the list, click on New and create a new data source.
Using ODBCLink/SE With ODBC Applications ODBCLink/SE Reference Manual You may highlight one or more tables and then click AOK@. This will create an Aattached table@ which you may later open and modify. An attached table is treated like a local table in every way (you may read it, update it, delete it, import it, or join it to other local or remote tables.) Note: 44 Ensure you have checked the SAVE PASSWORD box.
ODBCLink/SE Reference Manual Using ODBCLink/SE With ODBC Applications Notes for Users of MS-Access ⊗ For a table to be updatable in Access, it must have a unique key and Access must know about it. If the table is defined in ALLBASE/SQL with a unique key, this will be reported by ODBCLink/SE (in the SQLStatistics call that Access makes) and the table will be updatable. If Access cannot locate a primary key, it will prompt for the column or combination of columns that make up a unique key.
Using ODBCLink/SE With ODBC Applications ODBCLink/SE Reference Manual Using MS-Query To Run MS-QUERY from Microsoft Excel, select Data, Get External Data, New Database Query. The following screen is displayed. Select the data-source you are going to use to connect (you must have pre-configured a data source with ODBC administrator). After connecting, a list of the tables on your host you have access to is displayed. 46 ODBCLink/SE ©M.B.
ODBCLink/SE Reference Manual Using ODBCLink/SE With ODBC Applications Select one or more tables and click OK. You may join tables by dragging the column you want to join on from one table to another in the upper part of the screen. You may view the data by double-clicking on any column name or by dragging it from the upper to the lower part of the screen. Note: MS QUERY must be installed during the installation of Microsoft Excel.
Using ODBCLink/SE With ODBC Applications ODBCLink/SE Reference Manual Using Visual Basic (4.0 or higher) You can use ODBCLink/SE either with VB Database controls or with Database and dynaset variables. In addition, of course, you may call ODBC functions directly from the DLL. To use VB database controls, define a data control and assign it a Connect property of the form "DSN=HP3000;UID=users;PWD=password" and a RecordSource property of the form "SELECT * FROM TableName".
ODBCLink/SE Reference Manual Using ODBCLink/SE With ODBC Applications Connection Examples Connect Using SQL API 1. 2. 3. 4. 5. 6. 7. 8. 9.
Using ODBCLink/SE With ODBC Applications ODBCLink/SE Reference Manual 4. 'Second allocate a connection handle rc = SQLAllocConnect(henv, hdbc) If rc <> SQL_SUCCESS Then MsgBox ("SQLAllocConnect failed rc=" + Str(rc)) Call GetError Call FreeEnv Exit Function End If 5. 'Third allocate the connection and pass in the Connection string rc = SQLDriverConnect(hdbc, Form1.
ODBCLink/SE Reference Manual Using ODBCLink/SE With ODBC Applications rc = SQLError(henv, hdbc, SQL_NULL_HSTMT, SQLState, NativeError, error_str, 256, outlen)sDSNConnect = Space(256) If rc <> SQL_NO_DATA_FOUND Then msg = Left(error_str, outlen) If gl_SQLStatement <> "" Then msg = msg + " (" + gl_SQLStatement + ")" End If MsgBox msg End If End Sub 9.
Using ODBCLink/SE With ODBC Applications ODBCLink/SE Reference Manual If rc <> SQL_SUCCESS Then MsgBox ("SQLFreeEnv failed rc=" + Str(rc)) Exit Sub End If End Sub Connecting with DAO’s 1. 2. 3. 4. 5. 6. DECLARE YOUR VARIABLES FOR THE CONNECTION SET THE DAO WORKSPACE SET AND OPEN THE CONNECTION TO THE DATABASE SET AND OPEN THE RECORDSET FOR THE TABLE SE THE RECORDSET INFORMATION YOU NEED AND PROCESS IT ACORDINGLY MAKE SURE YOU CLOSE ANY ODJECTS THAT YOU HAVE CREATED WHEN ERRORS OCCUR(OR WHEN EXITING) 1.
ODBCLink/SE Reference Manual Using ODBCLink/SE With ODBC Applications Connecting with RDO’s 1. 2. 3. 4. 5. 6. DECLARE YOUR VARIABLES FOR THE CONNECTION SET THE RDO ENIVROMENT SET AND OPEN THE CONNECTION TO THE DATABASE SET AND OPEN THE RECORDSET FOR THE TABLE USE THE RECORDSET INFORMATION YOU NEED AND PROCESS IT ACORDINGLY MAKE SURE YOU CLOSE ANY ODJECTS THAT YOU HAVE CREATED WHEN ERRORS OCCUR(OR WHEN EXITING) 1. Dim RDOEN As RDO.rdoEnvironment Dim RDOCN As New RDO.rdoConnection Dim RDORS As RDO.
Using ODBCLink/SE With ODBC Applications ODBCLink/SE Reference Manual Connecting with ADO’s 1. 2. 3. 4. 5. 6. DECLARE YOUR VARIABLES FOR THE CONNECTION SET THE CONNECTION STRING SET AND OPEN THE CONNECTION TO THE DATABASE/TABLE SET AND OPEN THE RECORDSET FOR THE TABLE USE THE RECORDSET INFORMATION YOU NEED AND PROCESS IT ACCORDINGLY MAKE SURE YOU CLOSE ANY ODJECTS THAT YOU HAVE CREATED WHEN ERRORS OCCUR(OR WHEN EXITING) 1 Dim ADORS As ADODB.Recordset Dim ADOCN As ADODB.
ODBCLink/SE Reference Manual Troubleshooting Troubleshooting Terminating an ODBC Connection Occasionally it may be necessary to terminate an ODBC session that has deadlocked or is attempting to read a very large table (note that rebooting the Client PC will not be sufficient as the server has control at this point). You may do this from ISQL with the command TERMINATE USER user@account.
Troubleshooting ODBCLink/SE Reference Manual Using Microsoft ODBC Test (32-bit) You can use ODBC Test to verify correct functioning of the driver and to enter ad-hoc SQL commands. ODBCTEST and ODBCTE32 are part of the ODBC SDK that comes with the Microsoft Developers Network. To run ODBCTE32.EXE: 56 ⊗ Select Connect, Full Connect. You must enter a data source name, User-ID and a password, and click “OK”. You should get a message “Successfully connected to databasename”.
ODBCLink/SE Reference Manual Troubleshooting Verifying Software Version Numbers Verifying the Client-Side Components To determine which version of ODBCLink/SE is installed, run WHAT32.EXE from the RUN window. ODBCLink/SE ©M.B.
Troubleshooting ODBCLink/SE Reference Manual Deleting a Translation DLL Enter TRNDEL32.EXE in the RUN window. A welcome screen will be shown first. Click Continue. Select the translator you want to uninstall and press OK. The translator information will then be deleted from the registry. If the program is successful it will show a window indicating the successful removal. 58 ODBCLink/SE ©M.B.
ODBCLink/SE Reference Manual Troubleshooting Once the translator has been deleted it will no longer be displayed in the translator list in the driver setup. To add the translator back in simply rerun the ODBC driver install program. Note: The translator DLL file will still be in the windows directory after the program is run, but it will not be shown in the registries translator information. ODBCLink/SE ©M.B.
Troubleshooting ODBCLink/SE Reference Manual Tools on the Database Server Monitoring Activity with HP GlancePlus/XL (HP3000) Program. HP GlancePlus/XL allows you to monitor a job, session, or process on MPE/iX. The GlancePlus screens display statistics on how different system resources are used. For information, refer to the HP GlancePlus/XL User's Manual. Monitoring Activity with HP GlancePlus/UX (HP9000) Program. HP GlancePlus/UX allows you to monitor a login or process on HP-UX.
ODBCLink/SE Reference Manual Troubleshooting You should now be connected to the database.
Troubleshooting ODBCLink/SE Reference Manual Host Logging Normally, only connections and errors are logged to the ODBCLOG file on the host. If you check the box labelled “Trace SQL calls on the server” in the data-source setup dialogue, all the SQL sent from the host and the ALLBASE operation will be logged as well. If a listener error occurs, an error message is logged in the ODBCLOG file.
ODBCLink/SE Reference Manual Troubleshooting Tools on the Client PC The preferred method to trace ODBC calls on the client is by setting the “Trace ODBC Calls” check box in ODBC setup. However, Syware’s Dr. DeeBee Spy is installed with ODBCLink/SE (in the Windows directory). It can be used to trace calls to any ODBC driver. ODBC Call Tracing using ODBCLink.LOG To log all the ODBC calls made by the client, check the box “Trace ODBC calls on the client” on the data-source setup screen.
Troubleshooting ODBCLink/SE Reference Manual The Dr. DeeBee Spy icon will appear at the bottom of the screen. It will flash when it is logging. To turn off logging: ⊗ ⊗ Click on the Dr. DeeBee Spy icon. Choose CLOSE. The log is located in C:\WINDOWS\DRDEEBEE.LOG. Note: 64 “Dr. DeeBee Spy is © 1995 Syware, Inc., All rights reserved” ODBCLink/SE ©M.B.
ODBCLink/SE Reference Manual Troubleshooting Modifying the System Registry and ODBC.INI Files You only need to do this if you want to modify an option that you cannot configure in the ODBC control panel. An example of this is the MAXSTMT options. To add or change an option, either edit the ODBC.INI file (for 16-bit data-sources) or run the registry editor (regedt32.exe) in Windows 95 and greater or WindowsNT. In the registry editor, look under HKEY_CURRENT_USERS / Software / Microsoft / ODBC.INI.
Troubleshooting ODBCLink/SE Reference Manual Error Messages Errors in ODBCLink/SE can come from several sources; all messages have a prefix which indicates the source of the error, as follows: [ODBCLN32] [WINSOCK] [ALLBASE] Generated by the 32-bit client DLL. Comes from the Winsock driver. Generated by the ALLBASE/SQL command interpreter. The first action you should take in case of a problem is to attempt to execute the command manually, e.g.
ODBCLink/SE Reference Manual Appendix A Implementation Notes Appendix A Implementation Notes Following is a list of features that are unique or specific to ODBCLink/SE and some details about them. Primary key name returned by SQLStatistics Most ODBC applications including Microsoft Access, Visual Basic and PowerBuilder require a unique primary key for a table to be updatable. Note: If a unique key has not be defined in ALLBASE/SQL the table will not be updatable.
Appendix A Implementation Notes ODBCLink/SE Reference Manual ⊗ If you are in AUTOCOMMIT mode ON (this is the default option, set through SQLSetConnectOptions and in ODBC Administrator), there is an implicit Commit done whenever you fetch the last row. This is so that locks held on the database by the open cursor are released. This may destroy other open cursors.
ODBCLink/SE Reference Manual Note: Appendix A Implementation Notes Roman9 to PC-ANSI Translator will recognize and convert the symbol used for the European Currency Symbol, the EURO. Some characters cannot be converted to ROMAN8 and then back to ANSI. For example, when the copyright sign in ANSI is converted to ROMAN8, it is changed to a lowercase "c." When the data is returned to the PC client, the copyright sign cannot be recognized, as it was converted to a "c.
Appendix A Implementation Notes ODBCLink/SE Reference Manual ALLBASE/SQL and IMAGE/SQL Statements That Work Only with Embedded SQL PC client application software that accesses ALLBASE/SQL and IMAGE/SQL databases through ODBCLink/SE do not support embedded SQL. The application software calls the database functions directly; there is no need for preprocessing.
ODBCLink/SE Reference Manual Appendix B Creating a DBEnvironment Appendix B Creating a DBEnvironment On the HP3000 Database Server To enable a connection between a PC client and database server, you must set up an ALLBASE/SQL DBEnvironment. If you do not have an existing database for testing purposes, you can use the ALLBASE/SQL SQLSetup tool to create a DBEnvironment called PartsDBE. If you are using IMAGE/SQL, you can use the IMSQL.SAMPLEDB.SYS command to create an IMAGE/SQL database called MusicDBE.
Appendix B Creating a DBEnvironment ⊗ ⊗ ⊗ ⊗ ODBCLink/SE Reference Manual Plan the security structure of the DBEnvironment. Decide which users will be granted access to the DBEnvironment, databases within the DBEnvironment, and tables within the databases. Create the account where the DBEnvironment is to reside. Grant authorizations to users who will be using the test DBEnvironment. Create the DBEnvironment, including databases and tables.
ODBCLink/SE Reference Manual Appendix B Creating a DBEnvironment On the HP9000 Database Server To enable a connection between a PC client and database server, you must set up an ALLBASE/SQL DBEnvironment. If you do not have an existing database for testing purposes, you can use the ALLBASE/SQL SQLSetup tool to create a DBEnvironment called PartsDBE. Follow these steps to create the PartsDBE database on the HP9000: ⊗ ⊗ Login to the directory where you want to create the DBEnvironment.
Appendix B Creating a DBEnvironment ⊗ ⊗ ODBCLink/SE Reference Manual Grant authorizations to users who will be using the test DBEnvironment. Create the DBEnvironment, including databases and tables. After you setup the DBEnvironment, ensure that you can connect to it. For example, $ isql isql=> CONNECT TO '/users/hpsql/sampledb/PartsDBE’; isql=> SELECT * FROM SYSTEM.TABLE; : At this point you should see the system table information.
ODBCLink/SE Reference Manual Appendix C List of Installed Files Appendix C List of Installed Files 32 Bit Driver Client - For Windows 95 and Greater Note: “..\” is a short-hand that represents the location of the windows installation (e.g. c”\windows\”) Install Disc Windows 95 _bootstp.exe not installed to hard drive _mssetup.ex_ not installed to hard drive ctl3d95.dl_ ..\system\ctl3d95.dll DLL for 3D controls in Windows95 b5ccdc32.dl_ ..\system\b5ccdc32.
Appendix C List of Installed Files ODBCLink/SE Reference Manual r9ansi32.dl_ ..\system\r9ansi32.dll 32-bit character translation DLL for translations between the ANSI and roman-9 character sets. setup.exe not installed to hard drive Microsoft ODBC Setup program drive setup.lst not installed to hard drive trndel32.exe ...\system\trndel32.exe Translator uninstall utility to “de-register” translator information what32.ex_ ...\system\what32.
ODBCLink/SE Reference Manual Appendix C List of Installed Files 32 Bit Driver Client - For Windows NT 4.0 and Greater NOTE: “..\” is a short-hand that represents the location of the windows installation (e.g. c”\windows\”) Install Disc Windows NT _bootstp.exe not installed to hard drive _mssetup.ex_ not installed to hard drive b5ccdc32.dl_ ..\system32\b5ccdc32.dll Used for character translation for Chinese characters ctl3dnt.dl_ ..\system32\ctl3dnt.
Appendix C List of Installed Files ODBCLink/SE Reference Manual setup.lst not installed to hard drive trndel32.exe ...\system32\trndel32.exe Translator uninstall utility to “de-register” translator information what32.ex_ ...\system32\what32.exe Utility to determine what versions of drivers required by ODBC application are currently loaded on the Client PC 78 ODBCLink/SE ©M.B.
ODBCLink/SE Reference Manual Appendix C List of Installed Files MPE/iX Host ODBCJOB.ODBCSE.SYS ODBCLNSE.ODBCSE.SYS ODBCXLSE.ODBCSE.SYS ODBCUTSE.ODBCSE.SYS ODBCCL32.ODBCSE.SYS sample jobstream to run the listener process the listener program an XL library containing common code utility for technical support purposes a self-extracting archive for the 32bit client software ODBCLOG.ODBCSE.SYS log file (when created). HP-UX 9.
Appendix C List of Installed Files ODBCLink/SE Reference Manual Notes 80 ODBCLink/SE ©M.B.
ODBCLink/SE Reference Manual Appendix D ODBCLink/SE Companion Product Appendix D ODBCLink/SE Companion Product MBF-Console MBF-Console Introduction MBF-Console is a software tool that will increase the visibility of ODBC use.
Appendix D ODBCLink/SE Companion Product ODBCLink/SE Reference Manual File Menu Options Set Refresh Interval (in seconds) The Refresh Interval is the interval of time, in seconds, after which MBF-Console will automatically refresh its information. The time interval is normally determined by the System Administrator. Page Setup Define the Page Setup for the printer using Standard Windows Dialog 82 ODBCLink/SE ©M.B.
ODBCLink/SE Reference Manual Appendix D ODBCLink/SE Companion Product Print Print using Standard Windows Dialog Exit Exit from the Program Connect Menu Options: Configure DSNs... (Console Data Sources Configuration) Select: Connect from the top of the screen then Configure DSN” from the drop down menu. The following screen is displayed. ⊗ Click the “Add New DSN” button and enter the name of the Data Source you are going to use. ⊗ Click “Ok”.
Appendix D ODBCLink/SE Companion Product ODBCLink/SE Reference Manual Connections Windows Select: the appropriate “Connect, DSN=” menu to bring up the following windows: The top window is the Listener Window. The lower window is the Connections Window. The Listener Window The listeners window contains information about ODBCLink listener processes running on your system. It is a graphic representation of active listener jobs.
ODBCLink/SE Reference Manual ⊗ ⊗ ⊗ ⊗ ⊗ ⊗ ⊗ ⊗ Appendix D ODBCLink/SE Companion Product Port Number Pin Number Time Process Started IP Address of Process Login ID of Process CPU Seconds Used Number and Rate of Messages Received Number and Rate of Messages Sent To obtain more detailed information about a specific connection, double-click on it. This will open the Server Window Server Window: The server window is displayed by double clicking a connection in the Connections window.
Appendix D ODBCLink/SE Companion Product ⊗ ⊗ ⊗ ⊗ ⊗ ⊗ ⊗ ⊗ ⊗ ⊗ ODBCLink/SE Reference Manual ODBCLOG Setting Client Version Statistics for Time Period Time of Last Server Activity Reported Bytes Received Bytes Sent Number of Select Statements Number of Records Fetched Number of Update Statements Number of Delete Statements The options available in the Server Window include: ⊗ View Logfile Click “View logfile” to view the logfile entries for this process.
ODBCLink/SE Reference Manual Appendix D ODBCLink/SE Companion Product “View” Menu Option Refresh the Screen with this menu option. “Window” Menu Option This will list all open windows. From this list you can navigate between the available windows. ODBCLink/SE ©M.B.
Appendix D ODBCLink/SE Companion Product ODBCLink/SE Reference Manual Help Menu Options: Look for help using Standard Windows Dialog. Note: 88 Context-sensitive help is available at any time by pressing F1. ODBCLink/SE ©M.B.
ODBCLink/SE Reference Manual Appendix D ODBCLink/SE Companion Product Installing MBF-Console for MBF-UDALink The following example uses Reflection File Transfer from an HP-3000 to obtain the zipped file containing MBFConsole. Similar procedures in other binary transfer methods can be used. Note: If you are installing from a CD, go to page 91 Prior to the Reflection File Transfer, you will have to do the following: ⊗ Logon as MANAGER.SYS. ⊗ Restore DXINSTAL.PUB.SYS from the installation tape.
Appendix D ODBCLink/SE Companion Product Note: ODBCLink/SE Reference Manual Ensure the Transfer Type is Binary Select: the left side of the Transfer button, located top center of the screen, to receive from the Host, to the local PC. The File Transfer in Process screen appears briefly. When the File Transfer is completed, the zipped file containing MBF-Console is ready to be installed on your PC. Select: Start, Run. The Run window is displayed. Type: 90 C:\MBFOSTER\ODBCCONS.
ODBCLink/SE Reference Manual Appendix D ODBCLink/SE Companion Product The Self Extract Utility inflates and briefly lists the files on the screen while writing them to the folder selected. Select: Start, Run. The Run window is displayed, as above. If you are installing from a CD Type: E:\MBFOSTER\MBF-CONSOLE\SETUP.EXE ( “E” represents the drive letter of the CD-ROM) If you followed the tape installation instructions Type: C:\MBFOSTER\SETUP.EXE in the command field MBF-Console prepares for installation.
Appendix D ODBCLink/SE Companion Product ODBCLink/SE Reference Manual Select: NEXT. 92 ODBCLink/SE ©M.B.
ODBCLink/SE Reference Manual Appendix D ODBCLink/SE Companion Product The Destination Location screen is displayed. This screen enables you to install in MBFConsole in the directory of your choice. When you have decided, click Next. The next screen requires you to chose a program group for the MBF-Console Icon to reside. ODBCLink/SE ©M.B.
Appendix D ODBCLink/SE Companion Product ODBCLink/SE Reference Manual When you have decided, press Next. 94 ODBCLink/SE ©M.B.
ODBCLink/SE Reference Manual Appendix D ODBCLink/SE Companion Product Setup is ready to install MBFConsole. If all the information you have entered is correct, press Next ODBCLink/SE ©M.B.
Appendix D ODBCLink/SE Companion Product ODBCLink/SE Reference Manual The Installation Progress Bar is briefly displayed, followed by the Setup is Complete screen. Select: Finish to complete the Setup. Note: 96 Occasionally the installation of MBF-Console will install newer versions of the .dll files on your PC. If this is the case, you will be prompted to reboot you computer. Do so prior to running MBF-Console. ODBCLink/SE ©M.B.
ODBCLink/SE Reference Manual Appendix D ODBCLink/SE Companion Product Installing MBF-Console for ODBCLink/SE In order to test the console product, M. B. Foster has set up an environment where you can run a second listener while still keeping any older version still running. This is accomplished by utilizing a second socket identifier. This will give an opportunity to test out the new version and to evaluate the MBFConsole product.
Appendix D ODBCLink/SE Companion Product ODBCLink/SE Reference Manual The Self Extract Utility inflates and briefly lists the files on the screen while writing them to the folder selected. Select: Start, Run. The Run window is displayed, as above. Type: C:\MBFOSTER\SETUP.EXE in the command field MBF-Console prepares for installation. The welcome screen is displayed. Select: NEXT. 98 ODBCLink/SE ©M.B.
ODBCLink/SE Reference Manual Appendix D ODBCLink/SE Companion Product The Destination Location screen is displayed. This screen enables you to install in MBFConsole in the directory of your choice. When you have decided, click Next. The next screen requires you to chose a program group for the MBF-Console Icon to reside. ODBCLink/SE ©M.B.
Appendix D ODBCLink/SE Companion Product ODBCLink/SE Reference Manual When you have decided, press Next. 100 ODBCLink/SE ©M.B.
ODBCLink/SE Reference Manual Appendix D ODBCLink/SE Companion Product Setup is ready to install MBFConsole. If all the information you have entered is correct, press Next ODBCLink/SE ©M.B.
Appendix D ODBCLink/SE Companion Product ODBCLink/SE Reference Manual The Installation Progress Bar is briefly displayed, followed by the Setup is Complete screen. Select: Finish to complete the Setup. Note: 102 Occasionally the installation of MBF-Console will install newer versions of the .dll files on your PC. If this is the case, you will be prompted to reboot you computer. Do so prior to running MBF-Console. ODBCLink/SE ©M.B.
ODBCLink/SE Reference Manual Appendix D ODBCLink/SE Companion Product Notes ODBCLink/SE ©M.B.
Appendix D ODBCLink/SE Companion Product ODBCLink/SE Reference Manual Notes 104 ODBCLink/SE ©M.B.
ODBCLink/SE Reference Manual Index Index A ADO. . . . . . . . . . . . . . . . . . . . . . . . . . . . . . . . . . . . . . . . . . . . . . . . . . . . . . . . . . . . . . . . . . . . . . . . . . . . . . ALLBASE . . . . . . . . . . . . . . . . . . . . . . . . . . . . . . . . . . . . . . . . . . . . . . . . . . . . . . . . . . . . . . . . . . . . . . . . . ALLBASE / IMAGE Data Types . . . . . . . . . . . . . . . . . . . . . . . . . . . . . . . . . . . . . . . . . . . . . . . . . . . . . . .
Index ODBCLink/SE Reference Manual E EURO . . . . . . . . . . . . . . . . . . . . . . . . . . . . . . . . . . . . . . . . . . . . . . . . . . . . . . . . . . . . . . . . . . . . . . . . . 25, 69 European Currency Symbol . . . . . . . . . . . . . . . . . . . . . . . . . . . . . . . . . . . . . . . . . . . . . . . . . . . . . . 25, 69 Extracting the ODBCLink/SE file . . . . . . . . . . . . . . . . . . . . . . . . . . . . . . . . . . . . . . . . . . . . . . . . . . . . . . 13 G Gather Information . . . . .
ODBCLink/SE Reference Manual Index Listener Log File - HP9000 . . . . . . . . . . . . . . . . . . . . . . . . . . . . . . . . . . . . . . . . . . . . . . . . . . . . . . . . . . . 60 M MBF-Console . . . . . . . . . . . . . . . . . . . . . . . . . . . . . . . . . . . . . . . . . . . . . . . . . . . . . . . . . . . . . . . . . . . . . MBF-Console - Running . . . . . . . . . . . . . . . . . . . . . . . . . . . . . . . . . . . . . . . . . . . . . . . . . . . . . . . . . . . . .
Index ODBCLink/SE Reference Manual Options . . . . . . . . . . . . . . . . . . . . . . . . . . . . . . . . . . . . . . . . . . . . . . . . . . . . . . . . . . . . . . . . . . . . . . . 24 Translator . . . . . . . . . . . . . . . . . . . . . . . . . . . . . . . . . . . . . . . . . . . . . . . . . . . . . . . . . . . . . . . . . . . . . 25 Special Notes for Users of Impromptu . . . . . . . . . . . . . . . . . . . . . . . . . . . . . . . . . . . . . . . . . . . . . . . . . 39 SQLColAttributes . . . . . . . .
ODBCLink/SE Reference Manual Index V Verify Software Version Numbers . . . . . . . . . . . . . . . . . . . . . . . . . . . . . . . . . . . . . . . . . . . . . . . . . . . 7, 57 Verifying the client-side components . . . . . . . . . . . . . . . . . . . . . . . . . . . . . . . . . . . . . . . . . . . . . . 57 Viewing the SQL generated by Impromptu . . . . . . . . . . . . . . . . . . . . . . . . . . . . . . . . . . . . . . . . . . . . . 39 W Winsock WINSOCK.DLL. . . . . . . . . . . . . . . . . . . . . . . .
Index ODBCLink/SE Reference Manual Notes 110 ODBCLink/SE ©M.B.