
HP RPG/iX Utilities Reference Manual (30318-90006)


3- 273
14 Chapter 3 Application Help Facility
Introduction to the Application Help Facility
The application help facility is part of the RPG Screen Interface (RSI). At runtime, RSI uses "help areas"
and "help forms" created by SIGEDITOR. For applications converted from the IBM S/36, the SIGEDITOR
converts the help (or H) specifications to the RSI format as part of the convert S and D specifications
function.
Help Areas
Help areas are imaginary areas that are overlayed on the application form. The help area can be as small
as a single character or as large as the entire screen. Up to 256 help areas can be associated with an
individual form.
When an application form is displayed and the user presses the f6 (HELP) key, RSI notes the cursor
position at the time f6 is pressed and scans a list of help area definitions for the first one that covers the
cursor position. The help area definition contains the name of the first help form to display. Additional
help forms, if available, can be displayed using the f3 (ROLL UP) and f1 (ROLL DOWN) keys. The user
must press the ENTER key to return to the application form.
Help Forms
Help forms are ordinary RSI forms, except that they are made up of text only. They can start on any line
(01 through 24) and clear up to 24 lines. Help forms can be overlaid on other help forms, but not the
application form. Help forms cannot contain fields, video enhancements, or message constants. They
cannot use the variable starting line number feature. If a help form contains unsupported specifications,
they are ignored when the form is displayed.
To use the RSI application help facility in an RPG program, you must first prepare the program with DS
capability. The application form must have the f6 (HELP) key disabled. No additional RPG programming
is required to use the basic RSI application help facility. If you want to use the suppress selection or
boundary features, you must enter RPG calculation specifications to control these indicators.
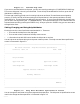
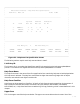
Defining Help Areas
From the main menu press f7 (FORM UTILS), this takes you to the form utilities menu. From the form
utilities menu press f1 (HELP AREAS). Then, to define a help area, move the cursor to where you want
the upper left corner of the help area and press the f1 (UPPER LEFT) key. Next, move the cursor to
where you want the lower right corner of the help area and press the f2 (LOWER RIGHT) key. At this
point, the help area is outlined on the screen as shown in figure 2-6.
___________________________________________________________________
| SOC. SEC. NO. |
| ------------------------------------------------------------|
| NAME |
| ADDRESS |
| ------------------------------------------------------------|
| ZIP CODE PHONE NO. |
___________________________________________________________________