HP RPG/XL Utilities HP 3000 MPE/iX Computer Systems Edition 1 Manufacturing Part Number: 30318-90006 E1089 U.S.A.
Notice The information contained in this document is subject to change without notice. Hewlett-Packard makes no warranty of any kind with regard to this material, including, but not limited to, the implied warranties of merchantability or fitness for a particular purpose. Hewlett-Packard shall not be liable for errors contained herein or for direct, indirect, special, incidental or consequential damages in connection with the furnishing or use of this material.
HP RPG/XL Utilities-Part 1 XSORT 1 PREFACE EXTRA FUNCTION SORT FOR RPG (XSORT) This manual is intended for the use of inexperienced as well as seasoned programmers. To answer the needs of programmers with varied backgrounds, the manual presents information of varying complexity, especially in explaining the XSORT specifications. Most of this manual will be devoted to the five-part specifications.
Conventions NOTATION UPPERCASE DESCRIPTION Within syntax statements, characters in uppercase must be entered in exactly the order shown, though you can enter them in either uppercase or lowercase. For example: SHOWJOB Valid entries: SHOWJOB Invalid entries: SHOW_JOB showjob italics shojwob ShowJob ShoJob Within syntax statements, a word in italics represents a formal parameter or argument that you must replace with an actual value.
stacked, you can select any one of the elements or none. In the following example, you can select devicename or deviceclass or neither: SHOWDEV [devicename ] [deviceclass ] [...] Within syntax statements, a horizontal ellipsis enclosed in brackets indicates that you can repeatedly select elements that appear within the immediately preceding pair of brackets or braces. In the following example, you can select itemname and its delimiter zero or more times.
must select A or B or AB or BA. The first element cannot be preceded by a comma: {A} {B}|,...| ... Within examples, horizontal or vertical ellipses indicate where portions of the example are omitted. Å Within syntax statements, the space symbol Å shows a required blank. In the following example, you must separate modifier and variable with a blank: SET[(modifier )]Å(variable ); underlining example: User input is underlined.
the Y key on the keyboard. base prefixes The prefixes %,#, and $ specify the numerical base of the value that follows: %num #num $num specifies an octal number. specifies a decimal number. specifies a hexadecimal number. When no base is specified, decimal is assumed.
10
2 Introduction Hewlett-Packard's Extra Function Sort for RPG/XL, hereaft er referred to as XSORT, enables users to rearrange data in their files, drop records from their files, and reformat records, as shown in figure 1-1. XSORT runs on the MPE XL computer system and is primarily used in conjunction with the RPG programming language. Its origin was the unsupported utility SORT3 which was designed to perform most of the functions of IBM's System/3 $DSORT and System/34 #GSORT.
Characteristics of XSORT: In extending and enhancing your sort capabilities, XSORT: • Uses from one to nine input files. • Employs multiple logical criteria to select records from MPE (disk and non-disk) and KSAM files, so you can process a subset of your input records. • Builds a different sort key for each type of record using input record fields and forced control fields. This facilitates the input of files with different data structures.
36 of the work record. The following is an example of how XSORT builds your work record to reflect your specifications: ------------------------------------------------------| | | | | Control field | Control field | Data | | | | | ------------------------------------------------------1 7 8 17 18 36 NOTE The control fields must precede the data fields in the work record. They will be retained on output unless you wish to drop them.
Record-Out Sort (SORTR) The output from a Record-out sort is a file of complete records that are immediately available for processing. These sorted records can contain: • Control fields and data. • Control fields only. • Data only. A Record-out sort offers faster processing than the Address-out as well as enabling you to reformat files and to create new files from reformatted records. Count-Only Sort (SORTC) This sort performs a Count-only pass on the input files.
• The relative record numbers of the records in the input file. • Part or all of the records in the input files. • A count of the number of records selected for processing from the input files. Supplying the Sort Specifications XSORT specifications are normally entered through a job stream. Interactive entry of specs is not recommended because XSORT does not prompt for input. You can use either XSORTEXT or $STDIN to supply sort statements.
. 1- 16
You do not always need to use all the specification types for every sort; but the order in which the specifications are used doesn't vary. You always fill out Header Specifications first. The ALTSEQ (Alternate Collating Sequence) and the S (Special) Option specifications can be ignored if they are not to be used in the sort. However, S Option specifications must be supplied when your Input is from non-disk devices or when you are sorting multiple files.
A discussion of the commands for SORT3 as compared to XSORT appears in appendix A. Your MPE Commands Provide: • Name of the program--XSORT.PUB.SYS • Name of the files you want to sort. The formal designator for a single-file sort is XSORTIN. For multiplefile sorts, formal file designators are XSORTIN1 through XSORTIN9. If XSORT can open the file XSORTIN, it assumes you want to do a single-filesort. If XSORTIN cannot be opened, XSORT assumes you want to do a multiple-filesort, starting with XSORTIN1.
with XSORTIN1. When you use more than one input file: • You cannot do an Address-out (SORTA) sort. • You cannot do an in place sort, in which output file overlays input • XSORT bases its operations on the characteristics of the first file opened. All the other files are assumed to have the same, or compatible, characteristics (file type and record length). • You must be sure that all your specifications apply to all the records in all the files you wish to use in a multifile sort.
Data and Timing Data Considerations • Maximum data input record size is 8192 bytes. • The collating sequence may be altered by the ALTSEQ specs. (See appendix C for further information concerning data.) Timing Factors The time it takes to run a sort depends on the following factors: • The number of records to be sorted. The fewer the records specified for sorting, the shorter the sort will take. • The record size. Larger records take longer to sort. • The number of specifications you enter.
Specifications for Address-Out Sort (SORTA) The columns that are shaded must be considered when you are planning an Address-out sort job.
Specifications for Count-Only Sort (SORTC) The Columns that are shaded must be considered when you are planning a Count-only sort.
1- 23
1- 24
3 Chapter 2 Header Specifications When you enter Header Specifications you are telling XSORT the following: Introduction • The type of sort you want to do--Address-out, Record-out, or Count-only. • The format you have selected for the sorted file. • The information you wish to have printed to help you check for errors. Only one Header Specification is needed for each sort job. Header Specification Column Entries The following table summarizes the types of column entries.
Table 1: Header Specification Column Entries Columns 27 Entries Explanation 0 or blank Print: XSORT specifications Diagnostic messages Statistics Abort messages Display messages 1 Print: Statistics Abort messages Display messages 2 Print: Abort messages Display messages 3 Print only display messages 28*** Blank X Retain control fields on output records in Record-out sort jobs. Drop control fields from output records in Record-out sort jobs.
7 Place the largest of these sums in columns 13-17. The entry cannot exceed 256. Additional information concerning this entry can be found under column 7 of the Field Description Specifications. Also, see figure 2-1, in which the largest control field sum of two record sections is calculated and the total entered in columns 13-17.
Figure 2-1.
Ascending or Descending Sequence This entry indicates the sequence in which you want the records sorted. Table 3: Column 18 Entry Sequence A Ascending sequence by control field D Descending sequence by control field Sequencing will be done according to the ASCII collating sequence unless it is altered using ALTSEQ specifications. Column 26: Collating Sequence This entry determines the collating sequence you want XSORT to use in its comparing operations.
Column 28 only applies to Record-out sorts (SORTR). It indicates whether or not you want to drop control fields from output records after they are sorted. An X means drop them. Leaving Column 28 blank means keeping the control fields. Reasons for Dropping Control Fields If you are using an alternate collating sequence or opposite control fields you would probably drop the control fields. In each case the control information is so altered during the sorting process that it is of no use.
4 Chapter 3 Alternate Collating Sequence Specifications Normally, XSORT uses the standard ASCII collating sequence included in appendix C. If you want to change the standard collating sequence, you must code an S in column 26 of the Header Specification and code a set of ALTSEQ specifications. You can code whatever number of ALTSEQ lines you need. Each of your statements must begin with ALTSEQ and contain no more than 80 column entries per line.
5 Enter as many such pairs as the number of characters you are taking out of normal sequence. 6 Leave no spaces between sets of hex numbers. 7 When you reach the end of a statement, continue on the next specification line, following the rules above (1-6). Entries can extend to column 80, although it is not necessary to fill an entire line before continuing to a new line. 8 Enter a double asterisk (**) in columns 1 and 2 of the specification line.
Programming with ALTSEQ Placing an alternate character in the sequence position which is normally assigned to another means that both occupy the same position and are considered equal. (See Sample ALTSEQ Statements section in this chapter.) If you do not want to have the characters regarded as equal, the one which normally occupies that position must be moved. Effect of ALTSEQ Statements on Other Coding ALTSEQ statements can change: 1 Factor 1 and factor 2 (See Record Type Specifications, Section 5).
5 Chapter 4 Special Option Specification The Special Option Specification presents you with additional run time options. Special Option, referred to as S Option, can be thought of as an extension of your Header Specification. It offers global controls including: • Address-out file first record number. • In place sort override. • Maximum number of records to be sorted. The S Option is entered following your Header Specification and ALTSEQ specifications (if used).
• If you enter blank, the record numbering starts at 0 unless you are sorting a KSAM file built with Firstrec=1, in which case record numbering starts as 1. • If you enter "0", the record numbering starts at 0. This is true even if you are sorting a KSAM file built with Firstrec=1. • If you enter "1", the record numbering starts at 1. Column 8: In Place Sort Override This entry tells XSORT whether or not you want to override the in place sort rule.
6 Chapter 5 Record Type Specifications Introduction Record Type Specifications tell XSORT which records in a file you wish to have sorted. If you want all the records in a file to be sorted, and they have all been prepared in the same format, you do not have to fill out this section of your XSORT specifications. Often, however, you use these entries to select records for the sort based on comparisons.
unconditionally. Sets The unique identification of a Record Type is made using sets of "include" and "omit" Record Type Specifications. These sets may be used singly or intermixed to include or omit data records in the current section according to their characteristics. (Multiple characteristics within a set must be tied together using the AND operation.) An Include set defines the characteristics of a Record Type that is to be included (accepted) in the current section.
COLUMNS ENTRIES EXPLANATION 17-18* EQ NE LT GT LE GE Factor 1 must equal factor 2. Factor 1 must not equal factor 2 Factor 1 must be less than factor 2. Factor 1 must be greater than factor 2. Factor 1 must be less than or equal to factor 2. Factor 1 must be greater than or equal to factor 2. 19* C F Factor 2 is a constant. Factor 2 is another field in the same input record. 20-23 1-1000 The input record position in which the factor 2 field begins (blank if the field is only one position long).
Column 7 Entry Explanation O This line contains the first characteristic of a new Record Type that has the same spec type (column 6) as the previous line. The O stands for OR. * The asterisk indicates a comment line. Comment lines are included as an aid in remembering why you were proceeding as you were at various points in the program. The comments will be printed if you leave column 27 of the Header specification blank or enter a zero.
Type Omit AND and OR Lines Colum n6 Colum n7 O O O .... O A Explanation One or more lines defining the characteristics of one Record Type. First characteristic of a different Record Type than the previous line. Additional characteristics for the same Record Type as the previous line. An Omit set can be preceded by the Header (or ALTSEQ or S Option, if used), Field Descriptions for the previous section, or an include set. An Omit set can never be followed by Field Description lines.
Column 8 Entry U Comparison Type Numeric data is unpacked. Maximum Field Length* 28 characters (unpacked digits) * Maximum field length applies to both factor 1 and factor 2 data. ** If you specify an alternate collating sequence, you cannot use packed data for record selection factors or sort control fields. Do not enter a P in column 8 of your include or omit Record Type Specifications or in column 8 of your Field Description specs used to define control fields.
Columns 17-18: Type of Comparison This entry tells XSORT what kind of comparison you want to make between factor 1 and factor 2. You will specify the type and location of factor 2 when you fill in columns 20-80 (if it is a constant) or 20-27 (if it is another field in the same record). When you specify Alternate Collating Sequence, XSORT modifies factors 1 and 2 before making comparisons. Column 17-18 Entry Meaning EQ Factor 1 must equal factor 2. NE Factor 1 must not equal factor 2.
Columns 20-80: Factor 2 Constant If factor 2 is a constant, you use columns 20-80 to enter the constant you have selected. Normally, columns 40-80 are reserved for comments. They can, however, be used as necessary for constants longer than 20 characters or digits. The constant can be any arrangement of characters. When you enter a constant containing character data, placing a C in column 8, your entry must be the same length as the factor 1 field and must begin in column 20.
If last digit in constant is: You replace it with this character: 4 M 5 N 6 O 7 P 8 Q 9 R Packed Constants Packed numbers in this entry receive different treatment. If factor 1 contains a packed number, the length of the constant must be twice the length of the factor 1 field.
The following table is an overview of field description specification column entries. Columns Entries Explanation 1-5 Any value. Line number. 6 F Field Description line identification. 7* N O F D * Normal control field. Opposite control field. Forced control field. Data field. Comment line. 8* P U C V Packed decimal data. Unpacked decimal data. Character data. Force a data character into the data field 9-12 1-1000 Starting position of field in the record.
commands. Column 7 Entry Meaning To Program N This is a normal control field. The field will be sorted according to the sequence specified in column 18 of the Header Specifications. O This is an opposite control field. It tells the program to sort the data in the sequence opposite to that specified in column 18 of the Header Specifications. F This is a forced control field. The entries in columns 9-19 indicate how the control field is to be changed. D This is a data field (used for SORTR only).
3-47
Forced Control Fields You can force a character into your control field by using forced control. There are special considerations you should keep in mind when you plan to use forced control fields. • Only one character can be used in your forced control field. • You can use either a conditional or an unconditional force. • A force-all line must be preceded by one or more conditional force lines. Conditional Force A conditional force can be used only when a particular entry appears in the record.
Record |------|---|------| Record |---|------| A 1 - position control field (A) in input record is moved to first control field position in work record. * Change each A to a $. |---|-------| |---|-------| | A | Data | |---|-------| | $ | Data | |---|-------| Original work record Changed work record There are two types of conditional forces: • Conditional force on Normal or Opposite control field. • Stand-alone conditional force.
Unconditional Force Your unconditional force does not represent a field present in the input records. You might wish to place a 5 in the first position of every output record. Using an unconditional force control field, you could tell XSORT to place a 5 in the first available control field of the work record. Control field portion 5 Data portion All other control fields would then follow the 5 that has been unconditionally forced. Assume the input records are in this format.
Comment lines have nothing to do with the way your program operates. They provide you with an opportunity to document your work. You can code documents anywhere within the XSORT specifications, but they will be printed only if a blank or 0 is in column 27 of your Header Specification. Column 8: C, P, U, or V Column 8 entries tell XSORT what type of data is to be used in the work records. Column 8 Entry Data Type Used Maximum Field Length C Character equals one byte (8 bits) of data.
Columns 9-16: Field Locations Columns 9-16 locate the input record positions that contain the field. The starting position (from) is identified in columns 9-12. The end position (to) is identified in columns 13-16. The order you impose in your Field Description Specifications will determine the order in which they will be located in the output records. For example, suppose your input records look like this.
Right-justifying entries is recommended. The starting (from) position of the input records ends in column 12. The end (to) position ends in column 16. In the example above, because it is a 1-character field, the 912 positions are left blank and the entry of the character's position is right-justified in column 16. Field Length The maximum allowable length of the field depends on your column 8 entry. COL.
not changed when you use forced characters. Column 19: Continuation A non-blank character here says that this line is a continuation of the force character specifications group begun on the preceding line or lines. When several force character specifications apply to the same 1-character control field, they must be entered together as a group.
• Force-all. • Conditional force on normal or opposite control fields. • Stand-alone conditional force. Example 1: Unconditionally Forced Character In this example a control field ($) is unconditionally forced into the work and output records. Example 2: Stand-Alone Conditional Force This example shows how different control field characters can be forced into position in the work record, depending on the character present in an input record position.
continuation lines are used in this example, only one position in the work and output records is defined by the first three lines. If column 19 were left blank and no continuation lines were used, each line would then define a new position in the work and output records. When you sort records in ascending order, having placed an A in column 18 of the Header, XSORT places hex FF into the work record before you force any characters.
Example 3: Conditional Force on Normal or Opposite Control Field In this example, as in the one previous, the control field in the input record changes the work and output records. This example is significantly different, however. Here the control field is moved to the work record and then changes are made. This occurs because the first control fields are normal control fields.
Example 4: Force-All In the example, if control fields contain characters other than 2, 4, and 6, use a force-all line so that you won't have a hex FF or 00 present in the work and output records.
Columns 20-39 Reserved for future use. Columns 40-80 Comments These columns are reserved for your comments. Columns 40-45 are set aside by dotted lines as a convenient place to write down the names of fields described in the Field Description lines. If you specified in your Header line that you wanted to have your specifications printed, your comments will be printed also. These comments have no effect on your program. Reserved for future use.
3-60
7 Chapter 7 Using XSORT Commands Introduction This section contains examples of the MPE commands necessary to run XSORT in interactive and job stream modes. These examples also encompass the various input and output file options provided by the utility. Running XSORT Extra Function Sort for RPG can be run in job stream or interactively. Streaming is the recommended method because the program does not presently prompt for input.
Case 1 - XSORTIN-and XSORTOUT are disk files. Case 2 - XSORTIN=$STDIN and XSORTOUT=$STDLIST. * Example #9 uses single file input. Count-only (SORTC) can also be used with multiple file input. To determine the appropriate commands for a multiple file SORTC, see Example #8 regarding how it specifies multiple input files (XSORTIN1...XSORTIN9). About the Sample Sort A very simple sort was devised for these examples. The input file, named TSTIN, consists of five records.
A brief explanation of each specification follows.
Header Specifications Column Entry Explanation 1-5 blank No line numbers are required. 6 H The H designates this as the Header specification for the sort. 7-12 SORTR SORTR indicates that this is a Record-out sort. 13-17 4 Largest sum of control field lengths for any record section, in bytes. In this sort the total is 4. 18 A Records are to be sorted in ascending order by control field. 28 X Control fields are to be dropped on output in this sort.
Column Entry Explanation 6 F These are field description lines. 7 N This is a normal control field. This is a data field. D This is a data field. 8 C Use full characters in the field. Force a data character into the data field. 9-12 V Force a data character into the data field 13-16 9,32 These are the starting positions of the data fields in the records. 18 * This is the character you are forcing by using your column 8 entry.
00005I C 33NECX 00010FNC 6 9 00020FDC 1 32 00030FDV 9 !EOD 10 !SAVE TSTOUT * !FCOPY FROM=TSTOUT;TO= 11 !EOJ 1 The first command in a job must be the JOB command, followed by the user name, account name, and optionally the group name. In production work it is useful to specify a job name before the user name to identify the specific job that is being run. In this example, TSTXSRT1 is the job name. 2 Comment lines are used to describe the function or nature of the job.
HEWLETT-PACKARD 32212A.3.13 FILE COPIER WED, MAR 11, 1981, 9:44 AM (C)-HEWLETT-PACKARD CO. 1980 *200* WARNING: FROMFILE RECSIZE IS 72 BYTES, TOFILE RECSIZE IS 133 BYTES. . AB123GSD212345 JONES X AB234CIC012345 ALBERS AC102GSD100001 WOODSON AC321ABCD10001 FRANKEN BB222CIC012345 WOODS EOF FOUND IN FROMFILE AFTER RECORD 4 5 RECORDS PROCESSED *** 0 ERRORS ∅ END OF SUBSYSTEM :PURGE TSTOUT :FILE XSORTIN=TSTIN :FILE XSORTOUT=TSTOUT :RUN XSORT.PUB.SYS HP32104A.05.
AB234CIC012345 ALBERS * BB222CIC012345 WOODS * AC102GSD100001 WOODSON * EOF FOUND 1N FROMFILE AFTER RECORD 3 4 RECORDS PROCESSED *** 0 ERRORS END OF SUBSYSTEM :EOJ CPU SEC. = 6. ELAPSED MIN. = 1. WED, MAR 11, 1981, 9:45 AM Example 2: Job Stream with XSORTEXT. Single input to different output. !JOB TSTXSRT2,MGR.SUBSYS,XSORT;OUTCLASS=,1 !COMMENT THIS IS AN EXAMPLE OF A SINGLE INPUT-TO!COMMENT DIFFERENT-OUTPUT SORT.THE JOB IS STREAMED, !COMMENT THE SPECIFICATIONS ON XSORTEXT.
00005I C 33NECX 00010FNC 6 9 00010FNC 6 9 00020FDC 1 32 00020FDC 1 32 00030FDV * 00030FDV * : EOD RECORDS READ = 5 RECORDS SELECTED & SORTED = 4 NUMBER OF COMPARES = 7 SCRATCHFILE I/O = 2 CPU SECONDS = .440 ELAPSED SECONDS = 1.884 TOTAL CPU SECONDS = 1.779 END OF PROGRAM :SAVE TSTOUT 1 After the command to run XSORT is given, the program prints an identification banner. When it is completed, the user enters the specifications for the session.
0003OFDV * RECORDS READ = 5 RECORDS SELECTED & SORTED = 4 NUMBER OF COMPARES = 7 SCRATCHFILE I/O = 2 CPU SECONDS = .339 ELAPSED SECONDS = 1.447 TOTAL CPU SECONDS = 1.116 END OF PROGRAM :SAVE TSTOUT Example 5: Using XSORTEXT, Case 2 Single input to different output. Input from $STDIN and output to $STDLIST. The file equation--XSORTIN=$STDIN, in this example--means the program does not know in advance how many records are to be sorted since input is not from a disk file.
AB234CICO12345 ALBERS * Output to BB222CICO12345 WOODS * $STDLIST AC102GSD100001 WOODSON * RECORDS READ = 5 RECORDS SELECTED & SORTED = 4 NUMBER OF COMPARES = 7 SCRATCHFILE I/O = 2 CPU SECONDS = .000 ELAPSED SECONDS = 101.440 TOTAL CPU SECONDS = 1.220 END OF PROGRAM Example 6: Job stream With Specifications Imbedded Single file, in place sort. !JOB TSTXSRT6,MGR.SUBSYS,XSORT;OUTCLASS=,1 !COMMENT THIS IS A SINGLE FILE, INPLACE SORT !COMMENT THAT IS STREAMED. SPECS ARE IMBEDDED.
!COMMENT THIS IS AN EXAMPLE OF A SINGLE SORT FILE TO !COMMENT DIFFERENT OUTPUT THAT ALREADY EXISTS. !COMMENT IT IS STREAMED, SPECS IMBEDDED !COMMENT ************************************** !COMMENT ************************************** !FCOPY FROM=TSTIN;TO= !FCOPY FROM=TSTFILE;TO= !FILE XSORTIN=TSTIN !FILE XSORTOUT=TSTFILE !RUN XSORT.PUB.
!FILE XSORTIN2=TSTIN2 file designators !FILE XSORTIN3=TSTIN3 !FILE XSORTOUT=TSTOUT !RUN XSORT.PUB.SYS 00000HSORTR 4A 00000S Y 35 00005I C 33NECX X 33 Specifications imbedded in 00010FNC 6 9 job stream 00020FDC 1 32 EDITOR file 00030FDV * !EOD !SAVE TSTOUT !FCOPY FROM=TSTOUT;TO= !EOJ 1 S Option is used to provide the maximum number of records to be sorted. NOTE The example uses XSORTIN1, XSORTIN2, etc. In a multiple input sort, XSORTIN cannot be used to designate an input file.
of multiple input files (XSORTIN1...XSORTING). You can combine the commands in Example 8 with those above to produce a Count-only, multiple file sort. Here is a physically condensed copy of Example 9 after it was run. Note the statistical report on the records sorted. :JOB TSTXSRT9,MGR.SUBSYS,XSORT PRIORITY = DS; INPRI = 8; TIME = UNLIMITED SECONDS JOB NUMBER = #J58 WED, MAR 11, 1981, 9:40 AM HP3000 / MPE IV C.00.
TOTAL CPU SECONDS = .224 END OF PROGRAM :EOJ CPU SEC. = 4. ELAPSED MIN. = 1.
7-76
8 Chapter 8 XSORT Applications Introduction There are three applications in this section. The first is a simple use of mixed include and omit sets in a single section. The second application involves multiple sections and sets. In both, the "comments" are used to make the sorts somewhat self-explanatory, and additional notes are provided to clarify what takes place. Application #1 The file containing the specifications for the sort is designated TSTSPECA.
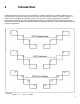
0 0 0 B3257 =INCLUDE (NOT 1 IN POS.7) 1 1 1 A0001 =INCLUDE (1 IN POS.3 AND POS.5) The descending order is evident in the characters of the control field described in positions 9-13. Application #2 This application shows how multiple sections and sets may be applied in a sort. Again, the comments are used to earmark the records and the specifications for the results of the sort. To help you understand the way Record Types, Sections, and Sets are related refer to Figure 8-1. Figure 8-1.
The specifications for the sort are supplied by the file designated TSTSPECB. HSORTR 13A S Y OX 80 75 EXAMPLE USING MIXED SECTIONS & SETS.
B0001X B0113M B9001M B9001M 09059Z C0001Y C0113Z C9001M C9001Y C9059Z C9059z C9059Z D0001Y D0113M D9059Y W9001X 1-6 Positions TX FL CA CA FL CA NY CA OR CA CA CA FL TX NY FL 12 60 20 51 72 01 99 20 99 17 10 35 87 02 09 50 13 SECTION-B, SECTION-A, SECTION-B, SECTION-B, SECTION-B, SECTION-B, SECTION-B, SECTION-B, SECTION-A, SECTION-B, SECTION-B, SECTION-B, SECTION-A, SECTION-B, SECTION-A, SECTION-A, 23 26 OTHER TYPE-4 OTHER OTHER TYPE-3 OTHER TYPE-3 OTHER TYPE-2 OTHER OTHER OTHER TYPE-3 OTHER TYPE-2 TYPE-
A breakdown of the files to be sorted and their contents precedes the discussion. Files Records in File Fields Used in Sorts Weekly Sales Detail sales records. Date, customer, product, quantity Weekly Bookings Detail booking records. Date, customer, product, quantity Sales and Bookings Summary sales and history Date, customer, product, bookings. quantity.
Field Names Contents Record Positions MRCHLN Merchandise line 21 -22 PRODCO Product code 23 -32 STACDE State code 33 -34 SLSTER Sales territory 35 -36 SLSNM1 Salesman number 37 -39 CANIND Cancel indicator 40 -40 DATEMM Date - month 41 -42 DATEYY Date - year 43 -44 UNITS5 Units booked 45 -49 TRANCD Transaction code 50 -50 Record Format for the Sales History File Field Names Contents Record Positions RECCDE Record code "SB" 1 -2 CUSTNO Customer number 3 -12 STACDE St
Field Names Contents Record Positions DOLSHP Shipped value 75 -83 DOLCAN Cancelled value 84 -92 DOLRET Returned value 93 -101 These are the files that were created specifically for the sample sorts. They are the Weekly Sales file (WKSALE), the Weekly Bookings file (WKBOOK), and the Sales History file (HISTUPD), in that order.
WS9000012001812311111113209XXX888888834567CA031122 SB1111111111CA11101ZZZ9999999110281123456723456783456789123456705123456789 SB2111111112CA01202XXX8888888120281234567834567894567890567890109234567890 SB3111111113TX01303LLL7777777130281345678945678905678901678901209345678901 SB4111111114CA01404VVV6666666140181444444444444446444444444444709444444440 SB5111111115CA01505AAA5555555150281555555155555525555553555555405555555551 SB6111111116CA01606DDD4444444160281666666166666626666663666666405666666661 SB711111111
Explanation of Specifications. Header Specification. Col 6 The H entry identifies this as the Header line. Cols 7-12 SORTR identifies this as a Record-out sort. Cols 13-17 Total length of the sort control fields for this sort is 20. The total is derived from adding CUSTNO (10 characters) and PRODCO (10 characters). Col 18 The A means the output sequence will be in ascending order by CUSTNO and PRODCO. Cols 29-32 34 is the total length of output records.
Record Type Specifications. Column 6 The I identifies this an an include line. Input records which match the criteria specified by this line will be used in the sort. Those which fail to meet the criteria will be omitted. Column 7 The * indicates a comment line. Column 8 Use only complete characters--one byte (eight bits)--in making comparisons. Cols 9-12 Because the input record field for factor 1 is only one character long, this entry is left blank.
2 An opposite sort is performed on units booked (UNITSB) to put the bookings in descending sequence within Merchandise Line. Here are the specifications as they would appear at the terminal and on the specification form. HSORTA I C 15 10A 16EQC01 SELECT TERR. 01 IAC 64 65EQC05 MERCH. LINE 05 IOC 15 16EQC01 OR IAC 64 65EQC09 SELECT TERR. 01 I* MERCH. LINE 09 FNC 31 FORCE TO EQ.CD.
Explanation of Specifications. Header Specification. Column 6 The H identifies this as the Header line. Cols 7-12 SORTA identifies this as an Address-out sort. Cols 13-17 10 is the largest sum of all control field lengths. It is derived generally from adding all control fields designated with an F, N, or 0 in column 7 for each record type. This case is an exception because a forced control field is being used.
Column 6 The I identifies this as an include line. The input records matching the criteria specified by this line will be used by the sort. Column 7 Leaving this column blank indicates that this is the first line of an I (include) set of record type lines. The * means a comment line. A identifies an AND line. It signifies that these specifications continue the definitions of the record type described in the last record type entry. O entered here stands for OR.
SRTUT RECORD 3 (%3, #3) 00000: 0000 0003 SRTUT RECORD 4 (%4, #4) 00000: 0000 0004 SRTUT RECORD 5 (%5, #5) 00000: 0000 0005 SRTUT RECORD 6 (%6, #6) 00000: 0000 0006 SRTUT RECORD 7 (%7, #7) 00000: 0000 0007 A simple RPG program has been devised to make use of the output of the sort. PAGE 0001 HEWLETT PACKARD 32104A.04.07 RPG/3000 (C) HEWLETT-PACKARD CO. 1978.
0019 0 70 "PAGE" 0020 0 H 1 1P 0021 0 OR 0V 0022 0 37 "GRMNT 0023 0 58 "CUSTOMER 0024 0 H 1 1P 0025 0 OR 0V 0026 0 37 "----- 0027 0 58 "---------- -----" 0028 0 0029 0 GARTCD 0030 0 UNITSBJ 38 0031 0 CUSTNO 0032 0 DATE Y 58 0033 0 0034 0 D 1 UNITS" DATE" -----" 01 T 1 25 50 LR TOTAL J 38 Here is the output of the program. You will notice that the sequence under the heading "GRMNT" (GARMENT) seems to start in descending rather than ascending order.
Sample Sort 3 This sample sort utilizes the multiple input file feature of XSORT. It combines the Weekly Bookings file and the Weekly Sales file. The sequence of the combined output file will be by customer number. Additionally, the Weekly Sales file is reformatted on output to the sorted file in order to match the format of the Weekly Bookings file records.
8- 93
Explanation of Specifications. Header Specification. Column 6 The H identifies this as the Header line. Cols 7-12 SORT R identifies this as a Record-out sort. Cols 13-17 10 is the largest total of control field lengths for either of the two record sections in the sort.
It is the sum derived from adding together all the control fields (fields with N, O, or F in column 7 of the Field Description specifications). In this case, control field length for the first record section is the same as that for the second section since it represents the same field, Customer Number. The field's location changes due to differences in the record formats of the two input files. Column 18 The A indicates that the records in the sorted file will be in ascending order by control field.
Column 8 C means the full character--1 byte (8 bits)--will be used in the comparisons. Cols 9-12 A 1 entered here indicates the position in the record where the factor 1 field begins. Cols 13-16 2 entered here indicates the position in the record where the factor 1 field ends. Cols 17-18 EQ means that, in the comparisons, factor 1 must equal factor 2. Column 19 The C indicates that factor 2 is a constant, not a field. Cols 20-27 WS is the factor 2 constant.
WS41111111146900009605VVV6666666AZ011046018145678 WS51111111155900008505AAA5555555CA011055018156789 WS51111111153900006309JJJ3333333CA031073018178901 WS61111111164900007405DDD4444444CA011064018167890 WB71111111177999997305LLL7777777AZ0130311281234569 WB71111111173999993709LLL3333333CA81707N0281789013 WB71111111171999991909ZZZ1111111CA11909Y0181901231 WS81111111182900005209GGG2222222CA031082018189012 WS91111111191900004109ZZZ1111111CA031091018190123 8- 97
8- 98
A Appendix A COMPATIBILITY WITH OTHER SYSTEMS Compatibility with SORT3 XSORT is based on the unsupported utility program named SORT3. To avoid difficulties in converting from SORT3, XSORT has been designed to recognize the formal file designators used by SORT3. There are no significant differences in the syntax of the sort specifications between the two products. The only issue to resolve in the conversion is the naming of the program file--XSORT vs SORT3. To do this, first use the command: :LISTF SORT3.
File Output XSORT NAMES XSORTOUT SORT3 NAMES SORT3OUT CONVERSION ACTIONS No action necessary. (Note, however, that the first input file, "...IN" or "...IN1," is what determines whether XSORT or SORT3 names will be expected for rest of the input/output files. No mixing of formal file names is allowed among the input and output files within any sort job.) Comparison with $DSORT and #GSORT This section compares XSORT with IBM System/3 $DSORT and IBM System 32 and 34 #GSORT.
B Appendix B ERROR MESSAGES XSORT error messages distinguish between two types of errors--syntax errors and execution errors. In the discussion of these messages below, the syntactical errors are covered first. They are broken down by the category under which they can be grouped. General syntactical errors are followed by those which occur under the headings of the various types of specifications: Header, ALTSEQ, S Option, Record Type, and Field Description.
Syntax Messages General Errors NUMBER MESSAGE FURTHER EXPLANATION 202 INVALID SPECIFICATION TYPECOL 6 MUST BE H, I, O, OR F Only exceptions are ALTSEQ records. 1001 MORE THAN ONE HEADER SPEC XSORT specifications must begin with one, and only one, header specification. 1004 BEGIN/END COLUMN MISSING OR INVALID NUMERIC For both Record Type and Field Description specifications, the "Location From/To" entries in columns 916 must contain valid numeric values.
Alternate Collating Sequence Errors NUMBER MESSAGE FURTHER EXPLANATION 1015 ALTSEQ TABLE MUST END WITH ** ALTSEQ specifications must be terminated by a record containing "**" in columns 1-2. 1016 INVALID HEX DIGIT Each hexidecimal character must be in the range of ASCII characters "O" through "F" 1023 MAX FIELD LENGTH WITH ALTSEQ IS 256 CHARACTERS When an alternate collating sequence is being used, the maximum length of any control or data field is 256 characters.
NUMBER MESSAGE FURTHER EXPLANATION 1019 INVALID DECIMAL DIGIT Constant in columns 20-80 must contain valid decimal digits and "+" or "-" in last position. 1024 MAX U FIELD LENGTH IS 28 DIGITS The maximum length of any unpacked numeric field is 28 digits. 1006 FIELD LENGTHS IN COMPARE ARE DIFFERENT For a field compare ("F" in column 19), Factor 1 (columns 9-16) field length must be the same as Factor 2 (columns 20-27) field length.
Field Description Errors NUMBER MESSAGE FURTHER EXPLANATION 246 INVALID FIELD TYPE -COL 7 MUST BE N, O, D, F OR * 252 CONTROL FIELD LENGTH EXCEEDS HEADER VALUE The sum of control field lengths for this record section exceeds the maximum sum specified in Header columns 13-17. 262 DATA LENGTH EXCEEDS HEADER VALUE Total length of data in the output record for this record section exceeds the length specified in Header columns 29-32.
• A "File Information Display" is printed if the error involves a file. • The sort is aborted. The error number, always preceded by a - (minus sign), appears after the PARAM = in the abort message. NUMBER MESSAGE FURTHER EXPLANATION -1 ERROR ON XSORTEXT Error on opening or reading XSORTEXT file. -2 ERROR ON $STDLIST Error on print to $STDLIST. -3 ERROR ON XSORTIN Error on opening, accessing, or closing XSORTIN file.
NUMBER MESSAGE FURTHER EXPLANATION -18 LOADPROC OF FREADC FAILED Internal error: loading procedure for FREADC intrinsic failed. -19 MULTI INPUT (XSORTIN1) AND SORTA INVALID Address-out sort (SORTA in Header columns 7-11 not allowed when multiple input files (XSORTIN1.....XSORTIN9) are used. -20 MULTI INPUT AND INPLACE SORT INVALID Inplace sort not allowed when multiple input files (XSORTIN1.....XSORTIN9) are used.
B-108
C Appendix C DATA INFORMATION Collating Sequence Table The Collating Sequence Table brings together comparative information concerning data used in sort jobs. It includes the ASCII and EBCDIC collating sequences in decimal, octal, hexidecimal, and binary representations. It gives the character (graphic) or control equivalents for both ASCII and EBCDIC. The relative position of alphabetic and numeric characters in the sorting sequence is shown in the right hand columns.
ALPHA/CONTROL CHARACTER COLLATING SEQUENCE Dec Oct Hex Binary ASCII EBCDIC 17 021 11 0001 0001 DC1 DC1 18 022 12 0001 0010 DC2 DC2 19 023 13 0001 0011 DC3 TM 20 024 14 0001 0100 DC4 RES 21 025 15 0001 0101 NAK NL 22 026 16 0001 0110 SYN BS 23 027 17 0001 0111 ETB IL 24 030 18 0001 1000 CAN CAN 25 031 19 0001 1001 EM EM 26 032 1A 0001 1010 SUB CC 27 033 1B 0001 1011 ESC CU1 28 034 1C 0001 1100 FS IFS 29 035 1D 0001
ALPHA/CONTROL CHARACTER COLLATING SEQUENCE Dec Oct Hex Binary ASCII NUMERIC VALUE EBCDIC ASCII 45 055 2D 0010 1101 - ENQ 46 056 2E 0010 1110 .
ALPHA/CONTROL CHARACTER COLLATING SEQUENCE Dec Oct Hex Binary ASCII NUMERIC VALUE EBCDIC ASCII 73 111 49 0100 1001 I 74 112 4A 0100 1010 J Â -1 75 113 4B 0100 1011 K .
ALPHA/CONTROL CHARACTER COLLATING SEQUENCE Dec Oct Hex Binary ASCII NUMERIC VALUE EBCDIC 101 145 65 0110 0101 e 102 146 66 0110 0110 f 103 147 67 0110 0111 g 104 150 68 0110 1000 h 105 151 69 0110 1001 i 106 152 6A 0110 1010 j 107 153 6B 0110 1011 k , 108 154 6C 0110 1100 l % 109 155 6D 0110 1101 m - 110 156 6E 0110 1110 n > 111 157 6F 0110 1111 o ? 112 160 70 0111 0000 p 113 161 71 0111 0001 q 114 162 72 0111 001
ALPHA/CONTROL CHARACTER COLLATING SEQUENCE Dec Oct Hex Binary ASCII EBCDIC 129 201 81 1000 0001 a 130 202 82 1000 0010 b 131 203 83 1000 0011 c 132 204 84 1000 0100 d 133 205 85 1000 0101 e 134 206 86 1000 0110 f 135 207 87 1000 0111 g 136 210 88 1000 1000 h 137 211 89 1000 1001 i 138 212 8A 1000 1010 139 213 8B 1000 1011 140 214 8C 1000 1100 141 215 8D 1000 1101 142 216 8E 1000 1110 143 217 8F 1000 1111 144 220 90
ALPHA/CONTROL CHARACTER COLLATING SEQUENCE Dec Oct Hex Binary ASCII EBCDIC 157 235 9D 1001 1101 158 236 9E 1001 1110 159 237 9F 1001 1111 160 240 A0 1010 0000 161 241 A1 1010 0001 ~ 162 242 A2 1010 0010 s 163 243 A3 1010 0011 t 164 244 A4 1010 0100 u 165 245 A5 1010 0101 v 166 246 A6 1010 0110 w 167 247 A7 1010 0111 x 168 250 A8 1010 1000 y 169 251 A9 1010 1001 z 170 252 AA 1010 1010 171 253 A8 1010 1011 172 254 AC
ALPHA/CONTROL CHARACTER COLLATING SEQUENCE Dec Oct Hex Binary ASCII EBCDIC NUMERIC VALUE ASCII EBCDIC 185 271 B9 1011 1001 186 272 BA 1011 1010 187 273 BB 1011 1011 188 274 BC 1011 1100 189 275 BD 1011 1101 190 276 BE 1011 1110 191 277 BF 1011 1111 192 300 C0 1100 0000 { +0 193 301 C1 1100 0001 A +1 194 302 C2 1100 0010 B +2 195 303 C3 1100 0011 C +3 196 304 C4 1100 0100 D +4 197 305 C5 1100 0101 E +5 198 306 C6 1100
ALPHA/CONTROL CHARACTER COLLATING SEQUENCE Dec Oct Hex Binary ASCII EBCDIC NUMERIC VALUE ASCII EBCDIC 213 325 D5 1101 0101 N -5 214 326 D6 1101 0110 O -6 215 327 D7 1101 0111 P -7 216 330 D8 1101 1000 Q -8 217 331 D9 1101 1001 R -9 218 332 DA 1101 1010 219 333 DB 1101 1011 220 334 DC 1101 1100 221 335 DD 1101 1101 222 336 DE 1101 1110 223 337 DF 1101 1111 224 340 E0 1110 0000 225 341 E1 1110 0001 226 342 E2 1110 0010 S
ALPHA/CONTROL CHARACTER COLLATING SEQUENCE Dec Oct Hex Binary ASCII EBCDIC NUMERIC VALUE ASCII EBCDIC 241 361 F1 1111 0001 1 1 242 362 F2 1111 0010 2 2 243 363 F3 1111 0011 3 3 244 364 F4 1111 0100 4 4 245 365 F5 1111 0101 5 5 246 366 F6 1111 0110 6 6 247 367 F7 1111 0111 7 7 248 370 F8 1111 1000 8 8 249 371 F9 1111 1001 9 9 250 372 FA 1111 1010 251 373 FB 1111 1011 252 374 FC 1111 1100 253 375 FD 1111 1101 254 376
[ERROR: ] Click here to view figure.
[ERROR: ] Click here to view figure.
D Appendix D XSORT SPECIFICATION FORMS The forms for specifications are for your convenience. Copies may be made for use in your sort jobs. Hewlett-Packard holds the copyright for the forms and asks that they be copied only for your particular applications.
D- 122
D- 123
D- 124
HP RPG/XL Utilities-Part 2 RISE
126
9 INTRODUCTION The RPG Interactive System Environment is a specialized editor, designed to create and modify programs written in the column-dependent language, RPG. It is an RPG Utility and, therefore, intended for the use of RPG programmers. You may need it for a simple, quick program, or you may have a job which requires interfacing with KSAM, Image, and VPLUS.
RISE Features: * Visual editing with images that represent the RPG specification coding forms. * Menu and special function keys (softkeys) for a broad range of uses. * Page-at-a-time direct screen editing via the terminal's cursor control keys. * Ability to call the RPG compiler as well as the Segmenter and manipulate the compiled listing using a split screen. * Choice of editing a file directly or editing a copy of that file. * Ability to execute important MPE commands and run any program file.
Requirements for Operation Hardware Requirements RISE operates as a member of the VPLUS family. Your terminal must be oneof those compatible with VPLUS, such as the model 2645. In addition, your terminal must have at least 8K of memory and the display enhancement character set. VPLUS requires a minimum of 8K ofmemory in your terminal to store and display RISE's special forms of the RPG Specification Records. These forms utilize the display enhancement character set to the user's advantage.
Modes of Operation Line and Block Modes RISE operates in Line or Block mode using the terminal's powerful capabilities to their fullest. Each mode offers you its own unique advantages. Line mode is similar to EDIT/3000. You type in lines in response to a ">" prompt. Typing errors can be corrected by backspacing, which erases the errors and allows you to retype the line as it should appear. When you press the carriage return you send the line to RISE for execution. Block Mode resembles VPLUS.
Figure 1-3. HP 2645 Terminal Keyboard Line Mode Advantages RISE is primarily a line mode editor. Line mode is effective because of the speed with which commands, one at a time, are sent to RISE for execution. Also, the effects of a command's execution are shown to you on the screen so that you see exactly what has occurred. For example, when you give the DELETE command and press the carriage return, RISE will display the lines being deleted.
allowing you to make any changes directly. Thus, all commands may be entered while in either mode. Summary of Modes ---------------------------------------------------------------------------------------------| | | | | | Line Mode | Block Mode | | | | | ---------------------------------------------------------------------------------------------| | | | | Reached by | Special Function Key and automatic | Automatic shift when you enter Block | | | shift when you enter line command. | Mode command.
Command Window Besides the Command Menu, you have another means of entering commands while in Block Mode. You can use the Command Window which is always displayed on the terminal when you are in this mode. The Command Window is useful to those who are familiar with the commands and have no need to go through the menu but want immediate action. In such an instance, you enter the command in the window as you would enter it in Line Mode, using a simple syntax which is described in chapter 2.
following: * SHOW the first page (10 lines) of the source code for the modification. (Your Command Window will also appear on the screen.) * Type in your modifications to the program directly. * Type in DELETE 100/150 in the Command Window. * Press the ENTER key. After you press ENTER, RISE reads in your changes, then pauses and executes your DELETE command, leaving you in the page modification mode of the SHOW command.
retain the deleted lines in the permanent file. Using the TEXT command you could copy it back to the work file in its original state for further work at the terminal. The price of the safeguard is additional time required to copy the files back and forth between your permanent file and the RISE work file. If your RPG source file is long, the overhead may be considerable. You can also edit your files directly using the FILE/EXIT commands. Only one copy of the file is created with this option.
The second safeguard is associated with the KEEP command. It protects you from overwriting an existing permanent file. If you try to KEEP the contents of your work file to a name of a file that already exists, RISE will prompt you as follows: "File exists already. Purge old 'filename'?" This gives you the opportunity to decide whether or not you want to overwrite the pre-existing permanent file. If you do, you respond "YES" and RISE will execute your KEEP command.
RISETOUR is interactive; it contains many requests and directions which call for your direct participation in the tour. It is automatic and controls the complete tour. Using it, you will quickly develop a familiarity with most of RISE's features first-hand. The tour is divided into lessons, and the lessons are grouped under the following headings: * File manipulation commands. * General editing commands. * Block mode. * RPG dedicated commands. * Calling the RPG compiler.
7. E[XIT] --end subsystem 8. FIL[E] --work file directly 9. F[IND] --locate a string 10. FO[RM] --display an RPG specification form on the screen 11. G[ET] --read and execute commands from a file 12. H[ELP] --explain commands 13. I[NCR] --set default increment value 14. J[OIN] --append or merge an entire file 15. K[EEP] --save the work file 16. LIN[E] --enter Line Mode 17. L[IST] --list lines in Line Mode 18. ME[NU] --display main menu 19. M[ODIFY] --modify lines 20.
The following commands execute only in Line Mode: ADD LIST BEGIN MODIFY FORM RUN LINE :MPEcommand The following commands execute only in Block Mode: COMMENT HELP MENU SHOW VERIFY The following commands execute in either mode: CHANGE FILE JOIN RENUM COPY FIND KEEP TEXT DELETE GET MOVE UNDEL EXIT INCR PRINT XPAND The following commands, if entered in Block Mode, will automatically return you to the main menu when the command is completed: FILE RENUM TEXT These commands alter the internal state
Command Limitations RISE will not accept commands longer than 50 characters. This limitation is established by the number of characters which will fit into the Command Window. It holds true with all commands, whatever the mode in which they are entered. Also, multiple commands entered on a single line are not accepted by RISE. RISE does not accept special characters used to separate parameters for a command.
10 COMMANDS-DETAILED DESCRIPTIONS 2- 141
Notations for this Manual Notation Meaning Example of Use -------------------------------------------------------------------------------------[opt] Part of command or parameter enclosed by brackets is optional. A[DD] [^^[formf]] form One of the designators of the RPG Record Specifications--H,F E,L,I,C,O--or CO[L], which brings a column indicator to the screen. FO[RM] form lb Line begin (beginning with line). D[ELETE] lb le Line end (ending with line). D[ELETE] lb/le inc Increment value.
U[NN] U[NN] The work file is to be made permanent without K[EEP] SAVEFILE the appended sequence numbers. A[LL] The command applies to the entire work file. D[ELETE] A[LL] F[IRST] Indicates first line in work file. COM[MENT] F[IRST] L[AST] ^^ Indicates last line in work file. Controls the display of the RPG Record Specification form. M[ODIFY] L[AST] A[DD] ^^H R[EPEAT] Controls the auto-repeating factor in ADD mode.
| position of the record pointer.) | | | --------------------------------------------------------------------------------------| | | (The special character, @, may be used in | L@-5/@+5 | place of * to indicate record pointer | | position.) | | | --------------------------------------------------------------------------------------| | | (Specifications may be mixed.
To compile, prepare, and run SIMCAL from within the RPG Interactive System Environment, you would enter the commands below. The comments on the right are for your information and are not part of your responses. While the Segmenter is executing, its HP banner and responses will appear on your screen. You are expected to supply colon (":") prompts as required when entering the ":MPEcommand".
(See:MPEcommand.) RISE will respond with execution messages, mode changes, and banners to some of the commands. The example below includes only the prompt for information to be used in running the calculator. Comments appear to the right and are not part of your responses. Also, see the MPE Segmenter Reference Manual, for more information on USL and program files.
Parameter Explanation lb The line number where you wish to start adding lines. If not specified, adding begins after the last line in the work file. If "lb" exists in the work file, RISE will first display the existing source record at "lb" and prompt you with a sequence number immediately following "lb". BY inc Increment by which you wish to add lines. If omitted the current default is used. ^^ Your control of the RPG Rec ord Specification forms.
portion of SIMCAL is entered. Various parameters are used. Errors are committed, and the messages appear with the listing. In the first example below, when the ADD command creates a work file, the ADD begins at line 1 because the file is empty. If the file existed previously, RISE would display the last line in the file and the next line number, where the ADD would begin. RISE prompts with line numbers for you to enter text. Two slashes (//) at the beginning of a line terminate the ADD command.
In the next example, lines 2 and 3 are entered (1). With the ^^R[EPEAT]2 parameter in effect, the second screen display shows that lines 2 and 3 have cleared automatically, the cursor has homed, and line 4 has been added (2). The new line contains a syntax error in the attempt to shut off the REPEAT parameter while changing the specification form to I, for Input Specifications (3). When the command is entered correctly, the Input Specifications form is displayed and lines 5 and 6 are added (4).
The remaining examples show lines added correctly with the prompt at column 6 (1). In line 9, the R[EPEAT] parameter is again in effect (2). The display shows the results after two Input Specification records are entered (3). After the second line is entered (line 10), the cursor will home up and prompt for more text with line 11. Line 11 shows the way in which you may use the L[IST] command in ADD mode if it is preceded by ">>" (4). D[ELETE] and M[ODIFY] may also be used in this mode if preceded by ">>".
[ERROR: ] Click here to view figure. BEGIN BEGIN allows you to initiate a new editing session as if you had just entered the RPG Interactive System Environment. Form B[EGIN] [N[OW]] Parameter Explanation N[OW] If you are editing a work file initiated with the TEXT command, NOW will cause the command to execute immediately, and it will disable the safety prompts.
The BEGIN command achieves effects similar to entering an EXIT command, thus leaving RISE to end the current editing session, and then reentering RISE to begin a new editing session. If you are editing or adding to one file and you wish to clear what you have done and start over quickly, BEGIN will save time and add convenience. If the file you are editing was initiated with the FILE command, RISE will automatically close that file for you and save your changes so you can start working on a new file.
5 6 :LINE FIVE : (3) >KEEP SAVEFILE File exist already, purge old SAVEFILE?YES Keep completed. (4) File name is SAVEFILE In the next example, SIMCAL is copied into a work file, and the first five lines are listed (1). When BEGIN is entered, no safety prompts appear because no changes have been made to the work file. With the ADD command, RISE is able to start a new file. Three lines are entered before ends Add Mode (2).
editing session (6). > (1) >FILE SIMCAL (2) Enter new file name followed by additional number of records. DIRSIM 10 File opened. >LIST 1/6 1 00011H (3) SIMCAL 2 00012FINPUT IP 3 00013FOUTPUT O 4 00014IINPUT AA 5 00015I OR 6 00016I OR F F 01 02 03 72 72 1 CA 1 CS 1 CM DISK DISK (4) >CHANGE ;DISK; TO ;TAPE; IN ALL 2 00012FINPUT IP F 3 00013FOUTPUT O F Changes completed. 72 72 TAPE TAPE (5) >BEGIN Ready to begin new session. >LIST ALL (6) Error 65: There is no edit file.
> (3) >FILE DIRSIM File opened. (4) >L1/6 1 00011H SIMCAL 2 00012FINPUT IP 3 00013FOUTPUT O 4 00014IINPUT AA 5 00015I OR 6 00016I OR > > > F F 01 02 03 72 72 1 CA 1 CS 1 CM TAPE TAPE CHANGE CHANGE changes an "oldstring" to a "newstring". Form CH[ANGE] "oldstring" TO "newstring" [IN lb [/le]] Parameter Explanation "oldstring" The old string you are replacing. "newstring" The new string that is replacing the old. IN Indicates that a range of lines to be changed follows.
Examples The following are legal abbreviations which may be used with the CHANGE command and its parameters: CH;OLD;TO $NEW$ IN F/* Change oldstring TO newstring from first line to current position of record pointer. CHAN;OLD; TO; NEW;IN1/10 Change oldstring to newstring in lines 1 through 10. In the examples of the CHANGE command, a mistake is made in the spelling of the command, and an error message is returned (1).
Form COM[MENT] [C] [lb] [BY inc] Parameter Explanation C A fifteen line comment banner is displayed. (If the C parameter is not given, the default banner occupies 10 lines.) The "C" parameter displays a banner with the Column Indicator form instead of the RPG Record Specification form. A space is not required between this parameter and the command. lb Location where comment banner is to be added. If this parameter is omitted, the banner is added at the end of the work file.
The next example is of the fifteen line comment banner shown with the column indicator (2).
COPY COPY allows you to duplicate lines in a file. Form COP[Y] lb [/le] TO loc [BY inc] Parameter Explanation lb First--or only--line you wish to have copied. le Last line of a group of lines you are copying elsewhere. TO loc Location where the lines will be copied. The location cannot be within the range of lines specified "lb/le" after COPY. If the destination line exists, the lines will be copied starting at the next line in sequence. BY inc Increment value by which you want the lines copied.
Error 62: The TO line cannot be less than the FROM line number. (3) >COPY ALL Error 149: TO location missing. (4) >COPY 1/5 TO LAST BY 1 39 00011H SIMCAL 40 00012FINPUT IP 41 00013FOUTPUT O 42 00014IINPUT AA 43 00015I OR Copy completed. > F F 01 02 1 1 72 72 CA CS DISK DISK DELETE DELETE enables you to delete lines from a work file. Form D[ELETE] lb[/le] Parameter Explanation lb The first or only line number where you wish to start your deletion. le The last line you are deleting.
DELE A Delete all lines in the file. In the example, an error is produced when an attempt to delete nonexistent lines is made (1).A second error occurs when ALL is misspelled (2). A third results from an unnecessary character entered following last line (3).Finally, those lines copied to the end of SIMCAL in the COPY example above are deleted by a legal command, and the results are displayed (4). (1) > > >DELETE 200/300 Error 81: Range is empty. (2) >D ALLL ^ Error 67: Syntax error on ALL option.
Purpose The EXIT command terminates the execution of RISE, returning control to MPE. Execution mode: Line or Block. Examples The following are legal abbreviations which may be used with the EXIT command and its parameters: EXI NOW Exit immediately without the safety prompts. E N Exit immediately without the safety prompts. E Exit--safety prompts may be displayed on the screen. In the example, a misspelling of EXIT causes an error message to be displayed (1).
Form FIL[E] filename [N[OW]] Parameter Explanation filename Name of the file to be edited directly. N[OW] Execute the command immediately without safety prompts. NOW is significant with FILE if, previous to issuing the command, you were editing a copy of another file. If you were directly editing another file, having used the FILE command, that file will be closed automatically, and your changes made permanent.
"filename" could represent FILE SIMCAL. Case 3. Converting Non-KSAM File to New KSAM File "filename" exists but is not a KSAM file. RISE must convert it. (The converted file is called "newfile" below.) You type > FILE "filename " RISE responds Enter new file name followed by additional number of records. You type "newfile " 100 (If you are adding records to those in "filename" (now called "newfile") enter the number of additional records you will add--100 in this example.
In the first example, the FILE command is used to create a new KSAM file named SIMCAL2. A message is returned asking for the maximum number of records to be included in the new file. The number given is 5 (1). This is an example of Case 1 (see above). The ADD command is entered, and an attempt to add the 6th record is nullified. The error message gives the reason and recommends using the XPAND command to increase file size (2).
The third example of the FILE command usage represents Case 2, in which an old KSAM file (SIMCAL2, which was created in the first example) is made available for direct editing using the FILE command. RISE responds with a message stating that the file is opened (1). LIST ALL shows the contents of the file (2). Exit is used to leave RISE (3). >FILE SIMCAL2 (1) File opened.
2 3 4 5 6 7 LINE LINE LINE LINE LINE LINE 2 3 4 5 6 7 (3) >EXIT END OF PROGRAM : In the fourth example, the TEXT command is used with SIMCAL, and the first five lines are listed (1). Next, the five lines are deleted (2). When the user attempts to change work files to SIMCAL3, using the FILE command, a safety prompt is displayed. The negative response results in a cancellation of the FILE command (3).
(5) Keep completed. File name is SAVEFILE (6) >D ALL 6 7 8 9 10 11 12 13 14 15 (7) 00016I 00017I 00018I 00019I 00020I OR OR OR 03 04 05 1 1 CM CD 8 9 00021C 00022C 00023C 00024C 00025C 01 02 03 04N99 04 99 OPRND1 OPRND1 OPRND1 OPRND1 72OPRND1 132OPRND2 ADD OPRND2 SUB OPRND2 MULT OPRND2 DIV OPRND2 99 RESULT 104 RESULT RESULT RESULT H Delete completed. (8) >FILE SIMCAL3 NOW Fi1e opened.
Form F[IND] [E[VERY] ] "string" [IN lb[/le] ] Parameter Explanation E[VERY] Every occurrence of the string is located in the given range. (If not specified, only the first occurrence is located.) "string" Character or characters you wish to find. (Note that you may omit "string", and RISE will default and use the previous "string" given with the last FIND command. However, you must specify "string" once.
distinguished from other commands which are similar (4). Note that "F" alone is defaulted to FIND, but when "F" is used with a second character, RISE requires a more thorough identification of the command, and no default is assumed. Finally, FIND is used with the string "DISK" in a line range. The first occurrence of "DISK" is listed on the screen (5). When the "F" command is given, the next occurrence is listed (6). An execution message informs the user that all occurrences have been found (7).
> FORM FORM displays an RPG Record Specification form or column indicator on the screen. Form FO[RM] form Parameter Explanation "form" Meaning H Header specifications F File specifications E File extension specifications L Line counter specifications I Input specifications C Calculation specifications O Output specifications CO[L] Column indicator NOTE Space is not required between command and parameters.
The Column Indicator is displayed and SIMCAL, which is the work file, is listed (3). halts the listing (4). (1) > >FORM XSPECS ^ Error 173: Only H,F,E,L,I,C,O, or COl allowed.
the command. For example, a comment may appear in the command file by specifying an asterisk (*) as the first character in a new line. You may use the GET command to activate the softkeys to execute commands. The function of a particular softkey may be accomplished indirectly by putting the numbers 0 through 8 on a single line in the command file where 0=ENTER key, 1=F1 (special function key 1), 2=F2, up to 8=F8.
Creating work space file. 1 :* THIS IS A SAMPLE COMMAND FILE. 2 :* AN ASTERISK INDICATES A COMMENT LINE. 3 :* YOU STORE A SEQUENCE OF COMMANDS IN A 4 :* FILE TO HAVE THEM ALL EXECUTED 5 :* AUTOMATICALLY. 6 :* 7 :* TEXT IN A FILE. (1) (2) 8 9 10 11 12 13 14 15 16 :TEXT SIMCAL :LIST ALL :* :* LET'S USE SHOW MODE TO AUTOMATICALLY :* SCROLL THROUGH THE FILE WITH THE RPG :* SPECIFICATION RECORD FORMS. :* :* WE SHOULD TURN THE PAUSE ON SO THAT WE :* HAVE TIME TO REVIEW THE SPECIFICATIONS.
Related Commands Special function key (softkey) labels are displayed on the top of the screen with the HELP command. They have the following meanings: Key Meaning -------------------------------------------------------------------------------------- F1 (not used) F2 (not used) F3 RPG source lines with or without editor sequence line numbers will be displayed with the next SHOW command you enter. F4 Move cursor to Command Window.
The second example shows a typical detailed explanation of a command--in this case the HELP command itself (2). (The command which brought the second example to the screen, if abbreviated to the minimum, could have been "H H".
INCR INCRement resets default increment. Form I[NCR] [value] Parameter Explanation value New increment value you wish to establish. (For limitations, see Note below.) Purpose The INCRement command resets the default INCRement to your new "value". Once you use the INCR command, all subsequent commands which require the increment value will use your new value unless you specify a different increment in the parameters of the command.
>L ALL 5 00011H SIMCAL 10 00012FINPUT 15 00013FOUTPUT 20 00014IINPUT (4) 25 00015I I P O AA 72 72 1 CA 02 1 CS OR F F 01 DISK DISK In the second example, the I command without a value resets the default increment value of 1, and the RENUMber command is entered (1). When an illegal abbreviation of LIST is entered, an error is generated (2). A legal abbreviation of LIST ALL is then entered, and the command is executed (3). (1) >I Increment reset to 1. >RENUM Renum completed.
Purpose The JOIN command appends or merges the entire contents of file "file name" to the work file. If "TO loc" is not specified "filename" is appended at the end of the work file. If "BY inc" is not specified, the current increment default value is used. Using an increment value of less than 1 allows you to concentrate more lines in a restricted location. Sometimes the entire contents of "filename" cannot be joined as indicated because they are blocked by the next higher line number.
(3) >JOIN RPGDOC TO .1 .1 H* .2 H* .3 H* .4 H* .5 H* .6 H* .7 H* (4) PROGRAM NAME: PROGRAMMER : DATE WRITTEN: PURPOSE : Join completed. (5) > (6) >LF/5 ^ Error 112: Can't distinguish between LINe or LISt command. (7) >L F/5 .1 H* .2 H* PROGRAM NAME: .3 H* .4 H* PROGRAMMER : .5 H* DATE WRITTEN: .6 H* PURPOSE : .
The "NOW" option ensures that the overwriting will take place immediately. It also disables the safety prompts. It saves time but it should only be used when you are certain that the work file should replace the permanent file. There is no provision for reconsidering changes once NOW is used. When you omit NOW, and respond to the message informing you that the "filename" exists and asking if you wish to overwrite the existing copy, you do have an opportunity to reconsider the replacement.
38 00048O*END OF PROGRAM NAMED SIMCAL : (4) >KEEP BACKUP NOW UNN Keep completed. (5) >File name is BACKUP > In the second example, a file named TESTFILE is copied into the work file, TESTFILE was previously stored as a permanent file with the UNNumbered parameter. Because sequence numbers are essential as references in editing, they are appended automatically for the user's convenience (1).
DELETE command, the lines being deleted are displayed. (You may not wish to have all the lines being deleted displayed. By typing you stop the listing. does not stop the execution of the command, however.) Related Commands Another method of entering Line Mode from Block Mode is the the special function key F7, when the softkey label for F7 reads "LINE MODE". Execution mode: Line Examples The following is a legal abbreviation of the LINE command: LIN Shift to Line Mode.
L *-5/*+5 List a range of lines beginning five lines before the current position of the record pointer and ending five lines after the record pointer. L10 List line 10. L List the line following the position of the current record pointer. (Used for stepping through a file, line by line.) In the first example, TEXT is used to copy SIMCAL into a work file, and the first five lines are listed on the screen using the LIST command (1).
In the next example, an error results when non-existent lines are used with the LIST command (1). Following that, LIST is entered with a "line beginning" which is higher in sequence than the "line ending", and another error message is shown (2). Next, the same error is committed using special characters to indicate the current position of the record pointer (3). LIST used with a line number which includes an illegal decimal value causes another error (4).
SHOW command. F4: Move cursor to Command Window. F5: Move cursor to Edit Commands. F6: Move cursor to General-2 Commands. F7: Enter Line Mode. F8: Refresh main menu (clears the screen and redraws the menu). Execution mode: Block. Examples The following is a legal abbreviation which may be used for the MENU command: ME Display the main command menu. The first example shows the main menu without any commands entered in any of the unprotected fields (1).
MODIFY MODIFY enables you to modify lines interactively. Form M[ODIFY] [lb[/le]] [^^] Parameter Explanation lb Single line or first line of range you wish to modify. le Last line of range you intend to modify. ^^ Displays the line or lines for modification with the corresponding RPG Record Specification form. Purpose The MODIFY command is your means of modifying lines interactively. It operates similarly to the same command in EDIT/3000.
Related Commands Insert ("I") Subcommand "Istring" will insert a character or string. You position the cursor beneath the position where you wish the insertion to begin. You type an "I" immediately followed by the "string" to be inserted. Replace ("R") Subcommand "Rstring" will replace the characters in the line marked "R" by your new "string". Again, you position the cursor beneath the first character you wish to replace before typing "Rstring".
M Modify line at the current position of the record pointer. MOD AL^^ Modify all the lines and display the corresponding RPG Record Specification form. The first five lines of SIMCAL are used for these examples. After the lines are listed, MODIFY FIRST is entered, and a two-character string is replaced using the R subcommand (1). Note that the line selected for modification is displayed unmodified on the screen initially, and that it is displayed again after the execution of the subcommand.
(6) 2 00012FINFILES IP F 80 : DISK TAPE In the next example, the delete (D) subcommand is used in conjunction with the insert (1) subcommand with the result that "MAGTAPE" replaces "TAPE" in the line (1). The next example demonstrates how all characters between the two outside D's used in the delete subcommand are removed upon execution of the subcommand (2). Again a is used to restore the characters erroneously deleted (3).
MOVE MOVE transfers lines to a new location.
Form MOV[E] lb[/le] TO loc [BY inc] Parameter Explanation lb Single line you wish to move or the beginning of a range of lines you are moving. le Last line of range you wish to move. TO loc Location where the lines are to appear. If destination line exists, the lines will be moved starting at the next line in sequence. BY inc Increment of line numbers you wish to use.
(4) >L1/5 1 00011H SIMCAL 2 00013FOUTPUT 3.5 00012FINPUT 4 00014IINPUT 5 00015I O IP AA OR F F 01 02 1 1 72 72 CA CS DISK DISK In the next example, the record pointer is moved to the last line in the file when LIST LAST is entered (1). A command is then given to MOVE a range of lines beginning ten lines before the current record pointer and ending with the last line in the file to line 100 (2). The results appear on the screen (3).
with the formal file name of "RISELIST" and device class of "LP". Whenever the RPG form type in column 6 changes, the PRINT command will skip three lines to group together those lines which have the same form type. This produces a more readable format for the source code. Because of this feature, the PRINT command should only be used when you are working on RPG source code. If "RPGLIST" is specified, the compilation listing produced by the VERIFY RPG command is printed instead of the work file.
Parameter Explanation Parameter option 1:[lb/le] [BY inc] Renumbers the range "lb/le" by "inc". If the line range is omitted, the entire file will be renumbered. (As in other commands, "ALL" may be used in place of "lb/le".) If "BY inc" is omitted, the default increment is used. Parameter option 2:BOTH [BY inc] Renumbers both the editor sequence numbers and the RPG source line numbers (columns 1-5) by "inc". Both will have the same value. The value of "inc" cannot be less than 1.
R SO W SE Renumber source line numbers so that they correspond with sequence line numbers. REN SO Renumber source line numbers so that they have bracketing values according to the record specification form with which they are associated. The examples use a truncated version of SIMCAL consisting of the first five lines. It has been stored in a permanent file with the name PARTSIM. When an attempt to TEXT the file is made, and the filename is typed incorrectly, an error message is returned (1).
(1) >RENUM SOUCE ^ Error 161: Syntax error on SOURCE. >RENUM SOURCE Renum completed. >L FIR/L 1 00010H SIMCAL 2 06000FINPUT IP F 3 06001FOUTPUT O F 4 10000IINPUT AA 01 1 5 10001I OR 02 1 (2) > (3) >RENUM SEQNUM WITT SOURCE ^ Error 164: Syntax error on WITH. >RENUM SEQNUM WITH SOURCE Renum completed.
[;STACK=stacksize] [;DL=dlsize] [;NOCB] P [;LIB=G] S The parameters, preceded by a semicolon, can appear in any order. The RUN command is similar to the MPE :RUN command. Because it is similar, the syntax of RISE's RUN command is exactly the same as MPE's RUN command syntax. Therefore, delimiters between parameters are required. Parameter Explanation progfile Actual designator of program file that contains prepared program. entrypoint Program entry point where execution is to begin.
LIB=G Search segmented procedure libraries to satisfy external references during allocation in the following order: group library, account public library, system library. Default is S. LIB=P Search segmented procedure library to satisfy external references during allocation in the following order: account public library, system library. Default is S. LIB=S Search system library only to satisfy external references during allocation. This is the default.
(7) >RUN $OLDPASS SIMPLE CALCULATOR ENTER DATA IN THE FORMAT: C NNNDD NNNDD (8) A 11100 11100 ..... YOUR PROBLEM: 111.00 ADD ENTER DATA IN THE FORMAT: C NNNDD NNNDD (9) 111.00 EQUALS 222.0000 S 22222 11111 ..... YOUR PROBLEM: 222.22 SUB 111.11 EQUALS 111.1100 10.00 EQUALS 100.0000 10.00 EQUALS 10.0100 ENTER DATA IN THE FORMAT: C NNNDD NNNDD (10) M 01000 01000 ..... YOUR PROBLEM: 10.00 MULT ENTER DATA IN THE FORMAT: C NNNDD NNNDD (11) D 10010 01000 ..... YOUR PROBLEM: 100.
instance.) In SHOW mode the terminal's cursor control keys and two of the editing keys--INSERT CHAR[acter] and DELETE CHAR[acter]--will prove particularly useful in your editing. (INSERT LINE and DELETE LINE keys are not activated.) Also, tabs have been set to correspond with the important Record Specification form columns. Using the TAB key rather than the space bar to position your cursor, you move quickly from column to column to the position where changes are necessary.
NOTE If the terminal is unexpectedly locked out at this point, see the section on Recovery Procedures. Scroll Set While in SHOW mode, you can increase your scrolling capabilities by switching to Scroll set. Again, this is accomplished by pressing F1. The softkeys have the following functions when Scroll set is activated: F1 Switch to Master set. F2 Display first page. F3 Display last page. F4 Move cursor to Command Window. F5 Scroll forwards a page. F6 Scroll backwards a page.
In the next examples, the special function key labeled SCROLL FORWARD is used while the Header Specification form is displayed. The first time the scrolling occurs, the RPG File Specification form appears on the screen with the associated source file lines (1). The next form to be brought to the screen by the SCROLL FORWARD softkey is the RPG Input Specification form.
displayed (2). In the next example, the form shown with the message in the bottom line communication window, and the changed labels for the softkeys are produced when the INSERT LINES softkey (F2) is pressed.
the SHOW MODE window contains precise instructions for inserting from one to four lines (1). The second display is produced by pressing softkey #3 (INSERT 3 LINES) after the cursor has been positioned at line 18. Note that the column 6 entries, which designate the Record Specification form appropriate to the lines being inserted, are supplied automatically by RISE (2). The user is then ready to position the cursor and insert new data.
"SCROLL". This indicates that the Scroll Set of keys are now active (1). Special function key #3 (SCROLL LAST) produces the next screen display, which contains the final lines of the source file associated with the RPG Output Specifications form (2). Bad graphic In the next example, the SHOW FIRST COL command brings the column indicator to the screen. In the first display, Scroll set is activated as the softkey labels indicate (1).
To produce the first display in the final example, the user has entered SHOW FIRST COL command or some valid abbreviation. Also, special function key #3 has been pressed while in Master Set (this key toggles sequence numbers on and off). A fifteen line "page" is brought to the screen and with it the sequence line numbers which RISE keeps for use in referencing records. Note the command in the command window (1).
2- 208
TEXT TEXT copies a permanent file into a work file for editing. Form T[EXT] filename [N[OW]] Parameter Explanation filename Name of the permanent file you are copying to the work file. N[OW] Your work file contains the contents of one file but you may wish to TEXT another without saving the contents of that work file. The contents of the file you wish to TEXT will not be copied unless you KEEP the current work file to a permanent file.
>L 1/5 1 00011H SIMCAL 2 00012FINPUT 3 00013FOUTPUT 4 00014IINPUT 5 00015I (2) >D 1/3 1 00011H SIMCAL 2 00012FINPUT 3 00013FOUTPUT Delete completed. IP O AA OR F F 01 02 IP O F F 1 1 72 72 CA CS DISK DISK 72 72 DISK DISK (3) >T SIMCAL KEEP not done, CLEAR current work file?NO Text cancelled. (4) >KEEP BACKUP Keep completed. (5) File name is BACKUP In the second example, the CHANGE command is used to replace one four-character string with another.
Form U[NDEL] Purpose The UNDELete command restores the lines which were removed by the last DELETE command. It does not restore characters which were deleted while in the MODIFY mode. If you DELETE lines, then ADD new ones with the same numbers as those deleted, the deletions will not be restored by the UNDEL command. It only restores lines when the numbers of the lines to be restored do not already exist in the work file.
4 5 (2) 00014IINPUT 00015I Undel completed. > >D 5/10 5 00015I 6 00016I 7 00017I 8 00018I 9 00019I 10 00020I (3) AA OR 01 02 1 1 CA CS OR OR OR OR 02 03 04 05 1 1 1 CS CM CD 3 72OPRND1 9 132OPRND2 99 Delete completed. In the next example, a file named RPGDOC--used previously in the JOIN example--is JOINed to the work file beginning at line 5 (1). The UNDEL command is then tried and rejected by RISE.
V[ERIFY] L[IST] P[REP] [progfile] [;ZERODB] [;PMAP] [;MAXDATA=segsize] [;STACK=stacksize] [;DL=dlsize] [;CAP=caplist] [;RL=filename] [;PATCH=patchsize] Parameter Explanation R[PG] Calls the RPG compiler to compile the work file into the USL file named "$OLDPASS", a system-defined file name. Afterwards, it causes the newly compiled listing to be displayed on the screen. Using special function keys, you can scroll through the file in split screen.
* PH = Process handling. * DS = Data segment management. * MR = Multiple resource management. * PM = Privileged-mode operation. Users who issue the prepare command can only specify capabilities that they themselves possess (through assignment by the Account Manager). If the user does not specify any capabilities, only IA and BA (if the user possesses them) will be assigned to this program. RL=filename The name of the Relocatable Library (RL) to be searched to satisfy external references during preparation.
F5 Scroll forwards one page. F6 Scroll backwards one page. F7 Scroll forwards 1/2 page. F8 Scroll backwards 1/2 page. Softkey F1 allows you to divide the screen up into two fixed portions--a top and bottom half--or join them in a full page display. Pressing F1 will switch the screen display in the following order: Top Window, Bottom Window, and back to Full Window. The F1 label indicates what will be displayed next on the screen if you press F1.
(1) 2- 216 1 00011H SIMCAL 2 00012FINPUT 3 00013FOUTPUT 4 00014IINPUT 5 00015I >VERIFY RPG IP O AA OR F 01 02 1 1 72 CA CS DISK DISK
The next example follows the previous one directly. Special function key #1 (TOP WINDOW) has been pressed, and the x screen is split (1). In the bottom half of the screen, error and warning message numbers appear beneath the lines containing the errors (2).
pressed, the usefulness of the split screen is demonstrated. In the second display, the top portion of the screen contains the compiled source lines and the error and warning numbers (3). The bottom window contains the numbers and their messages (4). Note that the up arrows (^^) indicate that the screen is presently in top window mode. In the next display, the same information is shown on the screen, but it is now in bottom window mode, as the down arrows (vv) indicate.
In the next example, it is assumed that no serious compilation error occurred so the user proceeds to 2- 219
prepare and execute. The VERIFY PREP option is employed, and the Segmenter banner is displayed (1). Next, the MPE command :SAVE assigns a new file designator to $OLDPASS when it is made permanent (2). A second MPE command, :LISTF, with the 2 parameter, brings to the screen file information including file name, file code, record size, record format, data format (3). The input/output file equations are given (4), and the RUN command is issued using the new file designator (5).
RPG'00 1 NAME STT R'OUT 1 R'EDIT 6 R'LINEC 7 R'CALT 2 R'CALD 3 DIVD 10 R'INT 4 R'ERROR 11 I'0001 5 SEGMENT LENGTH PRIMARY DB SECONDARY DB TOTAL DB ELAPSED TIME (2) CODE ENTRY SEG 0 0 ? ? 574 574 600 600 ? 766 766 ? 766 1052 1130 134 INITIAL STACK 277 INITIAL DL 433 MAXIMUM DATA 00:00:04.673 1440 CAPABILITY 600 0 TOTAL CODE 1164 23420 TOTAL RECORDS 14 PROCESSOR TIME 00:00.576 Segmenter completed.
Related Commands When you use the FILE command to create a new file, RISE asks you for the maximum number of records the file will contain. If, for example, you specified 10 lines for the new file, entered 10, and discovered that you had more lines to add to the file, RISE would return the following message: Error 147: No room in edit file; use XPAND. Using X[PAND] with the number of records you wish to add, you could enlarge the size of the file as desired.
Form :MPEcommand Purpose Executes an "MPEcommand" following a colon--:--that can be executed programmatically with RISE. How these commands are executed is described in the MPE Intrinsic Manual under Command Intrinsic. Related Commands When you type H[ELP]: a list of the MPE commands which can be executed programmatically by RISE will be displayed on the screen. Execution mode: Line. Examples A list of some MPE commands that may be executed through RISE will appear on the screen when HELP: is entered.
THU, MAY 28, 1981, 3:20 PM > (3) >:LISTF BACKUP,2 ACCOUNT= SUBSYS FILENAME CODE BACKUP (4) 2- 224 >:PURGE BACKUP > > GROUP= RPG -------LOGICAL RECORD---------SIZE TYP EOF LIMIT R/B 88B FA 35 38 2 ----SPACE---SECTORS #X MX 20 7 7
11 RECOVERY PROCEDURES While using the RPG Interactive System Environment, you may encounter one of six problem situations. They are: * System failures. * Terminal lockouts. * Breaking out of Block Mode. * Transmission errors. * Loss of echo at the screen. * Effects of :EOD. For your information, RISE uses the following file designators during operation: * Wdddhhmm --KSAM data file for work file. * WKddhhmm --KSAM key file for work file. * Ldddhhmm --compilation listing file.
file: D:\filtrixfiles\rpgutilrisk\Chap3.html >KEYINFO filename;RECOVER (and, after recovery is made) >EXIT (In the above, "filename" is the name of the KSAM data file determined in the LISTF command.) This will recover the work file and take you out of KSAMUTIL. You can then run RISE and continue editing after you TEXT in the recovered work file name. If the system fails while you are editing the file directly (initiated by the FILE command), perform steps 2 and 3 above.
NOTE Steps 6 and 7 may be skipped if you press softkey F7, which puts you in Line Mode instead of Block Mode. Recovery from a Transmission Error Transmission errors usually bring to the screen a nonsensical clutter of characters. The keyboard works but characters, such as escape characters, appear on the screen erroneously. They cause incorrect displays of forms in block mode. To recover from the effects of transmission errors do the following: 1.
file: D:\filtrixfiles\rpgutilrisk\Chap3.
E 3 Appendix A COMMAND SUMMARY A[DD] [lb] [BY inc] [^^[form] [R[EPEAT] [n]]] ADD lines starting at "lb" BY inc (rement); "^^" controls the RPG Record Spec forms and may be entered while in Add Mode at the start of a new line; the "R[EPEAT] n" option homes the cursor and clears the screen after "n" number of lines have been added. The LIST, DELETE, and MODIFY commands may be entered while in the Add Mode by typing ">>" at the start of a new line followed by the command.
restricts the search to a range. 12 FO[RM] form Displays the RPG Record Spec form of type "form". "form" may be H,F,E,L,I,C,O, or COL. 13 G[ET] filename Reads and executes commands stored in the file "filename". 14 H[ELP] [command] Gives brief desciptions of all RISE commands; when "command" is specified, provides detailed descriptions of single command. 15 I[NCR] [value] Sets default increment value; "value" sets new default increment value which prevails until "I[NCR] " is used again.
BOTH [BY inc] SO[URCE] [BY inc] SO[URCE] W[ITH] SE[QNUM] SE[QNUM] W[ITH] SO[URCE] Renumbers work file sequence line numbers; "lb/le" establishes range for renumbering; "BY inc" establishes increment value; "BOTH" renumbers sequence line numbers and RPG source line numbers (cols 1- 5); "SOURCE WITH SEQNUM" renumbers source lines to agree with the sequence line numbers; "SEQNUM WITH SOURCE" renumbers sequence line numbers to agree with source line numbers.
Expands the size of the work file by "numrecs" (number of records). 31 :MPEcommand Executes an "MPEcommand" entered following a colon (:) character. The MPE commands which you may enter are listed when you type H[ELP]:.
F Appendix B COMPARISON OF RISE AND EDIT/3000 RISE and EDIT/3000 are in many respects similar editors. There are significant differences between them, however. Below is a list of contrasting features that new RISE users, who are accustomed to EDIT/ 3000, will find helpful.
| between changes in column 6 (form type). | | | LIST ALL OFF prints offline without | | | spacing. | | | | | -----------------------------------------------------------------------------------------| | | | 9. HELP command replaces. | XPLAIN command. | | | | ----------------------------------------------------------------------------------------| | | | 10. MOVE command replaces. | GATHER command. | | | | -----------------------------------------------------------------------------------------| | | | 11.
G Appendix C INFORMATIVE EXECUTION MESSAGES NUM Informative Execution Message -------------------------------------------------------------------------------------0 Syntax checking is turned on. 1 Syntax checking is turned off. 2 Preparing for compilation... 3 Return to main menu with the MENU command, then compile. 4 Text completed. 5 Warning: record size is greater than 88 bytes, truncated to 80. 6 File is unnumbered; appending sequence numbers. 7 Print completed.
NUM Informative Execution Message -------------------------------------------------------------------------------------28 Xpand completed. 29 Creating new Ksam file; enter maximum number of records. 30 Enter response and press ENTER key. 31 Errors in response; Command cancelled. 32 File opened. 33 Enter new file name followed by additional number of records. 34 File exists already; enter a NEW file name. 35 Join completed. 36 Copy completed. 37 Move completed. 38 Renum completed.
H Appendix D ERROR MESSAGES NUM Error Message -------------------------------------------------------------------------------------0 Can't sense cursor position. 1 Only one command allowed. 2 Incorrect specification of the command in the menu. 3 Only F,T,K,J allowed in File type command. 4 Only I,P,C,R,M allowed in Gen1 type command. 5 Only D,S,A,F,CO,CH allowed in Edit type command. 6 Only U,H,V,E allowed in Gen2 type command. 7 There is no such editor command.
NUM Error Message -------------------------------------------------------------------------------------29 Syntax error on SHOW command. 30 Syntax error on TEXT command. 31 Syntax error on UNDEL command. 32 Syntax error on VERIFY command. 33 Syntax error on NOW parameter. 34 Only NOW parameter allowed with Exit command. 35 KEEP not done - use NOW option to CLEAR work file. 36 Illegal special character. 37 38 Syntax error on RPG option. 39 Syntax error on ON option.
NUM Error Message -------------------------------------------------------------------------------------61 Only a ‘*',line number,FIRST,LAST,ALL allowed in range. 62 The TO line cannot be less than the FROM line number. 63 Only the RPGLIST option is allowed after the range. 64 There is no compilation listing to print. 65 There is no edit file. 66 Syntax error on Rpglist option. 67 Syntax error on All option. 68 A special delimiter may not follow the line range. 69 Illegal delimiter.
NUM Error Message -------------------------------------------------------------------------------------93 No parameters are allowed with this command. 94 No string to find. 95 Missing range after IN option. 96 Only a delimited string and/or IN range allowed. 97 Missing close delimiter. 98 A string must be given between the delimiters. 99 A slash (/) cannot delimit a string. 100 Should be blank after line range. 101 ‘oldstring' TO ‘newstring' missing.
NUM Error Message -------------------------------------------------------------------------------------125 Expecting equal sign after a parameter. 126 Illegal numeric value after the equal sign. 127 Numeric value may only have a maximum of 5 digits. 128 Only G,P,S allowed for libsearch value. 129 Program name may contain a maximum of 8 chars. 130 Expecting lockword immediately after the slash. 131 Lockword may contain a maximum of 8 characters.
NUM Error Message -------------------------------------------------------------------------------------157 Expecting SOURCE after WITH. 158 Expecting WITH SOURCE after SEQNUM. 159 Expecting SEQNUM after WITH. 160 Only WITH or BY allowed after SOURCE. 161 Syntax error on SOURCE. 162 Syntax error on SEQNUM. 163 Can't distinquish between SOurce and SEqnum. 164 Syntax error on WITH. 165 A source line number has non-numeric characters. 166 A source line number is not in ascending sequence.
NUM Error Message -------------------------------------------------------------------------------------189 Should be blank after BY increment. 190 Should be blank after file name. 191 Should be blank after ^^. 192 Only ^^ allowed after line range. 193 Should be blank after SOURCE. 194 Should be blank after SEQNUM. 195 Only capital letters are allowed. 196 Syntax error on EVERY. 197 Should be blank after OFF. 198 Only OFF allowed after line range. 199 Syntax error on PREP.
D- 244
HP RPG/XL Utilities-Part 3 SIGEDIT
246
Preface to RPG SIGEDITOR This is the reference manual for Hewlett-Packard's SIGEDITOR. SIGEDITOR is a menu-driven forms design utility used by RPG programmers to construct forms. This manual assumes that you are an experienced RPG programmer using SIGEDITOR. In this manual, the term user refers to the person entering data into the forms that you have designed. This manual contains the following: Chapter 1 Gives an overview of SIGEDITOR. A short tutorial introduces you to the menu and the basic functions.
Conventions NOTATION UPPERCASE DESCRIPTION Within syntax statements, characters in uppercase must be entered in exactly the order shown, though you can enter them in either uppercase or lowercase. For example: SHOWJOB Valid entries: showjob ShowJob SHOWJOB Invalid entries: shojwob ShoJob SHOW_JOB italics Within syntax statements, a word in italics represents a formal parameter or argument that you must replace with an actual value.
If a punctuation character precedes the ellipsis, you must use that character as a delimiter to separate repeated elements. However, if you select only one element, the delimiter is not required. In the following example, the comma cannot precede the first instance of itemname: [itemname ][,...] |...
simultaneously press the Control key and the Y key on the keyboard. base prefixes The prefixes %,#, and $ specify the numerical base of the value that follows %num specifies an octal number. #num specifies a decimal number. $num specifies a hexadecimal number. When no base is specified, decimal is assumed.
12 Chapter 1 Introduction to SIGEDITOR SIGEDITOR is a menu-driven utility that lets you design forms for RPG applications. You design the forms through the RPG Screen Interface (RSI). This chapter introduces SIGEDITOR with a short tutorial showing you how to create and modify a form using basic SIGEDITOR functions. For detailed information on using SIGEDITOR, refer to chapter 2. SIGEDITOR Capabilities • Create and store up to 1,024 forms in a forms file. • Modify existing forms.
Running SIGEDITOR To begin using SIGEDITOR, enter the following command: :run sigedit.pub.sys The main menu heading appears at the top of the as shown in Figure 1-1. __________________________________________________________________________________ | | | HP32104A.08.00 SIGEDITOR WED, MAR 3, 1988 9:32 AM| | | | | | | __________________________________________________________________________________ Figure 1-1. Main Menu Heading The main menu keys appear at the bottom of the screen.
| | | EDIT EDT FORM EDT FLD SWITCH PREV PAG NEXT PAG FORM MAIN| | FORM ATTRIB ATTRIB LST FMT FRM LIST FRM LIST UTILS MENU| | | | | _____________________________________________________________________________________ Figure 1-4. The Edit Menu From here you can select the functions for designing a new form, editing an existing form, or selecting the form utilities functions. These keys and their related functions are explained in chapter 2 and summarized in appendix B.
SOC. SEC. NO. NAME ADDRESS ZIP CODE PHONE NO. Figure 1-7. Sample Form with a Centered Line Press ENTER . In the next screen, type the name of the new form and press ENTER to store the form and return to the main menu. At this point, you have created a forms file, designed a new form, and stored the form in the file. Editing a Form This section takes you through the steps of editing a form. The name of the newly created form is displayed beside Selected form: on your screen.
ADDRESS ADDRESS ZIP CODE PHONE NO. Figure 1-10. Sample Form with a Field Deleted The f4 key (HOLD FIELD) copies or moves a single field from one position to another. Position the cursor on the field labeled PHONE NO. and press the f1 key. An H appears in the field to indicate that the field is being held. Next, move the cursor to the next line under the first position of the PHONE NO. field and press the f5 key (PLACE HOLD). A field identical to the held field appears beginning at the cursor.
| e | f| a b | | | | | | SOC. SEC. NO. ___________________ | | NAME ________________________________________ | | ADDRESS _____________________________________ | | ADDRESS _____________________________________ | | ZIP CODE ___________ PHONE NO. ________ | | OFFICE PHONE __________ | | | | | | | d c h | g| _______________________________________________________________________ Figure 1-13.
13 Chapter 2 Using SIGEDITOR Introduction This chapter gives a detailed description of SIGEDITOR's capabilities. They are: • * Creating forms files. • * Entering forms specifications. • * Specifiying form field attributes. • * Using additional editing features. • * Using the form utilities. Opening, Creating, and Listing Forms Files To open a forms file, press f1 (SELECT FRMS FIL) from the main menu. Enter the form filename in the field provided and press ENTER .
| Suppress input | N Return input Erase input fields | Y | N PRNT ROLL | | ROLL REC UP DOWN | CLEAR HELP BKSPC | _____________________________________________________________________________________________| | Retain function keys N or | | A | Retain command keys B C D E F G H I J K L N or | | | M N P Q R S T U V W X Y | | | | | | PRESS ENTER: TO CONTINUE | | | ___________________________________________________________________________________
start line number and the number of lines to clear is eight, lines three through ten are cleared. The number of lines to clear plus the start line number must not exceed 24. If a value is not given, 24 lines (the default) are cleared. NOTE The number of lines to clear and the start line number can be used to overlay one form with another. Use caution when overlaying a form with output fields with forms with input fields.
Forms Cache (*GLOBAL) Legal values for this field are Y and N. The Forms cache (*GLOBAL) determines the form name stored in the for ms cache directory when the form is downloaded. NOTE Forms can be downloaded using the DOWNLOAD command of the Process Monitor software product, PROCMON. Currently, only the 2394A and 700/94 terminals support forms downloading. For more information, see the PROCMON/3000 Reference Manual.
If N (no) is specified, the function keys active for the previous screen are not retained, and the user can enable new function keys for this form. Table 1 describes each function key. Table 5: Function Keys Function Key Description Status Code f2 print screen 1121 f3 roll up 1122 f4 roll down 1123 f5 clear 1124 f6 help 1125 f7 record backspace 1126 Enable a function key by placing any character in the space identified by the function number.
_____________________________________________________________________________________ | | | NEXT PREV FIRST SET DEFAULT SEE/SET EDIT| | FIELD FIELD FIELD FIELD ATTRIB. ATTRIB. MENU| | | | | _____________________________________________________________________________________ Figure 2-2. Field Attribute Keys The first three keys allow you to move the cursor from field to field.
| | | Form File: formfile.group.
new I/O specifications, the data is not stored in the correct buffer locations. NOTE If you change the sequence numbers of a form's fields, regenerate I/O specifications and recompile the program. (See "Generating I/O Specifications.") Position Cursor Legal values for this field are Y, N, and 01-99. The Position Cursor attribute positions the cursor at a specific input field when a form is first displayed.
If Y (yes) is specified, the characters in the field appear in inverse video. If N (no) is specified, the characters appear in normal video. If an indicator is specified, the field appears in inverse video when the indicator is on. Underline Legal values for this field are Y, N, and 01-99. If Y (yes) is specified, the field is underlined. If N (no) is specified, the field is not underlined. If an indicator is specified, the field appears underlined when the indicator is on.
Constant Type Legal values for this field are C or blank. If C is specified in the Constant type specification, constant information given in the field is displayed in the output field. If the field is blank, blanks are displayed. If a blank is specified, information from the program output buffer area is displayed.
Examples of numeric and signed numeric data types are shown below. Entered on screen In buffer Numeric: Signed numeric: 1234.5 12345 -1234 123M or 1234A blank is represented by a 123M . Mandatory Enter Legal values for this field are Y and N. If Y (yes) is specified, the user must enter at least one character in the field before input from the form can be returned to your program. If N (no) is specified, information does not need to be entered in that field.
items such as account numbers. The number is initially created by a user program, using an appropriate algorithm, to compute a check digit, which is then appended to the right-most end of the number. For example, a 6-digit number plus the check digit would become a 7-digit account number. When the number is entered on the screen and self-check is specified, the number is checked, again using an appropriate algorithm, to ensure the number was entered correctly.
Other Keyboard Edit Keys Although it is not recommended, you can modify a form with keys not included in the function keys f1 through f8 . The additional six keys are shown in Figure 2-6. These keys can be useful when editing fields; however, it is good practice to use the eight function keys established by SIGEDITOR. INS DEL LINE LINE INS DEL CLEAR CLEAR CHAR CHAR LINE DSPLY Figure 2-5.
If the output file already exists, SIGEDITOR sends a verification message to the screen asking if the previous contents of the file can be purged. If the answer is no, SIGEDITOR requests another filename. Otherwise, a new message, GENERATING INPUT/OUTPUT SPECIFICATIONS is sent to the screen. You are then returned to the utilities menu.
______________________________________________________________________________________ Figure 2-8. Copy Form Screen The space allowed to enter the name of the FROM forms file is long enough to specify the fully qualified filename of a forms file. Once the designated forms file and form names are given and the ENTER key is pressed, SIGEDITOR simply copies the form to the specified forms file under the new form name. Press f8 to return to the form utilities menu.
2- 272
14 Chapter 3 Application Help Facility Introduction to the Application Help Facility The application help facility is part of the RPG Screen Interface (RSI). At runtime, RSI uses "help areas" and "help forms" created by SIGEDITOR. For applications converted from the IBM S/36, the SIGEDITOR converts the help (or H) specifications to the RSI format as part of the convert S and D specifications function. Help Areas Help areas are imaginary areas that are overlayed on the application form.
Figure 3-1. Defined Help Area If you are not satisfied with the help area, you can start over by pressing the f5 (REFRESH FORM) key. The current help area is the only one discarded. To see all help areas defined for the form, press the f6 (SHOW ALL AREAS) key. The last step in defining a help area is to assign help area attributes. The attributes are assigned by pressing f3 (HELP ATTR) and then entering the help attributes in the spaces provided on the help attributes form.
______________________________________________________________________________________ | | | | RPG Screen Interface - Help Area List Specification Form File: RSID002F | Form: FORM | | | --------------------------------------------------------------------------- | | | | | ID Form Upr Left Lower Rt Indicators | Row Row SS | Col Col BI | | | 10 | 20 | 30 NAMADD10 4 ZIPCOD10 PHONUM10 17 10 9 10 17 64 11 N 40 11 37 | 63 N | N | | | | | | | | | --------
application form. It must be in the range of 01 to 24. The only exception is in the case of the "NULL HELP AREA" (see roll key processing). When a "NULL HELP AREA" is created all row and column attributes must be zero (0). Left Column This is the left column of the help area border. The left column must be in the range of 01 to 80, except in the case of a "NULL HELP AREA" when it must be zero (0).
indicator set on (by the RPG program); if any are found they are deleted from the global help area list.
3- 278
15 Chapter 4 A Quick Reference to SIGEDITOR Introduction This chapter provides a quick guide to specific tasks of SIGEDITOR and gives step-by-step directions to perform a task. You can use these directions without reading chapters 1 and 2. The tasks in this chapter are: • Adding help to an existing form. • Copying a field. • Copying a form between forms files. • Creating a field in an existing form. • Deleting a field. • Deleting a form. • Drawing lines on a form.
9 Press f7 (FORM UTIL). 10 Press f1 (HELP AREAS). 11 Enter forms file name if forms file name displayed on screen is not correct. 12 Enter form name which help form is to be attached to and press f2 (CREATE AREAS). 13 Move cursor to the upper left corner of help area and press f1 (UPPER LEFT). 14 Move cursor to the lower right corner of the help area and press f2 (LOWER RIGHT). 15 Press f3 (HELP ATTR).
Creating a Field in an Existing Form 1 From the main menu, press f1 (SELECT FRMS FIL) to open a forms file. 2 Enter a valid forms filename and press ENTER . 3 Enter a valid form name and press f1 (EDIT FORM). 4 Position the cursor where the field is to begin. 5 Press f1 (CREATE FIELD) to create a new field. 6 Position the cursor where the field is to end. 7 Press f2 (STOP FIELD) to end the field. 8 Press ENTER . 9 Press ENTER again to save the form, or press f7 to abandon changes.
7 Press f1 (FROM POSITION). 8 Position the cursor at the line's ending position. 9 Press f2 (TO POSITION). (Repeat steps 5 through 9, as needed, to draw all the desired lines.) 10 Press ENTER . 11 Press ENTER again to save the form, or press f7 to abandon changes. 12 Press f8 to return to the main menu. Editing Field Attributes 1 From the main menu, press f1 (SELECT FRMS FIL) to open a form file. 2 Enter a valid forms filename and press ENTER .
NOTE When deleting lines from a form, the line connectors (T's, crosses) will not be deleted. To delete them, re-draw a line (or portion of a line) over the area containing the connector. Generating RPG I/O Specs 1 From the main menu, press f6 (GEN I/O SPECS). 2 Enter the name of the forms file and the file to contain RPG input and output specifications. the file already exists, SIGEDITOR asks if the file can be overwritten. 3 Press the ENTER key. 4 Press f8 to return to the main menu.
3 Enter a valid form name and press f1 (EDIT FORM). 4 Press f8 to switch menus. 5 Position the cursor in the field to be shortened. 6 Press f2 (SHORTEN FIELD) until the field is the correct length. 7 Press ENTER . 8 Press ENTER again to save the form, or press f7 to abandon changes. 9 Press f8 to return to the main menu. Updating/Deleting a Help Area 1 From the main menu, press f7 (FORM UTILS). 2 Press f1 (HELP AREAS).
16 Chapter 5 Using SIGEDITOR with RPG Introduction This chapter explains how to design SIGEDITOR forms for use with RPG. The chapter assumes you are familiar with SIGEDITOR. For more information about SIGEDITOR functions, refer to chapters 1 through 3. Sample RPG Program The program in Figure 4-1 uses two forms, FORM21 and FORM22, in the forms file SAMPLIB. The program adds, deletes, and updates records in a KSAM file.
| I 36 71 ADDR | | I 72 800ZIP | | I 81 90 PHONE# | | | | C* CLEAN UP C 01 SETOF 808182 | | C 01 SETOF 656070 | | C* DETERMINE ACTION REQUESTED | | 4 | C KA SETON 80 | C KB SETON 81 DEL RECORD | | C KC SETON 82 UPD RECORD | | C KG SETON LR END JOB | | C KG GOTO EOF | C N01 GOTO EOF | | 5 | 6 | C* | C | C ADD RECORD | READ RECORD FROM CUSTOMER MASTER FILE USING SSN AS A KEY SSN SETOF 42 CHAINCUSTMAST 42 | | NO HIT | _
| | O* 10 UPDATE DISK RECORD OCUSTMASTD | 02 82 | | O SSN B 9 | | O NAME B 35 | | O ADDR B 71 | | O ZIP B 80 | | O PHONE# B 90 | | O* ADD DISK RECORD | O DADD | O SSN B 9 | | O NAME B 35 | | O ADDR B 71 | | O ZIP B 80 | | O PHONE# B 90 | | O* | O | O SSN B 9 | | O NAME B 35 | | O ADDR B 71 | | O ZIP B 80 | | O PHONE# B 90 | | O* | 02 80 | DELETE DISK RECORD DDEL | 01 81N42 | END OF SOURCE STATEME
| | | | | | | | | | ____________________________________________________________ Figure 5-2. FORM21 If you choose to add a new record, the system searches the KSAM file for a record with the specified social security number. If the record already exists, an error message is displayed in a message field, as shown in Figure 4-2. If there is no associated record, FORM22 appears, and you can enter the record. The social security number appears on FORM22 automatically, as shown in Figure 4-3.
chapter 3 for more details). Once this process is complete, you can begin constructing the RPG program. FORM21 For this example, begin with FORM21 by setting the correct form attributes. Enable command keys 1, 2, 3, and 7 (A, B, C, and G) by placing a character in the space identified by the correct letter. The keys correspond to the three options available to the user (adding, deleting, or updating). Command key 7 is used to exit the program. Indicator 60 is used for override fields.
$CONTROL NAME=) suffixed with "FM". If the program name is missing, the default forms filename becomes "RPGOBJFM". The forms filename can be referenced by a file equation at runtime to redirect the forms file. The social security number is split into three fields on the screen to allow for punctuation. In the RPG program, the three fields have been combined into a single field by modifying the "I" specifications so that it can be used as the key field for the CUSTMAST KSAM file.
| O | O* FORM21 | | O | O | OWRKSTN | | O* | | O* FORM22 | | O* | | O | O PT1 3 | | O PT2 5 | | O PT3 9 | | O NAME 35 | | O ADDR 71 | | O ZIP 80 | | O PNPT1 83 | | 0 PNPT2 86 | | O PNPT3 90 | | K6 'FORM21' ERRMSG 6 K6 | | | 'FORM22' | | ___________________________________________________________________________________ Figure 5-4.
An example of overlays and variable start line forms used together is an order entry application that begins with a small form that occupies the top few lines of the screen to enter header information. The next form is a one-line form that is displayed once for each detail line of the order, moving down the screen a line at a time. The final form occupies the last line or two of the screen and contains the totals for the order.
I Appendix A SIGEDITOR Error Messages Introduction This appendix lists and explains the SIGEDITOR error messages. ----------------------------------------------------------------------------- MESSAGE UNABLE TO OPEN TERMINAL. (SIGERR 001) CAUSE There is a system problem with the terminal. ACTION Contact your system manager if you are unable to resolve this problem. ----------------------------------------------------------------------------- MESSAGE UNABLE TO OPEN LIBRARY FORM FILE.
MESSAGE FORM DOES NOT EXIST. (SIGERR 011) CAUSE The form file does not contain the specified form. ACTION Verify that spelling of form name is correct, including the usage of upper and lower case. ----------------------------------------------------------------------------- MESSAGE FORM SPECIFIED ALREADY EXISTS. (SIGERR 013) CAUSE The name specified for this form is the name of an existing form in the same forms file. ACTION Choose a unique form name.
MESSAGE FORM FILE SPECIFIED ALREADY EXISTS. (SIGERR 026) CAUSE The specified file currently exists as a permanent file. ACTION Select a unique form filename. ----------------------------------------------------------------------------MESSAGE UNABLE TO PURGE OLD FORMS FILE. (SIGERR 029) CAUSE There is a system problem, or the file is open from another source. ACTION Contact your system manager if you are unable to resolve this problem.
MESSAGE INVALID PROCESSING OPTION SPECIFIED. (SIGERR 040) CAUSE A value other than "A" or "P" was input. ACTION Type "A" to process all form files or "P" for a prompt before processing each forms file. ----------------------------------------------------------------------------MESSAGE A (Y)ES OR (N)O RESPONSE IS REQUIRED. (SIGERR 041) CAUSE A value other than "Y" or "N" was input while using the forms conversion program.
CAUSE There are too many record definitions for the console file. ACTION Reduce the number of record types in the RPG input specifications for this file. ----------------------------------------------------------------------------MESSAGE TOTAL NUMBER OF FIELDS WILL NOT FIT ON FORM. (SIGERR 060) CAUSE There are too many fields defined for a console form. ACTION Reduce the number of fields defined in the RPG input specifications for this form.
ACTION Reenter the name, making sure that it is 8 characters long and that the last 2 characters are numeric digits from 0 through 9. ----------------------------------------------------------------------------MESSAGE SUPPRESS SELECTION IND. MUST BE BLANK OR 01 TO 99. (SIGERR 067) CAUSE The suppress selection indicator is not a legal value. ACTION Reenter the indicator, making sure it is blank or an indicator in the range 01 to 99.
CAUSE The upper left row and column numbers used to define the help area must be less than or equal to the lower right row and column numbers, and they are not. ACTION Reenter the row and column numbers, making sure that they are correct in relation to each other. ----------------------------------------------------------------------------MESSAGE UPPER LEFT MUST BE DEFINED FIRST.
A-300
J Appendix B Summary of the SIGEDITOR Keys Introduction This appendix summarizes the function of each key. Main Menu SELECT CONVERT MERGE PRINT GEN I/O FORM FRMS FIL S&D SPEC CATALOG SPECS EXIT SPECS UTILS Key Description SELECT FRMS FIL Opens the file once a forms file has been named. CONVERTS &D SPEC Converts files containing S, D, and H specifications from an IBM system to the files used by SIGEDITOR. MERGE CATALOG Merges a catalog file with a forms file.
Help Areas Menu CREATE AREAS UPDT/DEL UTIL AREAS MENU Key Description CREATE AREAS Takes you to the create help areas keys. UPDT/DEL AREAS Takes you to the update/delete help areas keys UTIL MENU Takes you to the form utilities menu. Form Utilities Menu HELP DELETE COPY MERGE AREAS PRINT GEN I/O EXIT FRM FORM FORM CATALOG SPECS SPECS Key UTILS Description HELP AREAS Takes you to the help areas menu DELETE FORM Deletes a specified form.
Key Description ABANDON ALL CHGS Discards all help areas defined during this create session and returns you to the help areas menu. HELP MENU Saves all help areas defined during this create session and returns you to the help areas menu. Keys for Designing a New Form START STOP CENTER REFRESH SWITCH FIELD FIELD LINE MENU Key Description START FIELD Identifies the start of a new field. STOP FIELD Identifies the end of the field. CENTER LINE Centers a line of the form.
Keys for Drawing Lines FORM TO HORIZON VERTICAL ERASE POSITION POSITION SINGLE REFRESH SWITCH SINGLE Key MENU Description FROM POSITION Identifies the beginning of the line. TO POSITION Identifies the end of the line. HORIZON SINGLE Specifies the type of horizontal lines; can be SINGLE, BOLD, or DOUBLE. VERTICAL SINGLE Specifies the type of vertical lines; can be SINGLE, BOLD, or DOUBLE. ERASE Takes you to the Erase keys in order to erase lines from a form.
Key Description EDIT MENU Returns you to the Edit Menu. Update/Delete Help Areas CHANGE DELETE CHANGE SHOW ALL SCROLL SCROLL ABANDON HELP ATTR AREA ID AREAS FRWD Key BACK ALL CHGS MENU Description CHANGE ATTR Allows you to change the help attributes of a specific help area displayed on the screen. DELETE AREA Deletes (removes) a specific help area. CHANGE ID Allows you to rearrange the help areas using their ID numbers.
B- 306
K Appendix C Calculating the Self-Check Digit Introduction As described in chapter 2, the self-check digit is used for numeric fields. If a mode of self-checking is specified, the field is checked by the checking algorithm when information is entered. Modulus 10 Self-Check Digit To calculate the modulus 10 self-check digit, follow these steps: 1 Multiply the rightmost position and every other position, moving to the left, of the number by 2.
Example: 2 + 14 + 18 + 20 + 20 + 18 + 14 = 106 4 Divide the sum from step 3 by 11. Example: 106 divided by 11 is 9 with a remainder of 7. If the remainder is 0, the self-check digit is 0. If the remainder is 1, your number does not have a modulus 11 self-check digit, and you should not use the number in the fields you define with modulus 11 self-check fields. 5 Subtract the remainder obtained in step 4 from 11 to obtain the self-check digit.
HP RPG/XL Utilities-Part 4 RPGINIT Preface to RPGINIT This publication is the reference manual for Hewlett-Packard's RPGINIT. RPGINIT is a utility used by RPG programmers to create and initialize a Local Data Area file, create and initialize the RPG user date file, and display the contents of both files. This manual assumes that you are an experienced RPG programmer using RPGINIT. Additional Documentation More information on RPG/3000 can be found in the RPG/3000 Reference Manual.
17 Chapter 1 RPGINIT RPGINIT performs the following: • Creates a Local Data Area (LDA) file and initializes the file to ASCII blanks. • Creates and initializes the RPG user date file RPGUDATE to the current system date. • Displays the contents of both files and the session's user switch settings.
the table below: Value of PARM Action 1 Creates the LDAFILE with 256 bytes. 2 Creates the LDAFILE with 512 bytes. 3 Creates the LDAFILE with 768 bytes. 32 Creates the LDAFILE with 8192 bytes. If a value for PARM is not specified or is less than 1, the value for PARM defaults to 2 (a 512-byte LDAFILE). If the value for PARM is greater than 32, the value defaults to 32 (an 8192-byte LDAFILE).
RPGUDATE: 090186 USWITCH: U1=OFF, U2= ON, U3=OFF, U4=OFF, U5=OFF, U6=OFF, U7=OFF, U8=OFF LDAFILE: 0001: AA2001 AS SEM. BRACK ET 22 0051: 0101: 0151: 0201: 0251: MORE (Y/N)? 0257: 0307: 0357: 0407: 0457: 0507: If a value for PARM is not specified or is less than 1, you are prompted to view one 256-byte LDA record at a time. If the value for PARM is greater than 1, the number specified, or the total number of records in LDAFILE (whichever is smaller) is displayed without any prompting.