
Customizing Terminal and Printer Type Files with the Workstation Configurator (32022-90031)


36 Chapter 3
Using a New Terminal or Printer Type File
Linking Terminal and Printer Type Files to Ldev Numbers
Linking Terminal and Printer Type Files to
Ldev Numbers
One way to use a new terminal or printer type file is to associate the
terminal type or printer type file with a profile name and then associate
the profile name with an ldev number. This information is stored in the
NMCONFIG.PUB.SYS file. The NMCONFIG.PUB.SYS file defines the
HP 3000’s configuration.
The Node Management Configuration Services (NMMGR) is the tool
used to modify the NMCONFIG.PUB.SYS file. For information on using
NMMGR, refer to Using the Node Management Services (NMS)
Utilities. For detailed information on adding terminal and printer type
files to the NMCONFIG.PUB.SYS file, refer to Configuring Systems for
Terminals, Printers, and Other Serial Devices.
Follow the steps below to add a new terminal or printer type file to
NMCONFIG.PUB.SYS file.
1. Start NMMGR by typing NMMGR at the MPE prompt (:). Node
manager (NM) and network administrator (NA) capabilities are
required to run this program.
2. Verify that NMCONFIG.PUB.SYS is the configuration file name used.
3. Press the Open Config
[F1] function key to go to the Main screen.
4. Use the direct branching utility to reach the Profile Selection screen.
If using host-based management, type @DTS.PROFILE in the
NMMGR command line. If using PC-based management, type
@DTS.PROFPC in the NMMGR command line. Press the
[Enter] key.
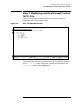
The DTS Profile Selection screen is displayed.
5. Type a new profile name in the Profile name field.
6. Verify that the cursor is in the Type field. Type terminal if the new
file is a terminal type file or printer if the new file is a printer type
file.
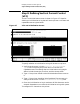
7. Press the Add [F5] function key. Either the DTS Printer Profile
screen or the DTS Terminal Profile screen is displayed, depending on
the type of profile specified in step 5.
8. Enter the new terminal or printer type file name in the Terminal or
Printer Type File Name field.
9. Modify the configurable variables, as necessary. Press the Save
Data
[F6] function key. Press the Prior Screen [F8] twice to move
to the Host Configuration screen.
10.Press the Go To DTC [F2] function key. The DTC Configuration
Selection screen is displayed.