Installing and Managing HP ARPA File Transfer Protocol Network Manager’s Guide HP 3000 MPE/iX Computer Systems Edition 5 36957-90157 E1098 Printed in: U.S.A.
Notice The information contained in this document is subject to change without notice. Hewlett-Packard makes no warranty of any kind with regard to this material, including, but not limited to, the implied warranties of merchantability or fitness for a particular purpose. Hewlett-Packard shall not be liable for errors contained herein or for direct, indirect, special, incidental or consequential damages in connection with the furnishing or use of this material.
Contents 1. Overview ARPA Services . . . . . . . . . . . . . . . . . . . . . . . . . . . . . . . . . . . . . . . . . . . . Telnet. . . . . . . . . . . . . . . . . . . . . . . . . . . . . . . . . . . . . . . . . . . . . . . . . . FTP . . . . . . . . . . . . . . . . . . . . . . . . . . . . . . . . . . . . . . . . . . . . . . . . . . . HP ARPA Telnet . . . . . . . . . . . . . . . . . . . . . . . . . . . . . . . . . . . . . . . . . . HP ARPA File Transfer Protocol. . . . . . . . . . . . . . . . . . . . . . . .
Contents 4. Managing FTP FTP Users. . . . . . . . . . . . . . . . . . . . . . . . . . . . . . . . . . . . . . . . . . . . . . . . MPE/iX FTP Users . . . . . . . . . . . . . . . . . . . . . . . . . . . . . . . . . . . . . . . . Remote FTP Users . . . . . . . . . . . . . . . . . . . . . . . . . . . . . . . . . . . . . . . . . FTP User Commands on MPE/iX . . . . . . . . . . . . . . . . . . . . . . . . . . . . . MPE/iX FTP Server Commands . . . . . . . . . . . . . . . . . . . . . . . . . . . . . .
Contents C. PING/iX Utility What is PING/iX . . . . . . . . . . . . . . . . . . . . . . . . . . . . . . . . . . . . . . . . . . 98 How to Use PING/iX . . . . . . . . . . . . . . . . . . . . . . . . . . . . . . . . . . . . . . . 99 Using Menu-Driven PING/iX . . . . . . . . . . . . . . . . . . . . . . . . . . . . . . . 100 Enter the IP Address . . . . . . . . . . . . . . . . . . . . . . . . . . . . . . . . . . . . 100 Enter the Number of Packets. . . . . . . . . . . . . . . . . . . . . . . . . . . . . .
Contents 6
Figures Figure 1-1 . FTP Client-Server Model. . . . . . . . . . . . . . . . . . . . . . . . . . . . . . . . . . . . . . . . . . . . . . . . . .12 Figure 1-2 . FTP Overview . . . . . . . . . . . . . . . . . . . . . . . . . . . . . . . . . . . . . . . . . . . . . . . . . . . . . . . . . .16 Figure 2-1 . Sample Resolver Configuration File . . . . . . . . . . . . . . . . . . . . . . . . . . . . . . . . . . . . . . . . .33 Figure 2-2 . Sample Hosts Configuration File . . . . . . . . . . . . . . . . . . . . . .
Figures 8
Preface The HP ARPA File Transfer Protocol product provides the ARPA file transfer protocol (FTP) service to MPE/iX users. The chapters in this manual are organized as follows: • Chapter 1, “Overview,” is a brief overview of ARPA Services and what is provided on MPE/iX. • Chapter 2, “Verify Installation and Update LAN Configuration,” describes how to verify FTP has been installed and the steps for updating the LAN for Ethernet support.
FTP • Installing and Managing HP ARPA File Transfer Protocol Network Manager’s Guide • HP ARPA File Transfer Protocol User’s Guide Telnet • Using the HP OpenView DTC Manager Link Products • NS 3000/iX Network Planning and Configuration Guide • Using the OpenView DTC Manager • (For NMMGR): Using the Node Management Services (NMS) Utilities General Networking • NS 3000/iX Operations and Maintenance Reference Manual • NS 3000/iX NMMGR Screens Reference Manual • NS 3000/iX Error Messages Reference Manual MP
1 Overview This chapter briefly describes ARPA services and what is provided on MPE/iX.
Overview ARPA Services ARPA Services The ARPA services are a subset of the networking services originally developed by the University of California at Berkeley for the Advanced Research Projects Agency (ARPA). ARPA services have become a de facto standard for multivendor network communication.MPE/iX provides the Teletype Network Protocol (Telnet) and File Transfer Protocol (FTP) ARPA services which enable users to communicate with non-HP and HP systems using these services.
Overview HP ARPA Telnet HP ARPA Telnet The HP ARPA Telnet products can be used with systems supporting the ARPA Telnet service such as other HP systems, UNIX systems and many non-UNIX systems. For more information on the HP ARPA Telnet products (HP ARPA Telnet Access, HP ARPA Telnet Express and HP OpenView DTC Manager), see Using HP OpenView DTC Manager.
Overview HP ARPA File Transfer Protocol HP ARPA File Transfer Protocol The HP ARPA File Transfer Protocol product (FTP) can be used with systems supporting the ARPA FTP service such as other HP systems, UNIX systems, and non-UNIX systems. FTP is supported over LAN, Token Ring, FDDI, 100VG-AnyLAN, 100Base-T, X.25, and NS Point-to-Point networks.
Overview HP ARPA File Transfer Protocol Appendix B, “Using the FTP Server,” provides remote non-MPE/iX system users information for accessing the MPE/iX FTP server. This information is also provided in an online text file named FTPDOC.ARPA.SYS which can be transferred to remote users using FTP.
Overview Who Should Use this Manual Who Should Use this Manual This manual is intended for the HP 3000 network manager/administrator who is responsible for managing the networking products and resources on the HP 3000. It is expected that the network manager has a thorough knowledge of the HP 3000 system. Planning for FTP An overview of the tasks required for installing, configuring, and starting FTP are shown in Figure 1-2.
2 Verify Installation and Update LAN Configuration This chapter describes how to verify the installation of FTP, and how to update the configuration of the local area network (LAN) link for Ethernet support. If you are installing a new MPE/iX system and link or are updating to a new release of MPE/iX, refer to the HP 3000 MPE/iX Installation, and Update Manual or the HP 3000 MPE/iX System Software Maintenance Manual.
Verify Installation and Update LAN Configuration Verifying Installation Verifying Installation At this point, you should have already installed the required hardware, link, and FTP software. Any other products you are installing should also have been done by this time. To verify that FTP has been installed correctly: • Run NMMAINT as follows: :nmmaint,50 NMS Maintenance Utility 32098-20014 B.00.10 (C) Hewlett-Packard Co. 1984 MON, APR 20, 1998, 10:50 PM Data comm products build version: N.61.
Verify Installation and Update LAN Configuration Verifying Installation Verify that the security fields are set as follows: File Name in ARPA.
Verify Installation and Update LAN Configuration Adding Ethernet Support Adding Ethernet Support To update the LAN configuration for Ethernet support, you need to do the following: • Update the NMCONFIG.PUB.SYS file using NMMGR. • If you are updating your system from a previous MPE/iX release, you must run NMMGRVER to update your NMCONFIG configuration file. • If needed, update the network directory with remote system names. • Restart the network in order to activate the new configuration file.
Verify Installation and Update LAN Configuration Convert NMCONFIG to New Release Convert NMCONFIG to New Release If your are updating your MPE/iX system from a previous release, you must update your NMCONFIG file. Run the utility NMMGRVER.PUB.SYS to convert the NMCONFIG file to the new release. NMMGRVER prompts you for the files to convert, and creates a backup file. For instructions on running NMMGRVER, refer to the NS 3000/iX Operations and Maintenance Manual.
Verify Installation and Update LAN Configuration Enabling Ethernet Support Enabling Ethernet Support Before updating the configuration file, obtain the configured name of the LAN NI, and the local node name. In addition, make sure you have a loopback NI of type LOOP configured. From within the NMMGR program, you can check what the configured NIs are. After you have opened the NMCONFIG.PUB.SYS file, enter the direct path @NETXPORT.NI. The Network Interface Configuration screen is displayed.
Verify Installation and Update LAN Configuration Enabling Ethernet Support Select the LAN NI to Modify On the next screen, the Network Transport Configuration screen, enter the name of the LAN network interface (NI) in the field labeled NI name, and press the [Config Network] key to proceed with guided configuration. Update the LAN NI Configuration The LAN Configuration screen is displayed. Use the [Tab] key to reach the Enable Ethernet? field and enter Y for yes.
Verify Installation and Update LAN Configuration Changing ARP Parameters Changing ARP Parameters When you use guided configuration to update the LAN NI for Ethernet support, default parameters are set for the address resolution protocol (ARP) configuration. To verify what these are, or to change them, do the following: 1. Obtain the configured LAN NI name (issue a NETCONTROL STATUS command). 2. Run NMMGR.PUB.SYS. 3.
Verify Installation and Update LAN Configuration Changing ARP Parameters 7. If you changed any of the parameters, you need to restart the network in order to activate the changed configuration file as described later in this chapter under the heading, “Restarting the Network.
Verify Installation and Update LAN Configuration Network Traffic Network Traffic Enabling Ethernet on an MPE/iX system increases the number of broadcast packets the system receives. If your installation has had network traffic problems in the past, or you expect this increase in traffic to affect your network performance, there are two things you can do: • First, if the node is not a gateway, verify that the store and forward feature has been disabled.
Verify Installation and Update LAN Configuration Network Traffic 5. For a non-gateway node, you should disable store and forward buffers. Enter zero (0) in the Store & Forward Buffers field. 6. After you have finished updating the IP Protocol Configuration, press the [Save Data] key. Next, a. Hold down the [Shift] key and press the [Tab] key which returns you to the command prompt. b. At the command prompt, enter: validate, then press the [Enter] key. c. The Validate screen is displayed.
Verify Installation and Update LAN Configuration Updating the Network Directory Updating the Network Directory For your installation, you may decide to provide users with NS node names for remote systems that do not support probe. MPE/iX FTP users can enter an NS node name instead of the IP address to connect to remote systems which have been identified in the network directory. If you are using ARPA domain names, refer to the subsection in this chapter called “Configuring ARPA Domain Names.
Verify Installation and Update LAN Configuration Updating the Network Directory 7. To exit the NMMGR program, hold the [Shift] key and press the [Tab] key which returns you to the command prompt. At the command prompt, enter: EXIT, then press the [Enter] key. 8. To activate the new network directory, you must restart the network as described in the section, “Restarting the Network” later in this chapter.
Verify Installation and Update LAN Configuration Configuring ARPA Domain Name Files Configuring ARPA Domain Name Files If you are planning to use the domain name resolver for name to IP address resolution, you will need to configure a set of ASCII files on each node that contain needed information. To configure these files, you use any standard editor to modify existing sample files according to the instructions in this chapter. The following subsections detail: • How to modify the RSLVSAMP.NET.
Verify Installation and Update LAN Configuration To Create or Modify the Resolver File To Create or Modify the Resolver File The resolver file (RESLVCNF.NET.SYS) is an initialization file for the domain name resolver. It contains information needed by the network to determine how to resolve a domain name to an IP address. This file is read by the resolver routines the first time they are invoked by a process. To create the resolver file, perform the following steps: 1. Copy the sample file, RSLVSAMP.NET.
Verify Installation and Update LAN Configuration Keywords Keywords Each entry in the resolver file consists of a keyword followed by a value separated by white space. The keyword and its associated value must appear on a single line and the keyword must start the line. Figure 2-1 shows an example of a resolver file. Comment lines start with a pound sign (#). domain Enter the local domain name. Most queries for names within this domain can use short names relative to the local domain name.
Verify Installation and Update LAN Configuration Keywords NOTE It is very important that you omit the leading zeros in the network addresses that you enter in the domain name resolver files. If you enter leading zeros here, the domain name resolver will interpret the numbers as octal numbers. You can list up to three name servers, but you must use a separate keyword entry for each. If there are multiple servers, the resolver will query them in the order listed.
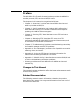
Verify Installation and Update LAN Configuration To Create or Modify the Hosts File To Create or Modify the Hosts File The host name data base file, HOSTS.NET.SYS, associates internet addresses with official host names and aliases. This allows a user to refer to a host by a symbolic name instead of an internet address. When using the name server, this file serves only as a backup when the server is not running. In this circumstance, it is a common practice that HOSTS.NET.
Verify Installation and Update LAN Configuration To Create or Modify the Hosts File Figure 2-2 Sample Hosts Configuration File # This file contains information regarding the known hosts. # # The form for each entry is: # host IP address local host name host aliases # # Note: the entries cannot be preceded by a blank space. # 172.0.0.1 localhost loopback me myself local 192.41.112.100 bashful.locl.inet.com bashful 192.41.112.114 happy.locl.inet.com happy 192.41.112.413 queezy.locl.inet.com queezy 192.41.
Verify Installation and Update LAN Configuration Additional Domain Name Configuration Files Additional Domain Name Configuration Files In addition to the resolver file and the host name data base, there are other files available to allow you to configure additional information about your network. Each of these files is provided in sample format in the NET.SYS account. Each sample file contains an explanation of the format for the data and a sample entry.
Verify Installation and Update LAN Configuration Network Name Database Network Name Database The network name database, NETWORKS.NET.SYS, associates IP addresses with official network names and aliases. This allows the user to refer to a network by a symbolic name instead of an internet address. To configure the network name database, modify the sample file NETSAMP.NET.SYS.
Verify Installation and Update LAN Configuration Protocol Name Database Protocol Name Database The protocol name database, PROTOCOL.NET.SYS, associates protocol numbers with official protocol name and aliases. This allows the user to refer to a protocol by a symbolic name instead of a number. The protocol number mappings are defined in RFC 1010 Assigned Numbers. To configure the protocol name database, modify the sample file PROTSAMP.NET.SYS.
Verify Installation and Update LAN Configuration Service Name Database Service Name Database The service name database, SERVICES.NET.SYS, associates official service names and aliases with the port number and protocol the services use. Reserved port numbers 0 through 255 are assigned by RFC 1010. To configure the service name database, modify the sample file SERVSAMP.NET.SYS.
Verify Installation and Update LAN Configuration Restarting the Network Restarting the Network In order to activate the changed configuration file, you need to restart the network. 1. If you have the Network Services (NS 3000/iX) installed, stop them by first issuing NSCONTROL STOP followed by NSCONTROL ABORT. 2. Next, to stop the transport, issue a NETCONTROL STOP. 3.
3 Starting FTP Once you have configured the LAN or updated the configuration for Ethernet support, the next step is starting INETD.
Starting FTP Starting INETD Starting INETD Since FTPSRVR runs under INETD, INETD has to be started now. Refer to the Configuring and Managing MPE/iX Internet Services Manual, for specifics into the setup of the INETD (the Internet Super Daemon) configuration files referenced here. Here are the entries needed for FTPSRVR to run under INETD. These entries can be added by streaming FTPCNFJ.ARPA.SYS or by manually editing each file. Services File The SERVICES.NET.
Starting FTP Starting INETD Optional Configuration The optional configuration changes for FTPSRVR support anonymous logon. To support anonymous FTP, certain system administrative tasks have to be done. These are essential for system security. 1. FTPGUEST account and user, named USER under the FTPGUEST account should be created: :NEWACCT FTPGUEST,USER If this account and user already exist, proceed to step 2. 2. Assign passwords to FTPGUEST account and USER: :ALTACCT FTPGUEST;PASS=ANYPASS :ALTUSER USER.
Starting FTP Providing Access to the FTP Server Only Providing Access to the FTP Server Only For security reasons, you can prevent MPE/iX users from running the FTP user program by locking the file named FTP.ARPA.SYS with the MPE/iX command ALTSEC.
Starting FTP Providing Access to the MPE/iX FTP User Only Providing Access to the MPE/iX FTP User Only To prevent remote users from accessing the MPE/iX FTP server: • don’t run INETD (if only FTPSRVR is running under INETD) • otherwise, comment out the line ftp stream tcp nowait MANAGER.SYS /SYS/ARPA/FTPSRVR ftpsrvr by placing the # symbol in the first column in the file INETDCNF.NET.SYS and restart INETD as :INETD.
Starting FTP Changing Logging Changing Logging The INETD’s log file will log any error which results in the FTPSRVR getting aborted.
Starting FTP Testing the FTP User Interface and Server Testing the FTP User Interface and Server Once you have FTP installed and running, you can test FTP in loopback mode and to a remote system. Test in Loopback Mode You can test FTP in loopback mode by establishing an FTP session on your local node as in the following sample session. In loopback, you are accessing and seeing responses from the MPE/iX FTP server. Run FTP Enter the following at the MPE/iX prompt: FTP.ARPA.
Starting FTP Testing the FTP User Interface and Server Transfer a File Choose a file to transfer from you account, back to the same account with a different target name: ftp> GET NSCREEN2 TESTFILE Check to see that the file transfer was successful by issuing an FTP LS command: ftp> LS 200 PORT command ok. NSCREEN1 NSCREEN2 NSPROGX TESTFILE 226 Transfer complete nnn bytes sent in n.nn seconds: (n.nn Kbytes/sec) ftp> Exit From FTP End the session by entering the FTP command QUIT: ftp> QUIT.
4 Managing FTP This chapter provides you with information for managing FTP: • Describes what FTP users need to access remote systems or the MPE/iX FTP server with FTP, • Summarizes the HP ARPA File Transfer Protocol features (user and server commands), and • Describes MPE/iX FTP architecture.
Managing FTP FTP Users FTP Users On MPE/iX, there are two groups of FTP users: MPE/iX FTP users accessing remote systems with FTP user commands, and remote system FTP users accessing the FTP server on MPE/iX.
Managing FTP MPE/iX FTP Users MPE/iX FTP Users MPE/iX FTP users need the ARPA domain names, IP addresses, or NS node names and logon accounts for remote systems they can access with FTP user commands. To allow users to use alias names, you can identify remote systems in the network directory as NS node names. Standard ARPA domain names are supported.
Managing FTP Remote FTP Users Remote FTP Users Remote FTP users accessing the FTP server will need the: • Node name or IP address of the MPE/iX system, • User logon account and passwords, • MPE/iX file system information. For users unfamiliar with the MPE/iX file system, see Appendix B, “Using the FTP Server.” This information is also provided in an online text file: FTPDOC.ARPA.SYS which can be transferred to remote users using FTP.
Managing FTP FTP User Commands on MPE/iX FTP User Commands on MPE/iX The following quick reference provides the syntax and usage of the FTP user commands, listed in alphabetic order. To stop a file transfer or directory listing in progress, you can [CTRL-Y]. You are prompted to exit FTP, cancel the transfer, or continue. From the FTP prompt you can exit by entering QUIT or pressing the [Break] key.
Managing FTP FTP User Commands on MPE/iX DEBUG DELETE remotefilename Turns on or off the terminal screen display of the commands and parameters that are sent to the remote host. The default is off. Deletes the remote file specified. A directory path may be included with remotefilename. DIR [remotedirectory [localfile]] Writes the requested remotedirectory listing to the terminal, or to a local file if specified.
Managing FTP FTP User Commands on MPE/iX HELP [ftpcommand] LCD localdirectory Displays a list of the valid FTP user commands. If an FTP user command is specified with HELP, a brief description of the command is displayed. You can also use the HELP command for information on specific FTP messages and errors, and the supported build parameters (buildparms). Changes the working directory on the local machine to the directory specified.
Managing FTP FTP User Commands on MPE/iX intended. The resulting file names are in upper case letters unless you use the CASE command to force the resulting file names to all lower case letters. OPEN remotehostname Opens a connection to the remote host specified. Must be either an ARPA domain name, IP address, or an NS node name. PROMPT PUT localfile [remotefile] [;move] Toggle interactive prompting.
Managing FTP FTP User Commands on MPE/iX the default state). In this case, all file transfers will unconditionally replace the target file. off RESET sets the internal replace flag and the value of the environment variable to FALSE. In this state, all file transfers will be conditional predicated on user response to replace the target file if it previously existed. Clear reply queue. This command resynchronises command/reply sequencing with the remote FTP server.
Managing FTP FTP User Commands on MPE/iX value of 0 means no timeout (that is, wait forever). If num-secs is not specified, the current timeout value will be displayed. Otherwise, this command sets the connection timeout to num-secs seconds. TRACE TYPE [transfertype] If command is specified, toggle tracing. Sets the FTP file transfer type to the specified type. If a transfer type is not included, the current file transfer type is displayed. The supported transfer types are ASCII and BINARY.
Managing FTP MPE/iX FTP Server Commands MPE/iX FTP Server Commands The quick reference provides a list of the FTP user commands a remote FTP user accessing MPE/iX can use. The corresponding MPE/iX FTP server commands are in parentheses. User command (SERVER command) DESCRIPTION ASCII (TYPE A) Sets the FTP file transfer type to ASCII. This is the default when you first enter FTP. BINARY (TYPE I) Sets the FTP file transfer type to binary.
Managing FTP MPE/iX FTP Server Commands LS [remotedirectory] [localfile] (NLST) Displays the contents of a remote directory, one file per line. If a localfile name is specified, the listing will be saved to the file specified. If remotedirectory is not included, the current remote working directory contents are listed. MDELETE remotefiles (NLST,DELE) The remote system expands the wildcard characters in remotefiles and deletes the set of files on the remote MPE/iX host.
Managing FTP MPE/iX FTP Server Commands QUIT (QUIT) Closes the connection to the remote system and exits from FTP. REMOTEHELP [servercommand] (HELP) Displays the remote host (MPE/iX) FTP server commands supported. If a server command is specified with the REMOTEHELP command, a brief description of the command is displayed. RENAME remotefile newname (RNFR,RNTO) Renames a remote file. RMDIR remotedirectory (RMD|XRMD) Deletes a directory from the remote machine.
Managing FTP MPE/iX FTP Server Commands USER sess,user.acct,group (USER) Used to enter a logon name in order to establish a session on the remote host. A connection to the remote host must already have been established using OPEN. Passwords may be included in the logon string as follows: sess,user/userpass.acct/acctpass,group/grp pass Note: Passwords can only be entered once. If you enter passwords with the logon string, do not re-enter them at the password prompt, just press the [Return] key.
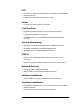
Managing FTP FTP Architecture FTP Architecture This section describes the FTP architecture and the overall network architecture for a system that includes FTP. Figure 4-1 shows the FTP client-server model. The FTP commands and replies are the messages and errors you can receive as described in Appendix A, “Error Messages.” Over the data connection, files and directory information are transferred. Data is transferred in a defined format.
Managing FTP FTP Architecture Figure 4-2 Network Architecture 64 Chapter 4
5 Troubleshooting This chapter describes possible problems you may encounter and methods you can use to troubleshoot them. Refer to the diagram in Figure 5-1 and the information on the following pages to isolate the problem and resolve it.
Troubleshooting MPE/iX FTP User MPE/iX FTP User Cannot Connect by Node Name (IP Address OK) An MPE/iX FTP user cannot connect by NS node name, but can connect using the remote system IP address: • If the node name is configured in the network directory, check to see that it is configured correctly. If it is not, configure the node name. • For remote nodes that support probe or probe proxy, and are not configured in the network directory, examine the network configuration.
Troubleshooting MPE/iX FTP User Cannot Transfer Files For FTP file transfer problems, first turn verbose and debug on. • Use the LS or DIR command to verify the file name spelling. • Check how the file names are entered. Some systems support both upper and lower case file names. Some systems support characters in file names that are not supported on MPE/iX. • Supported file types for MPE/iX: must be binary, bytestream, or ASCII, fixed or variable records. • Check the default file transfer type being used.
Troubleshooting Remote User Remote User A remote user accessing the MPE/iX FTP server may encounter the following problems. Cannot Connect to MPE/iX The remote user cannot connect to the MPE/iX FTP server. • Run the PING utility from the remote host to MPE/iX. • If PING is successful, Check the INETD process on MPE/iX. • Issue the SHOWJOB command and verify that the INETD job is executing (EXEC). • If the INETD is running, check whether the entry for FTP is in the configuration file (INETDCNF).
Troubleshooting Remote User NOTE Passwords can only be entered once. For example, if the user enters the account password in the USER command string, do not re-enter it at the password prompt. • Try to log on from MPE/iX (HELLO user.account,group) • Check that the LOOP type NI is active by issuing NETCONTROL NI=niname;STATUS. • Check the privileges on the FTP system files: issue a :listf @.arpa.sys,3. For each file, the output under SECURITY should be as follows: File Name in ARPA.
Troubleshooting Remote User 70 Chapter 5
A Error Messages This appendix contains messages and errors that may be received by FTP users on MPE/iX, and remote users accessing the FTP server.
Error Messages FTP User Messages and Errors FTP User Messages and Errors These error and warning messages may be returned to FTP users on MPE/iX while using the FTP user program. In the following list of messages and errors, the exclamation point (!) represents a variable value. MESSAGE: Error in loading keywords from FTP catalog. (FTPERR 3) FTPERR 3 CAUSE: The User-FTP program encountered an error while trying to load the FTP command keywords onto its program stack from the FTP catalog.
Error Messages FTP User Messages and Errors ACTION: Check the syntax of the desired command. MESSAGE: Invalid reply code from remote server (FTPERR 11) FTPERR 11 CAUSE: An erroneous reply code was returned from the remote server for some FTP command. ACTION: Enable debug and verbose and try the operation again. MESSAGE: Data Transfer Request Failed. (FTPERR 13) FTPERR 13 CAUSE: An error was detected during a data transfer. This error is accompanied by another error which indicates the problem.
Error Messages FTP User Messages and Errors ACTION: None. MESSAGE: We only support file structure, sorry. (FTPWARN 19) FTPWARN 19 CAUSE: The FTP STRUCT command was entered. ACTION: None. MESSAGE: We only support non-print format, sorry. (FTPWARN 20) FTPWARN 20 CAUSE: The FTP FORM command was entered. ACTION: None. MESSAGE: Verbose mode off. (FTPINFO 21) FTPINFO 21 CAUSE: The FTP VERBOSE command was entered when verbose was enabled. ACTION: None. MESSAGE: Verbose mode on.
Error Messages FTP User Messages and Errors ACTION: Enter the USER command to logon, or the CLOSE command before opening another connection. MESSAGE: FTP Unknown Error Detected. Subsystem = !, Information = ! (FTPERR 28) FTPERR 28 CAUSE: An unknown error was detected from some underlying subsystem. ACTION: Seek the assistance of your Hewlett-Packard representative for assistance. MESSAGE: (We only support MPEXL Fixed and Variable record format, sorry.
Error Messages FTP User Messages and Errors MESSAGE: ExitOnError mode off. (FTPERR 34) FTPERR 34 CAUSE: The EXITONERROR command was entered while the exit-on-error feature was enabled. ACTION: None. MESSAGE: Invalid IP address. (FTPERR 35) FTPERR 35 CAUSE: An invalid IP address was used while trying to open a connection. ACTION: Refer to the HP ARPA File Transfer Protocol User’s Guide for assistance. MESSAGE: Performing an ASCII transfer to a binary file.
Error Messages FTP User Messages and Errors MESSAGE: Interactive mode on. (FTPINFO 41) FTPINFO 41 CAUSE: The PROMPT command was issued while prompting was disabled. ACTION: None. MESSAGE: Interactive mode on. (FTPINFO 42) FTPINFO 42 CAUSE: The PROMPT command was issued while prompting was enabled. ACTION: None. MESSAGE: Interactive mode on. (FTPINFO 43) FTPINFO 43 CAUSE: The CASE command was issued while “Forcing Lower Case” was disabled. ACTION: None. MESSAGE: Lower case off.
Error Messages FTP User Messages and Errors MESSAGE: Connection time-out value set to ! seconds. FTPINFO 49 CAUSE: User entered "TIMEOUT [num-secs]" ACTION: If num-secs was specified, the connection time-out value was set. Otherwise, the current value was simply displayed. Note: a value of 0 indicates no time-outs. MESSAGE: Store unique mode on. FTPINFO 50 CAUSE: The FTP sunique command was entered when store-unique was disabled.
Error Messages FTP User Messages and Errors ACTION: When a connection for a data transfer is established, TCP tracing will be turned on. MESSAGE: Data tracing off. FTPINFO 57 CAUSE: The FTP trace command was entered when data tracing was enabled. ACTION: None. MESSAGE: Command tracing file name is !. FTPINFO 58 CAUSE: Command tracing was turned on and a connection to a remote system was established. ACTION: Use this file for debugging purposes. MESSAGE: Data tracing file name is !.
Error Messages FTP Server Messages and Errors FTP Server Messages and Errors FTP users accessing the MPE/iX as an FTP server may receive the messages and/or errors as listed, which are based on the Military Standard, FTP, MIL-STD-1780.
Error Messages FTP Server Messages and Errors MESSAGE: 200 Type set to !. 200 CAUSE: A TYPE command was received and accepted. ACTION: None. MESSAGE: 202 Command not implemented at this site. 202 CAUSE: The MPE/iX FTP server received a command that is not implemented. ACTION: This command cannot be used. MESSAGE: “1”: !. 213 CAUSE: A file status (SIZE | MDTM) command was received and accepted. This first parameter is the filename.
Error Messages FTP Server Messages and Errors ACTION: None. MESSAGE: 250 File transfer completed. 250 CAUSE: A file transfer for a GET, PUT, LS or DIR has completed. ACTION: None. MESSAGE: ! is the current directory. “!” is the current session. 257 CAUSE: A PWD command was received and accepted. ACTION: None. MESSAGE: ! successful, “!” created. 257 CAUSE: A directory creation (MKD/XMKD) has completed. ACTION: MESSAGE: 331 Password required for !.
Error Messages FTP Server Messages and Errors MESSAGE: 502 Command not implemented by this server. 502 CAUSE: The MPE/iX FTP server received an unrecognized command. ACTION: This command cannot be used. MESSAGE: 503 Illegal sequence of commands 503 CAUSE: The server was sent a series of commands that were in the wrong order (example: RNTO before RNFR). ACTION: Check the commands and send them in the correct order.
Error Messages FTP Server Messages and Errors 84 Appendix A
B Using the FTP Server This appendix provides information for remote users accessing the MPE/iX FTP server.
Using the FTP Server Who Should Use This Appendix Who Should Use This Appendix This appendix contains information for non-MPE/iX system users accessing the MPE/iX FTP server. This information is also provided in an online text file: FTPDOC.ARPA.SYS which can be transferred to remote users using FTP.
Using the FTP Server Sample FTP Session: Accessing MPE/iX Sample FTP Session: Accessing MPE/iX The purpose of this sample session is to provide help for a remote user accessing the MPE/iX FTP server. More detailed information about FTP behavior follows the sample.
Using the FTP Server Start FTP Start FTP Start FTP from your system. Connect to the Remote MPE/iX System To open a connection to MPE/iX use the OPEN command followed by the internet protocol (IP) address for the MPE/iX system. For example: ftp> OPEN 192.50.43.21 220 MPE/iX File Transfer Protocol Server [A00020001] (C) Hewlett-Packard Co. 1990 Log On to MPE/iX Supply the MPE/iX logon account and password when prompted, or use the USER command.
Using the FTP Server Start FTP nnn bytes received in n.nn seconds (n.nn Kbytes/sec) ftp> Transfer a File to Your System Transfer a remote MPE/iX file to your system using the GET command: ftp> GET nscreen1 200 PORT command ok. 150 File NSCREEN1 opened; data connection will be opened 226 Transfer complete nnn bytes received in n.nn seconds (n.nn Kbytes/sec) ftp> The file will be saved as nscreen1 on you system.
Using the FTP Server Start FTP Transfer Multiple Files from MPE/iX to Your System To transfer multiple files from MPE/iX to your system use the MGET command: ftp> MGET @ All files in the working group will be transferred and have the same names as on MPE/iX (up to 8 alphanumeric characters, all capitals). Transfer multiple files from other than the working group on MPE/iX to your system. ftp> MGET N@.GROUP1 The resulting file names are: NSPROG1.GROUP1 NSPROG2.GROUP1 NPROGRAM.
Using the FTP Server Start FTP AFILE1234 80B FA 800 104800 AFILENAM 80B FA 800 104800 AFILEXX 80B FA 800 104800 226 Transfer complete nnn bytes received in n.nn seconds (n.nn Kbytes/sec) ftp> If the file names are longer than eight characters, the file transfer fails. Note that all files were saved with the default FTP ASCII file attributes: records of fixed length and 80 bytes.
Using the FTP Server Start FTP Groups An MPE/iX user account can contain many groups, each containing files. A group is comparable to a directory, but only to one level. Unlike UNIX systems, the MPE/iX file system is not hierarchical. The MPE/iX account manager can assign a default group for a user account. For example, the user account MYNAME.ARPACCT is assigned a default group PUB (with no group password). The user logon is as follows: ftp> USER MYNAME/userpw.
Using the FTP Server File Naming on MPE/iX File Naming on MPE/iX The MPE/iX file system is not case sensitive: file1 is the same file as FILE1. A fully-qualified MPE/iX filename is in the form: filename. groupname. account Each part, (filename, groupname, and account) is 1–8 alphanumeric characters, beginning with an alphabetic character. To avoid file naming problems, always explicitly specify resulting filenames in correct MPE/iX format.
Using the FTP Server Using Metacharacters Using Metacharacters Be aware if you use metacharacters (wildcards) and specify a group and/or account with MGET. The resulting filenames will be fully qualified MPE/iX file names (filename.groupname.account), a maximum of 26 characters, including periods. If your system supports fewer characters than MPE/iX, the filenames may be truncated. Use the LS command to verify the set of files you are transferring.
Using the FTP Server Changing File Building Parameters Changing File Building Parameters When transferring files from your system to MPE/iX, you can use file building parameters following the PUT command string: ftp> PUT localfile remotefile, buildparms The supported build parameters are: ;REC=[-recsizebytes] [,blkfactor[,[{F}][,{BINARY}]]]] {V} {ASCII {B} [;DEV=device] [;CODE=filecode] [;DISC=[numrec] [, [numextents] [, [initialloc]]] The parameter REC= can also be specified in words (two bytes per wo
Using the FTP Server Supported MPE/iX File Types Supported MPE/iX File Types The following types of MPE/iX files can be transferred to a remote host using FTP. Standard MPE files, with fixed, variable, or bytestream format, and either binary or ASCII data types. In addition, the latest enhancemnets enable the transfer of the following types of non-standard types between two HP 3000 machines. Both the FTP server and the client must be running the latest version. 1. Circular files 2. Message files 3.
C PING/iX Utility This appendix describes the PING/iX utility and is organized as follows: • What is PING/iX • How to Use PING/iX • PING/iX Error and Information Messages 97
PING/iX Utility What is PING/iX What is PING/iX PING/iX is an interactive utility that can be used to confirm the reachability of a remote node that supports the internet protocol (IP). It can also be used to estimate round trip times before proceeding with lengthy transactions. PING/iX sends Internet Control Message Protocol (ICMP) Echo Requests to the remote node once a second, and monitors the echo replies that arrive.
PING/iX Utility How to Use PING/iX How to Use PING/iX To use PING/iX, you need the internet protocol (IP) address of the remote node. If you do not wish to use the default values, you can optionally specify the number of packets to send, and number of data bytes per packet. The defaults are 64 bytes per packet, with an infinite number of packets. Use [CTRL-Y] to stop sending packets. You must have NA and NM capabilities to use PING/iX. PING/iX can be run from a menu by entering: :RUN PING.NET.
PING/iX Utility Using Menu-Driven PING/iX Using Menu-Driven PING/iX When you run PING/iX without parameters, the display shows the input parameters available. For example, enter: :RUN PING.NET.SYS The following menu is displayed: ------- PING/iX (ICMP Echo Requestor) : Version B0300003 ------- Information on Input Parameters: (CONTROL-Y at any point to exit to main level) IP address — In decimal form; (.e.g.,) 15.13.131.
PING/iX Utility Using Menu-Driven PING/iX The number of data bytes entered must be between 0 and 2048. The default is to send 64 bytes of data with each packet, which can be selected by pressing the [Return] key at the prompt. If four or more bytes of data is sent, the round trip time for each request-reply is displayed. Stopping PING/iX From the menu displaying the IP address prompt, you can exit from PING/iX by pressing the [Return] key. Note that you cannot use the [Break] key to exit.
PING/iX Utility Using Menu-Driven PING/iX --PING/iX $0F0D833B : 10 byte packet(s), 10 packet(s)-10 10 10 10 10 10 10 10 10 10 byte(s) byte(s) byte(s) byte(s) byte(s) byte(s) byte(s) byte(s) byte(s) byte(s) from from from from from from from from from from $0F0D833B $0F0D833B $0F0D833B $0F0D833B $0F0D833B $0F0D833B $0F0D833B $0F0D833B $0F0D833B $0F0D833B : : : : : : : : : : icmp_seq icmp_seq icmp_seq icmp_seq icmp_seq icmp_seq icmp_seq icmp_seq icmp_seq icmp_seq = = = = = = = = = = 1, 2, 3, 4, 5, 6, 7
PING/iX Utility Using PING/iX From the Command Line Using PING/iX From the Command Line You can run PING/iX from the command line by using an INFO string. The INFO string must contain the IP address of the remote node, and optionally, the number of packets and number of bytes: :RUN PING.NET.SYS;INFO=" ipaddress [,packets] [,bytes]" Within the INFO string, commas are required to separate parameters. The number of packets and bytes that can be sent are the same as using the menu-driven option.
PING/iX Utility PING/iX Error and Information Messages PING/iX Error and Information Messages In addition to the normal reply message details and statistics, PING/iX can display informational and/or error messages which are described below. MESSAGE: Receive timeout occurred. Shutting Down. . . CAUSE: The PING/iX process has not received any response to its requests for two minutes. So it shuts itself down, assuming that the local or the remote side is inactive.
PING/iX Utility Internal Errors Internal Errors The following messages are all internal errors, and should not happen under normal circumstances. In each case, submit an SR (see the NS 3000/iX Operations and Maintenance Manual). • Error opening $STDIN. Program quitting. • Error opening $STDLIST. Program quitting. • Cannot create port. Program quitting. • Internal Error in server. Shutting Down... • Buffer Error in server. Shutting Down...
PING/iX Utility Internal Errors 106 Appendix C
Glossary A C address A numerical identifier defined and used by a particular protocol and associated software to distinguish one node from another. control connection The communication path between the FTP User PI and the Server PI used to exchange commands and replies. This connection follows the TELNET Protocol guidelines. address resolution In NS networks, the mapping of node names to IP addresses and the mapping of IP addresses to subnet addresses. See also: probe protocol, ARP.
Glossary file system The part of the operating system that handles access to input/output devices, data blocking, buffering, data transfers, and deblocking. flow control A means of regulating the rate at which data transfer takes place between devices to protect against data overruns. H host computer The primary or controlling computer on a network. The computer on which the network control software resides. For HP purposes, it may also be used to distinguish the MPE/iX system (host) from the DTC.
Glossary NMMAINT A utility that lists the software module version numbers for all HP AdvanceNet products, including NS 3000/iX. It detects missing or invalid software modules NMMGR Node Management Services Configuration Manager. A software subsystem that enables you to configure DTC connectivity and network access parameters for an HP 3000 Series 900 computer. node A computer that is part of a network. The DTC is also considered to be a node and has its own address.
Glossary They define what functions are to be performed and how messages are to be exchanged. PI Protocol interpreter. In the FTP client-server model, describes the processing of FTP commands and replies over the control connection between the user and server. R remote node A node on an internetwork other than the node you are currently using or referencing. V Virtual Terminal A network service that allows a user to establish interactive sessions on a node.
Index Symbols ? user commands, 53 A address resolution protocol, 24 anonymous FTP, 43 ARP, 24 changing parameters, 23 retransmission maximum, 24 retransmission timeout, 24 ARPA services, 12 ASCII user command, 53 B BINARY user command, 53 BYE user command, 53 C CASE user command, 53 CD server command, 59 user command, 53 client-server model, 12 CLOSE user command, 53 creating subnets, 26 D DEBUG user command, 54 DELE server command, 59, 60 DELETE user command, 54 DIR user command, 54 DISCONNECT user comman
Index MODTIME user command, 55, 60 MPE/iX FTP user, 66 MPUT user command, 56 RNFR server command, 61 RNTO server command, 61 S security required for ARPA.