HP EDIT Reference Manual ABCDE HP Part No.
The information contained in this document is subject to change without notice. HEWLETT-PACKARD MAKES NO WARRANTY OF ANY KIND WITH REGARD TO THIS MATERIAL, INCLUDING, BUT NOT LIMITED TO, THE IMPLIED WARRANTIES OF MERCHANTABILITY AND FITNESS FOR A PARTICULAR PURPOSE. Hewlett-Packard shall not be liable for errors contained herein or for incidental or consequential damages in connection with the furnishing, performance, or use of this material.
Printing History New editions are complete revisions of the manual. Update packages, which are issued between editions, contain additional and replacement pages to be merged into the manual by the customer. The dates on the title page change only when a new edition or a new update is published. No information is incorporated into a reprinting unless it appears as a prior update; the edition does not change when an update is incorporated.
Preface HP EDIT is a full-screen editor designed for application program development as well as general text preparation. The HP EDIT Reference Manual provides complete information on all HP EDIT features and reference information for all HP EDIT commands. The manual is intended for both new and experienced editor users or those familiar with any text processing system. It is suggested that new HP EDIT users rst read the tutorial, Learning HP EDIT , before reading the rst three chapters of this manual.
Appendix D This appendix describes the di erences using HP EDIT with 16-bit characters and HP EDIT with 8-bit characters.
Conventions The following conventions are used in this manual: [] Brackets shown in command syntax enclose optional parameters. Italics Italic letters shown in text indicate system responses or provide special emphasis. Bold Bold letters shown in text indicate user input. 4 5 Implies a keyboard key. For example, 4CTRL5 means the control key on the keyboard. Small numbers in the lower left corner of drawings are for HP use only.
Contents DRAFT 9/3/97 1. Getting Started Prerequisites And Recommendations . . . . . Starting A Session . . . . . . . . . . . . . Performing The Standard Start-up Procedure Customizing The Start-up Procedure . . . . Adding The Info Parameter . . . . . . . Adding the Line Parameter . . . . . . . Creating A File Equation . . . . . . . . Creating A UDC . . . . . . . . . . . . Conducting A Basic Editing Session . . . . . Executing Commands . . . . . . . . . . . Getting Help . . . . . . . . . . . . . . .
Moving Around in The File . . . . . . . . Moving The Cursor . . . . . . . . . . . Scrolling . . . . . . . . . . . . . . . Using Tabs . . . . . . . . . . . . . . Creating And Modifying Text . . . . . . . Methods For Creating And Modifying Text Alternating Modes Editing . . . . . . Text Entry Editing . . . . . . . . . . Alternating Between Overwrite And Insert . Entering The / Character . . . . . . . . Indenting Text Automatically . . . . . . Using Macro Counterparts . . . . . . . . Undoing Commands . . . . .
3. Overview of HP EDIT Commands Cursor And Window Movement Commands . . . . Cursor Movement . . . . . . . . . . . . . . Moving within The Window . . . . . . . . . Moving within The File . . . . . . . . . . . Window Movement . . . . . . . . . . . . . . Editing Commands . . . . . . . . . . . . . . . Text Entry . . . . . . . . . . . . . . . . . Appending Text . . . . . . . . . . . . . . Inserting Text . . . . . . . . . . . . . . . Replacing Text . . . . . . . . . . . . . . . Overwriting Text . . . . . . . . .
Key Management . . . . . . . . . . . . . . Executing Unassigned Or Pre xed Commands Assigning Or Reassigning An Individual Key . Displaying Current Key Assignments . . . . Returning Keys to Their Default Assignments Security Management . . . . . . . . . . . . Encrypting Text . . . . . . . . . . . . . Decrypting Text . . . . . . . . . . . . . Macro Commands . . . . . . . . . . . . . . Execution And Management . . . . . . . . . De ning Macros . . . . . . . . . . . . . Executing Macros . . . . . . . . . . . .
Check Spelling . . . . . . . . . . Clear To Beginning Of Line . . . . Clear To End Of Line . . . . . . . Close Window . . . . . . . . . . Compress Blank Lines . . . . . . Compress Blank Space . . . . . . Copy And Append To Bu er . . . . Copy To Bu er . . . . . . . . . Cursor Line To Bottom . . . . . . Cursor Line To Center . . . . . . Cursor Line To Top . . . . . . . . Cursor To Bottom . . . . . . . . Cursor To Center . . . . . . . . . Cursor To Top . . . . . . . . . . Cut And Append To Bu er . . . .
Find Blank Space . . . . . . . . Find Character . . . . . . . . . . Find Matching Delimiter . . . . . Find Previous . . . . . . . . . . Find Previous Blank Space . . . . Find Previous Character . . . . . Forward Character . . . . . . . . Forward Line . . . . . . . . . . Forward Word . . . . . . . . . . Global Search And Replace Backward Global Search And Replace Forward Go To Column/Mark . . . . . . . Go To Line/Mark . . . . . . . . Go To Macro . . . . . . . . . . Help . . . . . . . . . . . . . .
Reset All Key Assignments . . . Reset Key Assignment . . . . . Right Justify Line . . . . . . . Run Program . . . . . . . . . Run TDP Formatter . . . . . . Save Con g File . . . . . . . . Scroll Backward . . . . . . . . Scroll Forward . . . . . . . . . Scroll Left . . . . . . . . . . . Scroll Right . . . . . . . . . . Search And Replace Backward . . Search And Replace Forward . . . Search Backward . . . . . . . . Search Forward . . . . . . . . Select Block . . . . . . . . . . Set Distance To Mark . . . . .
Use Current Key Assignment . . . . . . . . . . Use X Register . . . . . . . . . . . . . . . . . Use Y Register . . . . . . . . . . . . . . . . . 4-372 4-373 4-375 A. Error Messages B. Alphabetical List of Commands C. Command Reference Tables Cursor And Window Commands . . . . Text Entry Commands . . . . . . . . Text Alteration Commands . . . . . . Formatting Text . . . . . . . . . . . Text Location Commands . . . . . . . Block Selection Commands . . . . . .
Find Commands . . . . . . . Go To Column/Mark . . . . . Join Commands . . . . . . . Paste Commands . . . . . . . Run TDP Formatter . . . . . Search And Replace Commands Shift Commands . . . . . . . Sort Commands . . . . . . . Upshift/Downshift Commands . . . . . . . . . . . . . . . . . . . . . . . . . . . . . . . . . . . . . . . . . . . . . . . . . . . . . . . . . . . . . . . . . . . . . . . . .
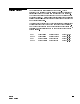
Figures 1-1. Sample File . . . . . . . . . . . . . . . . . 1-2. HP EDIT Modes . . . . . . . . . . . . . . . 1-3 1-7 4-1. Available Calculator Operators . . . . . . . . . 4-2. Available Variable Operators . . . . . . . . . .
1 Getting Started This chapter provides introductory information that enables you to initiate, conduct, and exit an HP EDIT session.
Starting A Session You start an HP EDIT session by issuing the proper run string from the MPE command interpreter. You can issue the standard run string, or you can simplify the start-up procedure by implementing a User-De ned Command (UDC). Each time you start an HP EDIT session, you must specify the name of the le you intend to edit. By default, HP EDIT searches for les in your home group, but it also accepts quali ed le name paths that reference les in other groups.
If the speci ed le exists, HP EDIT responds to your input by displaying the rst page of the le named FILENAME.GRPNAME as shown in gure 1-1. If the speci ed le does not exist, HP EDIT asks whether you want to create a new le: 3. If the le name you speci ed in Step 2 appears correct, press the y key.
If the le name you speci ed in Step 2 appears incorrect, press the n key. If you press the n key, HP EDIT prompts you again for the le name. Specify the desired le name and press 4Return5 as for Step 2. Customizing The Start-up Procedure You can customize the start-up procedure so that you are able to begin an HP EDIT session more quickly.
Creating A UDC You can create a UDC that substantially reduces the number of keystrokes required to access HP EDIT. The following UDC example incorporates the Info parameter for further start-up simpli cation: hpedit filename=" " run hpedit.pub.
Some of the less frequently used HP EDIT commands do not have assigned default keys. In order to execute these commands, HP EDIT provides a command called Execute Editor Command. When you execute this command, HP EDIT prompts for a command name. You can use this command to execute any HP EDIT command, including those to which keys or key sequences are assigned. You can execute several frequently used HP EDIT commands with function keys. By default, function keys are enabled for your session.
HP EDIT enables you to move freely between the two modes to perform all editing tasks. It is also possible to remain in Text Entry mode during a session and perform all of the basic editing tasks using certain terminal keys in conjunction with function keys. Consequently, your usage of editing modes depends on your personal preference. Refer to \Creating And Modifying Text" in chapter 2 for further information on mode usage.
Keeping Text Ending The Session When you have nished editing and want to save text in the current le, you can execute the Keep Text command. You can save the text to the current le name, or you can save the text to another le name. If you enter or modify text during a session and want to save the changes, you must execute this command before you can exit HP EDIT or read in another le. You can end the session by executing the Exit command or by pressing the Exit function key.
2 Conducting An Editing Session This chapter provides information about HP EDIT features you can use while conducting an editing session. The topics discussed introduce major HP EDIT commands and are presented in the order of probable usage. Chapter 3 provides more information on all of the commands associated with these topics. You can obtain reference information about a particular command by referring to chapter 4.
Message Line The second line shows error messages, prompts, and HP EDIT message responses to your input for certain commands. File and Record Line The third line shows the current le name, the current record number of the rst line in the text window, and the total number of records in the le. The next 21 lines of the screen are available for your text. This area is called the text window.
Table 2-1. Permissible Text Entry Terminal Keys TERMINAL KEY EFFECT Up Arrow Moves the cursor up a row. If the cursor is at the top of the screen when you press the key, the cursor moves to the bottom of the screen. Moves the cursor down a row. If the cursor is at the bottom of the screen when you press the key, the cursor moves to the top of the screen. Moves the cursor one column to the left. If the cursor is at the left margin when you press the key, the cursor moves to the right.
Table 2-2. Excluded Terminal Keys TERMINAL KEY EFFECT Clear Display Deletes all lines of text displayed beyond the cursor. Has no actual e ect on the text, but a ects the display. Moves the display to the next screen. Has no actual e ect on the text, but a ects the display. Moves the display to the previous screen. Has no actual e ect on the text, but a ects the display. Moves the display up a row. Has no actual e ect on the text, but a ects the display. Moves the display down a row.
When pressed, each key invokes a second level of function keys, except for the Help and Exit keys, which correspond to the commands Help and Exit. The main keys in Text Entry mode are identical to those in Command mode, except that a Command Mode key replaces the Exit key. This key returns you to Command mode and functions identically to pressing /4Return5.
The Main Keys function key returns you to the main set of keys. Position Commands Function Keys The Position Commands function key invokes the following set of keys: These keys correspond to the following commands: Scroll Backward Scroll Forward Top Of File Bottom Of File Beginning Of Line End Of Line Go To Line/Mark The Main Keys function key returns you to the main set of keys.
Cut/Paste Function Keys The Cut/Paste function key invokes the following set of keys: These keys correspond to the following commands: Set Mark Set Distance To Mark Copy To Bu er Cut To Bu er Paste Before Paste After Copy And Append To Bu er The Main Keys function key returns you to the main set of keys.
Accessing Files And Programs As mentioned in chapter 1, you must specify a le name when you start HP EDIT in order to conduct a session. However, once you have speci ed a le name and the session begins, you have several options for accessing other les within a session. You can: Specify another le to edit Insert the contents of another le Start one or more child sessions You can also issue MPE commands or run programs from within HP EDIT.
When you have nished editing a le, you can save the text with the Keep Text command. HP EDIT generates a standard ASCII le, which is compatible with les used by EDIT/V or any text processor that uses standard le formats. By default, HP EDIT saves the contents of your le to the original le name. However, you can save all or any portion of your le to another le name. For information about partial keeps, refer to the Keep Text command in chapter 4.
For instance, to delete ve lines from a le, you could execute the Delete Line command ve times. However, a much more e cient method would be to type the number 5 as the count before executing the command. Using the count in this manner achieves the same result with three less keystrokes. The count can be any integer value. HP EDIT resets the count to 1 after you issue each command.
Scrolling You can scroll the screen any number of lines forward or backward. You can also scroll the screen any number of columns left or right. Scrolling forward moves the cursor toward the bottom of the le. Conversely, scrolling backward moves the cursor toward the top of the le. Scrolling left moves the cursor toward the left margin; scrolling right moves the cursor toward the right margin. By default, the screen scrolls 20 lines at a time.
Creating And Modifying Text You create new text or modify existing text by executing one of the following types of commands from Command mode that places HP EDIT in Text Entry mode: Append Append To Character Append To Word Append To End Of Line Append Line Insert Insert Character Insert Line Replace Replace Character Replace Word Replace Line Overwrite Overwrite The append commands insert text after the indicated text units.
Methods For Creating And Modifying Text You typically create and modify text using one of the following editing methods: Alternating between modes Remaining in Text Entry mode The rst method provides easy access to all HP EDIT features and is characterized by executing HP EDIT commands. The second method provides access to frequently used HP EDIT commands by pressing function keys and focuses on entering text while remaining in Text Entry mode and using the Text Entry terminal keys listed in table 2-1.
Text Entry Editing This editing method di ers from the previous one in that once you enter Text Entry mode, you remain in this mode until you have nished editing. After you have executed a text entry command, you use the cursor arrow keys to move around in the window, the other insertion and deletion terminal keys listed in table 2-1 to perform basic text manipulations, and the function keys to perform commands.
Alternating Between Overwrite And Insert HP EDIT enables you to use the Insert Character key in Text Entry mode to alternate between inserting and overwriting text. If you are currently writing over text and want to insert text or split the line, you would press the Insert Character key. HP EDIT then inserts subsequent text and treats backspacing and other operations as if you had initiated them from the insert state in Text Entry mode.
Undoing Commands HP EDIT provides several undo commands that enable you to cancel previously executed commands. This ability is bene cial when you mistakenly issue the wrong command or issue a command that produces undesirable results. HP EDIT maintains a history of text modi cation commands, and can undo a single command or every text-altering command issued since you texted in the current le.
Refer to \Text Location Commands" in chapter 3 for more information about these commands. Pattern-Matching Characters Special pattern-matching characters assist you in de ning search patterns more general than simple matching strings. If you prefer, you can disable the pattern-matching characters from the Set Options screen so that HP EDIT interprets the characters literally during search and replace operations.
Performing Block Operations During your editing session, you may want to execute commands on blocks of text. There are many HP EDIT commands that can operate on blocks of text. Among them are Check Spelling, Compress Blank Space, copy commands, cut and paste commands, decrypt commands, delete commands, downshift commands, encrypt commands, replace commands, and upshift commands. There are two kinds of blocks: implicit and explicit . You can perform only one command on an implicit block.
Deleting Blocks Line Numbering Deleting text blocks is similar to cutting and pasting text. As with cutting and pasting, you rst select a block, then execute the Delete Line command. HP EDIT supports the following types of le formats: Unnumbered Standard-numbered COBOL-numbered Variable HP EDIT enables you to renumber a single line or range of lines, and can also automatically renumber adjacent lines when required or whenever you keep the le.
Editing Line Numbers You can renumber one or more lines of a standard-numbered or COBOL-numbered le. You use the Edit Line Number command to renumber a single line of text and the Renumber Lines command to renumber a range of lines. When you execute the Renumber Lines command, HP EDIT prompts you for the beginning and ending range and the numbering increment. You can specify a numbering increment as small as .001.
Printing And Formatting Printing A File You can print the contents of your current editing session from within HP EDIT. You can also format the text with the Text and Document Processor (TDP) if TDP is available on your system. HP EDIT provides the Print Text command to print your le. Using the Print Text command, you can print selected lines of text, a selected block of text, or an entire le.
Recovering Files Recovery Process HP EDIT maintains a recovery le in your logon group that always contains a reasonably current copy of the text you are editing. You can recover the contents of your editing session if a system failure occurs, except for the possible loss of up to 20 of the most recent changes, by accessing this recovery le. HP EDIT creates the recovery le Kdddhhmm when you text in a le and deletes it when you leave HP EDIT or text in another le.
Customizing The Editing Environment When you start HP EDIT, it establishes your editing environment using the default values for key assignments and parameter values. This editing environment is con gured to meet the editing requirements of most users. However, HP EDIT enables you to modify the following components to suit your individual requirements: Editing Parameters Key Assignments Macros The Set Options screen displays the major HP EDIT operating parameters.
Saving A Configuration After tailoring the editing environment, you can save the new values using the Save Con g File command. You can save the values to either the default EDCONFIG con guration le, which loads if it exists in your group when you start HP EDIT, or to another named le. Loading A Configuration You can load the con guration by using the Load Con g File command. A newly loaded con guration only a ects the current session, not other child or parent sessions.
Creating Macros You can either use a manual or automated approach to creating macros. To create a macro manually, you rst write the macro text, then de ne it using the De ne Macro command. The Begin Capture and Capture Macro commands provide an automated approach to creating macros. After executing the Begin Capture command, you type in any sequence of keystrokes that performs a desired function. You then execute the Capture Macro command to de ne the keystrokes as a macro.
Displaying The Configuration After you have created your customized editing environment, you may want to display one or more of its components for informational purposes. You can execute the Show Editor Statistics command to display general status information pertaining to your current editing session. The Set Options command shows the current value of editing parameters. The Show All Key Assignments command shows all currently con gured key assignments.
3 Overview of HP EDIT Commands This chapter provides introductory information about the function of all HP EDIT commands. It is bene cial to understand how commands are related so that you can e ectively use all of the editing capabilities of HP EDIT.
Moving the cursor within a text window Forward Character Forward Word Forward Line Back Character Back Word Back Line Cursor To Top Cursor To Center Cursor To Bottom Tab Moving the cursor to a location anywhere in the le Beginning Of Line End Of Line Top Of File Bottom Of File Go To Column/Mark Go To Line/Mark Moving within The Window The commands in this group move the cursor to speci c locations within the current text window. The text usually remains stationary when you execute any of these commands.
The Cursor To Top command moves the cursor to the top line of the window. The Cursor To Center and Cursor To Bottom commands function similarly. The Tab command, to which the 4Tab5 key is assigned by default, moves the cursor to the next tab position. The default value is 5 spaces. You can alter this value with the Tab Spacing parameter of the Set Options screen. You can also use the four terminal cursor keys to move the cursor to any location on the screen.
The Scroll Forward and Scroll Backward commands enable you to display any portion of a le. The Scroll Forward command moves the cursor toward the bottom of the le. The Scroll Backward command moves the cursor toward the top of the le. You can scroll the default number of lines or you can change the scroll size by preceding the command with a count. The new scroll size remains in e ect until you change it.
Appending Text You can use the append commands to add text after the speci ed text unit. When accessing an empty le, HP EDIT responds by opening the rst line of the le where you can begin to enter text. Append Character adds text after the character where the cursor is positioned. Append Word adds text after the end of the current word. Append Line opens a new line after the current one and places the cursor at the beginning of the new line.
You can use the Insert Character key to write over and insert text. If you press the key while writing over text, HP EDIT switches from the overwrite function to the insert function. You can then insert text. When nished, you can press the Insert Character key again to return to the overwrite function.
Sorting text De ne Sort Key Columns Sort Ascending Sort Descending Converting text case Upshift Character Upshift Word Upshift Line Downshift Character Downshift Word Downshift Line Compressing blanks Compress Blank Space Compress Blank Lines Filling a line Fill Character Checking spelling Check Spelling Deleting Text The delete commands enable you to remove selected portions of text or blank spaces within the text.
Undoing Text Changes During your editing session, you may inadvertently enter incorrect text while in Text Entry mode, or you may execute the wrong text-altering command. HP EDIT features three error recovery commands, collectively referred to as the undo commands, which enable you to restore text to its previous state before you made the error. The command you select depends on the number of text-altering changes you want to undo.
Shifting Text The Shift Line Left command shifts the entire line of text to the left; whereas the Shift End Of Line Left command shifts the trailing portion (text to the right of the cursor) of a line to the left. The Shift Line Right command shifts the entire line of text to the right; the Shift End Of Line Right command shifts the trailing portion of a line to the right. You can use the Center Text command to center a line of text between the left margin and the right margin.
Compressing Blanks While editing an existing le, you may discover that your text contains several unwanted blanks between words. Rather than manually deleting each blank, you could use the Compress Blank Space command to remove the extra blank spaces and replace them with single blanks. Similarly, you could use the Compress Blank Lines command to remove extra unwanted blank lines and replace them with single blank lines.
Except for the Find Matching Delimiter command, this group of commands enables you to search forward or backward for a speci ed character, blank space, or period. The Find Matching Delimiter command enables you to locate the matching member of a delimiter pair, such as a right bracket (]). Valid search delimiters are brackets, braces, and parentheses.
Defining Replacement Patterns You similarly de ne a replacement pattern as you would de ne a search pattern. Consequently, the De ne Replace Pattern, Insert Replace Pattern, and De ne Replace Pattern From Text commands function almost identically to the search commands described above. They di er only in that pattern-matching characters are not recognized or used in a replacement string.
Searching for Text The search commands locate one or more occurrences of text matching a prede ned search pattern. The Search Forward command searches from the current cursor location to the bottom of the le for the search pattern. The Search Backward command searches from the current cursor location to the top of the le for the search pattern.
Swapping locations Swap Cursor With Mark Swap With Previous Location Defining Markers Before you can use a place marker, you must rst set the marker using the Set Mark command. After you have set from one to ten marks, each remains at the de ned location until you set that mark at another location or delete the line containing the mark. After you have set one or more marks, you can execute the Show Editor Statistics command to display all currently set marks and their respective line and column locations.
Management Commands File Management DRAFT 9/3/97 Management commands enable you to manage your le and your session by performing a variety of functions, ranging from texting in a new le to exiting HP EDIT. In addition, some of the management commands provide the special functions of assigning keys to commands and encrypting text for le security. Commands in this category enable you to perform special functions within a le not directly related to text editing.
Displaying Or Modifying The Configuration When you initiate an editing session, HP EDIT reads in an editing environment from the default con guration le in your logon group called EDCONFIG. You can retain this environment during your session, or you can display and change many of the elements in the editing environment by using the Set Options command. When you execute this command, a separate screen appears that displays the current editing parameter settings.
After you have nished editing, you can execute the Keep Text command to save text changes. You can also execute this command any time during your session to update the existing le with your changes. By default, HP EDIT saves the text to the current le name unless you instruct it to do otherwise. You can alternatively save the le contents to an existing or new le.
Using Multiple Windows During editing, you may want to compare the text of two di erent portions of your le, or you may want to move text from one area to another. The Open Window command enables you to edit two portions of your le simultaneously without having to scroll between them. When you execute this command, HP EDIT divides the screen into two windows so you can access di erent portions of your le at the same time. HP EDIT converts the current cursor line into a boundary line.
auto indent automatic bumping display line numbers renumber lines auto keep interval right margin shift count keep le type word category lines per page output device print line numbers print header lines When editing the same le in two di erent windows, you can set the following options independently for each window: Forward/Back Scroll Size Left/Right Scroll Size The following list of options are global and apply to both windows in an editing process.
Editing Line Numbers HP EDIT enables you to renumber one line or several lines of numbered les. Before you renumber one or more lines, you should rst enable the Display Line Numbers parameter from the Set Options screen if line numbers are not already displayed. To renumber a single line number, you move the cursor to the line whose number is to be changed, then execute the Edit Line Number command. HP EDIT clears the number from the screen.
Session Management Commands in this category enable you to perform special functions within the current editing session that are independent of the current editing le.
These commands enable you to work on several les simultaneously. Each time you execute the Activate Next Process command at the end of the process chain, the current session becomes a parent session to a newly activated child. If you create multiple sessions with this command, you can execute the Activate Previous Process command repeatedly until you have reached the original parent session.
Executing unassigned or pre xed commands Execute Editor Command Meta Assigning or reassigning an individual key Assign Key Displaying current key assignments Show Key Assignment Show All Key Assignments Insert All Key Assignments Show Reassigned Keys Returning keys to their default assignments Reset Key Assignment Reset All Key Assignments Executing Unassigned Or Prefixed Commands You can execute most HP EDIT commands by pressing an assigned key or sequence of keys.
You use the Assign Key command to assign a non-numeric key to any HP EDIT command. Since the keyboard consists of a limited number of keys, additional key assignments are possible by using control and Meta sequences. Consequently, you can assign a single key to a command or a single key pressed in conjunction with the 4CTRL5 key or pre xed by the 4ESC5 (Meta) key.
Returning Keys to Their Default Assignments After you have assigned one or more keys, you may later decide that you want to return them to their default values. You can use the Reset Key Assignment command to return a single assigned key to its default value. HP EDIT prompts you for the key to be cleared and then displays the speci ed key and its original command name, if any, on the message line. You can return all keys to their original default values by executing the Reset All Key Assignments command.
Macro Commands Macros enable you to perform tasks that would ordinarily require several separate operations. The complexity of macros you can create varies widely, ranging from scrolling text to performing mathematical computations. HP EDIT provides basic macro commands to meet your general requirements, such as de ning and executing macros. In addition, HP EDIT also features specialized commands for use within macros, in which you can provide text input from the keyboard during macro execution.
Defining Macros You can either de ne a macro interactively or manually. If you de ne a macro interactively, HP EDIT prompts you for the information it needs to create a macro. This simpli ed method constitutes the standard, preferred method of creating a macro. You can also manually de ne a macro from text if you would rather provide all of the required macro syntax as well as the text. You can de ne a macro interactively using the Begin Capture and Capture Macro commands.
These commands function di erently only when they are executed from within a macro. If you execute them from the keyboard as standalone commands, the Go To Macro command functions the same as the Execute Macro command. If you want to execute a macro that returns to the current input level after execution, you should use the Execute Macro command. This command is also recommended when you want to execute a macro that consists of a group of nested macros.
These commands only delete macros that exist in the current session. To permanently delete macros from a con guration le, you can overwrite the con guration le with the current environment using the Save Con g File command after deleting the unwanted macros from the environment. Suppressing Macros If you de ne a preemptive macro and press the key assigned to the macro (the macro name), the macro automatically executes.
Keyboard input functions and associated commands are: Adding or changing text Append To Character From Macro Append To Word From Macro Append Line From Macro Append To End Of Line From Macro Insert Character From Macro Insert Line From Macro Overwrite From Macro Replace Character From Macro Replace Word From Macro Replace Line From Macro De ning search and replace patterns De ne Search Pattern From Macro De ne Replace Pattern From Macro Adding Or Changing Text Whenever you want to add, insert, overwrite, o
Conditional Conditional commands enable you to conditionally execute selected portions of macros, depending on the value of a settable ag. Like the keyboard input macro commands, these commands are typically used within a macro.
Calculate Use X Register Use Y Register You can access the HP EDIT calculator either interactively or programatically. When you execute the Calculate command from the keyboard, HP EDIT prompts you to specify the desired calculation. You can enter as many calculator commands as you want to the end of the message line. When you press 4Return5, HP EDIT responds by displaying the nal values of the X and Y registers.
4 HP EDIT Commands This chapter contains reference modules for all HP EDIT commands. The modules are arranged in alphabetical order and provide the following sections: Purpose Consists of a single sentence describing the purpose of the command. The sentence provides a brief explanation of the command function. The rst paragraph of the Description section provides a more detailed explanation. Default Syntax Shows the default key or pre xed keys assigned to the command.
Activate Next Process Purpose Default Syntax Description Command Process Activates a child session from a parent session. 4CTRL5 n This command suspends a parent editing session and activates a new or existing child session. This command and the Activate Previous Process command enable you to edit multiple les simultaneously. If a child session exists when you execute the command, HP EDIT returns to the same location in the child session as the last time the child session was active.
Activate Next Process 2. Press the Activate Next function key. HP EDIT activates the child session le and displays Session activated on the message line. 3. Repeat steps 1 and 2 if there are multiple editing sessions until you have reached the desired child session. To activate a new child session from a parent session: 1. Press and hold 4CTRL5, then press the n key. HP EDIT preempts the session and displays Starting new editing session on a separate screen, then prompts you for the le name. 2.
Activate Next Process d a c b 4. Type next at the cursor position and press 4Return5. HP EDIT reads in the le named NEXT. 5. Move the cursor to the position where you want to paste the text from the previous le. 6. Execute the Paste After (p) or Paste Before (P) command. HP EDIT inserts the copied lines from the previous le. Note If you want to retain this session but want to return to the parent session, perform only step 7.
Activate Previous Process Activate Previous Process Purpose Default Syntax Description Command Process Reactivates a parent session from a child session. 4CTRL5 p This command suspends a child editing session and reactivates a parent session. This command and the Activate Next Process command enable you to edit multiple les simultaneously. When you execute this command, HP EDIT returns you to the preceding parent session. A session can function as both a child and parent.
Activate Previous Process 2. Press the Activate Previous function key. HP EDIT activates the parent session le and displays Next session is still active on the message line. 3. Repeat Steps 1 and 2 if there are multiple editing sessions until you have reached the desired parent session. No further parent sessions exist if the message Next session is still active. No previous session. appears on the message line.
Append Line Append Line Purpose Default Syntax Description Procedure Enables a user to add text below the current line. A This command places HP EDIT in Text Entry mode and enables you to add text starting at the beginning of a new line. When you invoke this command, HP EDIT moves the cursor to the rst column of a new line below the current line, enabling you to add text. To add text beginning on a new line: 1. Move the cursor to a column anywhere on the line below which you want to add text. 2.
Append Line Text will be added below this line. This new text follows the first line.
Append Line From Macro Append Line From Macro Purpose Default Syntax Description Command Process Syntax Considerations Enables you to add a new line within an executing macro. $A This command, when executed within a macro, suspends the macro and enables you to add a new line following the current line. When the macro pauses for your input, HP EDIT moves the cursor to the rst column of a new line below the current line, enabling you to add text.
Append Line From Macro Example To construct, de ne, and execute a macro that pauses for you to add a new line below the current line: 1. Insert a new line in text by executing the Insert Line (I) command. 2. Type in the following macro beginning at the cursor position: mL=AAppend a line/^m$AAto complete the text./^m 3. Press / and 4Return5 to exit Text Entry mode and enter Command mode. 4. Execute the De ne Macro (z) command.
Append Line From Macro Related Commands DRAFT 9/3/97 Append Line Append To Character From Macro Append To End Of Line From Macro Append To Word From Macro De ne Replace Pattern From Macro De ne Search Pattern From Macro Insert Character From Macro Insert Line From Macro Replace Character From Macro Replace Line From Macro Replace Word From Macro Overwrite From Macro HP EDIT Commands 13:43 4-11
Append To Character Purpose Default Syntax Description Enables you to add text after the current character. a This command places HP EDIT in Text Entry mode and moves the cursor one column beyond the character where the cursor is currently located, enabling you to add text. All of the original text to the right of the append location shifts to the right when you enter text.
Append To Character Related Commands DRAFT 9/3/97 Append Line Append To Character From Macro Append To End of Line Append To Word Insert Character Insert Line Overwrite Replace Character Replace Word Replace Line HP EDIT Commands 13:43 4-13
Append To Character From Macro Purpose Default Syntax Description Command Process Syntax Considerations Enables you to add text after the current character within an executing macro. $a This command, when executed within a macro, suspends the macro and enables you to add text starting after the current character. When the macro pauses for your input, HP EDIT moves the cursor one column beyond its current position, enabling you to add text.
Append To Character From Macro Example To construct, de ne, and execute a macro that pauses for you to append text after the current character: 1. Insert a new line in text by executing the Insert Line (I) command. 2. Type in the following macro beginning at the cursor position: mc=AAppend to char/^m$a; to complete the text./^m 3. Press / and 4Return5 to exit Text Entry mode and enter Command mode. 4. Execute the De ne Macro (z) command.
Append To Character From Macro Related Commands 4-16 Append Line From Macro Append To Character Append To End Of Line From Macro Append To Word From Macro De ne Replace Pattern From Macro De ne Search Pattern From Macro Insert Character From Macro Insert Line From Macro Replace Character From Macro Replace Line From Macro Replace Word From Macro Overwrite From Macro HP EDIT Commands DRAFT 9/3/97 13:43
Append To End Of Line Append To End Of Line Purpose Default Syntax Description Procedure Example Enables you to add text to the end of a line. ; This command places HP EDIT in Text Entry mode and moves the cursor one column beyond the last character of the current line, enabling you to add text starting at the end of the current line. To add text at the end of a line: 1. Move the cursor to a column anywhere on the line where you want to add text. 2. Press the ; key.
Append To End Of Line Related Commands 4-18 Append Line Append To Character Append To End Of Line From Macro Append To Word Insert Character Insert Line Overwrite Replace Character Replace Word Replace Line HP EDIT Commands DRAFT 9/3/97 13:43
Append To End Of Line From Macro Append To End Of Line From Macro Purpose Default Syntax Description Command Process Syntax Considerations Enables you to add text to the end of a line within an executing macro. $; This command, when executed within a macro, suspends a currently executing macro and enables you to add text starting at the end of the current line.
Append To End Of Line From Macro Example To construct, de ne, and execute a macro that pauses for you to append text to the end of a line: 1. Insert a new line in text by executing the Insert Line (I) command. 2. Type in the following macro beginning at the cursor position: m;=AAppend to/^m$;; to add text./^m 3. Press / and 4Return5 to exit Text Entry mode and enter Command mode. 4. Execute the De ne Macro (z) command. HP EDIT removes the macro from the screen and stores it for subsequent execution. 5.
Append To End Of Line From Macro Related Commands DRAFT 9/3/97 Append Line From Macro Append To Character From Macro Append To End Of Line Append To Word From Macro De ne Replace Pattern From Macro De ne Search Pattern From Macro Insert Character From Macro Insert Line From Macro Replace Character From Macro Replace Line From Macro Replace Word From Macro Overwrite From Macro HP EDIT Commands 13:43 4-21
Append To Word Purpose Syntax Description Command Process Enables a user to add text following a word. 4CTRL5 a This command places HP EDIT in Text Entry mode and enables you to add text following the current word. When you issue this command, HP EDIT moves the cursor one column beyond the word where the cursor is currently located, enabling you to add text. All of the original text to the right of the append location shifts to the right when you enter text.
Append To Word Procedure Example To add text following a word: 1. Move the cursor to any character of a word beyond which you want to add text. 2. Press and hold 4CTRL5, then press the a key. HP EDIT moves the cursor one column beyond the last character of the word and places HP EDIT in Text Entry mode. 3. Add text as needed. HP EDIT adds the new text and shifts the original text to the right. 4. Press / and 4Return5 when you have nished adding text to return to Command mode.
Append To Word From Macro Purpose Default Syntax Description Command Process Syntax Considerations Enables you to add text after the current word within an executing macro. $^a This command, when executed within a macro, suspends a currently executing macro and enables you to add text starting after the current word. When the macro pauses for your input, HP EDIT moves the cursor one column beyond the current word, enabling you to add unlimited text.
Append To Word From Macro [a-zA-Z0-9] [~ ] Procedure Example Words consists of upper and lowercase letters as well as digits. Words are separated by spaces and any non-alphanumeric characters. Words consist of any non-space characters separated by spaces. To execute this command within a macro: 1. Construct the macro containing the command using proper macro syntax. Refer to the De ne Macro command for information about constructing macros. If the macro is preemptive, skip to Step 3. 2.
Append To Word From Macro 7. Press the spacebar and type word as shown: Append to this word_ 8. Press / and 4Return5 to return to Command mode. HP EDIT resumes and concludes the macro execution and appends to complete the text. following your input as shown: Append to this word to complete the text.
Assign Key Assign Key Purpose Default Syntax Description Assigns a key to a command, or reassigns a key currently assigned to a command. K This command enables you to: Assign a key to a command that does not have a default assigned key Assign another key to a command that has a default assigned key Reassign a key currently assigned to a command You can assign a non-numeric character or non-numeric character preceded by the Meta key to any HP EDIT command.
Assign Key Saving Values Permanently If you want to save the new key assignment for subsequent sessions, you can use the Save Con g File command, which saves option values and macro de nitions as well as all reassigned keys. You can either: Specify a le in which to save the assigned key, then read in the le using the Load Con g File command in subsequent sessions or Save the assigned key to the le EDCONFIG to eliminate reading in a customized key assignment le when you initiate an editing session.
Assign Key Key to assign: _ 3. Press the q key. HP EDIT displays the following prompt on the message line: Is key prefixed by Meta? _ 4. Press the n key. HP EDIT returns the cursor to its previous position in the le and displays the following message on the message line: q:Exit 5. Execute the Save Con g File command by pressing 4ESC5, then pressing the s key. HP EDIT displays the following prompt on the message line: Press CTRL-Y to cancel. Save configuration to EDCONFIG 6. Press the 4Return5 key.
Back Character Purpose Default Syntax Description Procedures Moves the cursor one or more characters to the left. 2 3 n 4Backspace5 where n is a count representing the number of characters to the left the cursor is to move. The default value of n is 1. This command moves the cursor one or more characters to the left of its current position.
Back Line Back Line Purpose Default Syntax Description Moves the cursor up one or more lines. 2 3 n where n is a count representing the number of lines the cursor is to move up. The default value of n is 1. This command moves the cursor one or more lines above its current position. If the destination line contains text, the cursor moves to the rst non-blank character. If the destination line is blank, the cursor moves to the rst column of the line.
Back Word Purpose Default Syntax Description Word Definition Moves the cursor to the beginning of the current word or a previous word. 2 3 n b where n is a count representing the number of words the cursor is to move. The default value of n is 1. This command moves the cursor to the rst character of the current word. If the cursor is already on the rst character of a word or between words, the command moves the cursor to the rst character of the previous word.
Back Word Procedures To move the cursor to the rst character of the current word: 1. Press the b key. To move the cursor to a previous word: 1. Type a count representing the number of words you want the cursor to move. 2. Press the b key. HP EDIT moves the cursor the speci ed number of words. or 1. Press the b key repeatedly until the cursor is positioned at the desired location. Examples To move the cursor to the beginning of the word HERE: Move the cursor here. 1. Press the b key once.
Begin Capture Purpose Default Syntax Description Begins recording user input to de ne a macro. 4ESC5 ( This command, along with the Capture Macro command, enables you to de ne a macro from keyboard input. When you execute the command, HP EDIT initiates the macro de nition process and indicates on the message line that the capture process has been activated. You begin the capture process by typing any sequence of keystrokes in both Command and Text Entry modes.
Begin Capture 5. Execute the Capture Macro command by pressing 4ESC5, then pressing the ) key. HP EDIT displays the following prompt on the message line: Assign macro to which key? _ 6. Press the s key. HP EDIT displays the following prompt on the message line: Is key prefixed with Meta? _ 7. Press the n key to reply no. HP EDIT displays the following prompt on the message line: Is macro preemptive? _ 8. Press the n key to reply no.
Beginning Of Line Purpose Default Syntax Description Procedure Moves the cursor to the beginning of the line. [ This command moves the cursor from its current position on a line of text to the rst column of the line. To move the cursor, either: 1. Press the [ key. or 1. Press the Position Commands function key. HP EDIT invokes the second-level Position Commands function keys. 2. Press the Begin Of Line function key.
Bottom Of File Bottom Of File Purpose Default Syntax Description Procedure Moves the cursor to the bottom of the le. ) This command moves the cursor from its current position to the last line of the current le. When you execute this command, the cursor moves to the rst column of the last line on the last screen of text. To scroll to the bottom of the le, either: 1. Press the ) key. or 1. Press the Position Commands function key. HP EDIT invokes the second-level Position Commands function keys. 2.
Break To MPE Purpose Default Syntax Description Enables execution of non-program MPE commands. ! This command temporarily suspends editing and enables you to execute non-program MPE commands without having to conclude the editing session. Refer to Interrupting Program Commands in the MPE Commands Reference Manual for information about permissible commands. When you execute the command, HP EDIT suspends editing and displays a message and MPE prompt at the top of an otherwise blank screen.
Break To MPE 3. Type resume and press 4Return5. HP EDIT returns to the editing session.
Calculate Purpose Default Syntax Description Invokes the HP EDIT calculator. $+ This command enables you to use the HP EDIT calculator to perform computations that manipulate the contents of the X and Y registers. The command additionally enables you to modify certain editor variables.
Calculate Although the HP EDIT calculator limits mathematical operations to addition, subtraction, multiplication, division, and comparisons, you can also access several editor variables in the same manner as you would access registers. Operators And The Stack The operators a ect the stack di erently. Several of the operators either push , pop, or roll the stack. Some operators do not change the current stack registers.
Calculate Table 4-1. Available Calculator Operators OPERATORS Digits + * / DEFINITION EFFECT ON STACK Enters new value in X Pushed X <|Y plus X Popped X <|Y minus X X <|Y times X X <|Y divided by X Popped Popped Popped ^ Enter (T <|Z <|Y <|X) Pushed rn * Recall reg. or var. n into X Pushed sn * Store X into reg. or var.
Calculate Accessible Variables The Recall (r) and Store (s) operators enable you to access several HP EDIT variables. You can read or write to several of the variables, while others can only be read. Table 4-2 lists the accessible variables, their de nitions, permissible access, and the minimum and maximum values or value ranges for each variable. Table 4-2.
Calculate 4. Insert ^m following the computation. 5. Press / and 4Return5 to exit Text Entry mode and enter Command mode. 6. Execute the De ne Macro (z) command. HP EDIT deletes the macro from the screen and stores it for subsequent execution. If the macro name is non-preemptive, proceed to step 7. If the macro is preemptive, skip to step 8. Note You can also alternatively use the Begin Capture and Capture Macro commands to capture calculator commands instead of performing steps 1 through 6. 7.
Calculate 3. Press / and 4Return5 to exit Text Entry mode and enter Command mode. 4. Execute the De ne Multiple Macros (4ESC5 z) command with the cursor positioned on the rst line of the macros you typed. HP EDIT deletes the macros from the screen and displays the following message: 3 macros defined 5. Issue the Execute Macro (m) command. HP EDIT displays the following prompt on the message line: Specify macroname 6. Press the c key. HP EDIT executes this macro as well as the nested l and t macros.
Cancel Block Purpose Default Syntax Description Procedure Related Commands 4-46 Cancels a block selection. 4CTRL5 X This command cancels an explicit block selection from anywhere within the le. 1. Press the 4CTRL5 and X keys. Mark Character Block Start Mark Line Block Start Select Block.
Capture File Capture File Purpose Default Syntax Captures current process text input and commands in a separate le. None This command does not have a default key assignment. You can either assign a key to the command using the Assign Key command or issue the command using Execute Editor Command. Description This command provides an alternative to the Capture Macro command for recording keyboard input.
Capture File 4. Type capture le beginning at the cursor position beside the prompt. HP EDIT displays the prompt Capture le name: on the message line. Proceed to Step 5 unless you want to abort the command. To abort the command, press either 4Return5 or 4CTRL5 y. HP EDIT displays Capture still active on the message line. You can then either continue editing or terminate the capture by executing the Capture Macro ( 4ESC5 ) ) command. 5. Type the name of the le to which you want to save the recorded input.
Capture Macro Capture Macro Purpose Default Syntax Description Command Process De nes a macro using recorded user input. 4ESC5 ) This command, along with the Begin Capture command, enables you to de ne a macro from keyboard input. The Begin Capture command initiates the macro de nition process by enabling you to create the desired macro text. The Capture Macro command completes the macro de nition process by prompting for information that HP EDIT requires to transform your keyed text into a macro.
Capture Macro 4. Press the y key to reply yes, or press the n key to reply no. If you reply yes, HP EDIT automatically executes this macro when you subsequently press the assigned key. If you reply no, HP EDIT does not execute this macro when you subsequently press the assigned key. Instead, you must execute the macro using either the Execute Macro (m) command or the Go To Macro (M) command.
Capture Macro 8. Press the n key to reply no. If you reply yes instead, HP EDIT automatically executes this macro whenever you press the s key, rather than execute the Scroll Forward (s) command. Replying no to the prompt necessitates using the Execute Macro (m) command or the Go To Macro (M) command to execute the macro.
Center Text Purpose Default Syntax Description Centers one or more lines of text. 2 3 n | where n represents the number of lines to center beginning at the cursor line. The default value of n is 1. This command centers one or more lines of text between the left margin and the current right margin column. The right margin is determined by the Join Length variable, which has a default value of 80.
Center Text To center a line using another join length: 1. Issue the Set Options (O) command. 2. Press the j key to modify the Join Length eld. 3. Enter the desired numeric value representing the right margin column and press 4Return5. 4. Press 4Return5 to return to your editing session. 5. Move the cursor to a column anywhere on the line to be centered. 6. Press the key. HP EDIT centers the text between the left margin and the user-de ned right margin.
Change Filename Purpose Default Syntax Description Changes the default le name. T This command changes the default le name so that subsequent execution of the Keep Text command keeps the text to a le other than the one that was initially read in. This command is useful when you either want to create a new le from an existing le, or if you want to edit an existing le and save it to a new le while retaining the existing le.
Change Filename d a c b 2. Type new at the cursor position as shown: d a c b 3. Press 4Return5.
Change Filename d a c b To change the le name to a new le name in a di erent group: 1. Press the T key, or press the File Commands function key, followed by the Change Filename function key. HP EDIT displays the following prompt on the message line: d a c b 2. Type program.
Change Filename d a c b 3. Press 4Return5.
Change Filename From Text Purpose Default Syntax Changes the default le name using the current line of text. None This command does not have a default key assignment. You can either assign a key to the command using the Assign Key command or issue the command using Execute Editor Command. Description Command Process Command Application Procedure This command changes the default le name by extracting text from the current line as the new le name.
Change Filename From Text Related Commands DRAFT 9/3/97 Change Filename Change Filename From Text Insert Filename Keep File HP EDIT Commands 13:43 4-59
Check Spelling Purpose Default Syntax Description Checks spelling within your current le. 2 3 n 4ESC5 S where n is a count that represents the number of lines to spell check for a block of text. This command checks the spelling of either a selected block of text or of your entire le. The Check Spelling command uses the default dictionary AMSPELL or a dictionary that you specify. Once the Check Spelling command is issued, the cursor moves to each misspelled word and highlights it.
Check Spelling e (exit) i (ignore) t (type word) DRAFT 9/3/97 1. If you like the word Check Spelling suggests, press 4Return5. The speller replaces the highlighted word with the suggested word. 2. If the suggested word isn't the correct word, press c for the next suggestion. Continue pressing c for suggested words until the speller says it doesn't have any more suggestions. 3. If you don't like any of the words the speller selects, press the spacebar.
Clear To Beginning Of Line Purpose Default Syntax Description Procedure Example Deletes text to the left of the cursor. L This command deletes all text to the left of the cursor and shifts the remaining text to the beginning of the line. To delete text to the left of the cursor: 1. Move the cursor under the rst character of the text you want to retain. 2. Press the L key. HP EDIT deletes the text to the left of the cursor and moves the remaining text to the beginning of the line.
Clear To End Of Line Clear To End Of Line Purpose Default Syntax Description Procedure Example Deletes text to the end of a line. l This command deletes all text from the cursor location to the end of the line. After the text is deleted, the cursor moves one column to the left. To delete text from the cursor location to the end of the line: 1. Move the cursor to the rst column of the text you want to delete. 2. Press the l key. HP EDIT deletes the text and moves the cursor one column to the left.
Close Window Purpose Default Syntax Description Closes the text window where the cursor is positioned. 4ESC5 W This command closes one window of a two-window screen to return the screen to a single window state. When you execute the command, HP EDIT removes the window where the cursor is located. If you are editing two di erent les in two windows, HP EDIT will hide the le and window the cursor is in when you execute the Close Window command.
Close Window d a c b 1. Move the cursor anywhere within the second window as shown. 2. Press 4ESC5, then press the W key.
Compress Blank Lines Purpose Default Syntax Replaces multiple blank lines with single blank lines. None This command does not have a default key assignment. You can either assign a key to the command using the Assign Key command or issue the command using Execute Editor Command. Description Procedure Example This command searches the speci ed number of lines for multiple blank lines and replaces each group of blank lines with a single blank line. To replace multiple blank lines: 1.
Compress Blank Lines 3. Issue Execute Editor Command (E). HP EDIT displays the prompt Command: on the message line. 4. Type compress blank lines and press 4Return5. HP EDIT removes multiple blank lines and replaces them with single blank lines as shown: Sample text 1. Sample text 2. Sample text 3. Sample text 4. Sample text 5. Sample text 6.
Compress Blank Space Purpose Default Syntax Replaces multiple blanks with single blanks. None This command does not have a default key assignment. You can either assign a key to the command using the Assign Key command or issue the command using Execute Editor Command. Description Procedures This command searches the speci ed number of lines for multiple blank spaces and replaces them with single blanks. To remove multiple blanks from a single line: 1.
Compress Blank Space 2. Type compress blank space and press 4Return5. HP EDIT removes multiple blanks and replaces them with single blanks as shown: There are excessive blanks in this line.
Copy And Append To Buffer Purpose Default Syntax Description Copy and Append Process Copy and Append Methods Adds selected text to the current Cut/Paste bu er contents. 2 3 n 4ESC5 c where n is a count that represents the number of lines to add beginning at the cursor line. The default value of n is 1. This command adds one or more lines of text to the current contents of the Cut/Paste bu er.
Copy And Append To Buffer To add lines to the bu er using blocks: 1. Select the block of text you want to copy and append. 2. Press 4ESC5 and the c key, or press the Cut/Paste function key followed by the Copy and Append function key. HP EDIT displays X lines in Cut/Paste bu er on the message line. X equals the number of lines speci ed in the block plus the previous number of lines in the bu er.
Copy To Buffer Purpose Default Syntax Description Copy Process Buffer Alteration Copies selected text to the Cut/Paste bu er. 2 3 n c where n is a count that represents the number of lines to copy beginning at the cursor line. The default value of n is 1. This command copies text to the Cut/Paste bu er. The command is used in conjunction with the Paste Before and Paste After commands to copy a segment of text to another location in a le.
Copy To Buffer Procedures To copy lines to the bu er using the manual count method: 1. Move the cursor to a column anywhere on the rst line of the group of lines to be copied. 2. Type a count that represents the number of lines you want to copy to the Cut/Paste bu er. 3. Press the c key, or press the Cut/Paste function key, followed by the Copy Lines function key.
Cursor Line To Bottom Purpose Default Syntax Description Scrolls the cursor line to the bottom of the current window. 4ESC5 4CTRL5 b This command scrolls the line where the cursor is currently positioned to the bottom of the current screen window. The cursor remains in its current position on the line after the line scrolls to its new location at the bottom of the window. Procedure Related Commands 4-74 To scroll the cursor line to the bottom of the window: 1. Press 4ESC5. 2.
Cursor Line To Center Cursor Line To Center Purpose Default Syntax Description Scrolls the cursor line to the center of the current window. 4ESC5 4CTRL5 c This command scrolls the line where the cursor is currently positioned to the center of the current window. The cursor remains in its current position on the line when the cursor line scrolls to its new location at the center of the window. Procedure Related Commands DRAFT 9/3/97 To scroll the cursor line to the center of the current window: 1.
Cursor Line To Top Purpose Default Syntax Description Scrolls the cursor line to the top of the current window. 4ESC5 4CTRL5 t This command scrolls the line where the cursor is currently positioned to the top of the current window. The cursor remains in its current position on the line when the cursor line scrolls to its new location at the top of the window. Procedure Related Commands 4-76 To scroll the cursor line to the top of the window: 1. Press 4ESC5. 2.
Cursor To Bottom Cursor To Bottom Purpose Default Syntax Description Moves the cursor to the bottom line of the current window. 4CTRL5 b This command moves the cursor from its current position to the bottom line of the current window containing text. The text remains stationary when you execute the command. The cursor moves to the same column of the bottom line as the current line column.
Cursor To Center Purpose Default Syntax Description Moves the cursor to the center line of the current window. 4CTRL5 c This command moves the cursor from its current position to the center line of the current window. The text remains stationary when you execute the command. The cursor moves to the same column of the center line as the current line column. If the cursor is currently positioned at a location beyond the length of the center line, the cursor moves left to the last character of this line.
Cursor To Top Cursor To Top Purpose Default Syntax Description Moves the cursor to the top line of the current window. 4CTRL5 t This command moves the cursor from its current position to the top line of the current window. The text remains stationary when you execute this command. The cursor moves to the same column of the top line as the current line column.
Cut And Append To Buffer Purpose Default Syntax Description Removal and Append Process Removal and Append Methods Deletes selected text and adds it to the current Cut/Paste bu er contents. 2 3 n 4ESC5 C where n is a count that represents the number of lines to add beginning at the cursor line. The default value of n is 1. This command removes one or more lines of text from a le and adds them to the current contents of the Cut/Paste bu er.
Cut And Append To Buffer To cut and add lines to the bu er using a block: 1. Select a block of text. 2. Press 4ESC5 and the C key. HP EDIT removes the lines from the text and displays X lines in cut/paste bu er on the message line. X equals the number of lines speci ed in the block plus the previous number of lines in the bu er. Example To cut and add the following lines to the current Cut/Paste bu er contents: These two lines will be cut and added to the buffer.
Cut To Buffer Purpose Default Syntax Description Removal Process Buffer Alteration Deletes selected text and moves it to the Cut/Paste bu er. 2 3 n C where n is a count that represents the number of lines to cut beginning at the cursor line. The default value of n is 1. This command removes text and places it in the Cut/Paste bu er. The command is used in conjunction with the Paste Before and Paste After commands to move a segment of text to another location in a le.
Cut To Buffer The second method is recommended if the portion of text you want to cut is not readily apparent. Procedure To cut lines into the bu er using a count: 1. Move the cursor to a column anywhere on the rst line of the group of lines to be cut. 2. Type a count representing the number of lines you want to cut and place in the Cut/Paste bu er. If the count is greater than the number of lines remaining in the le, HP EDIT only cuts the remaining lines. 3.
Cut To Buffer Related Commands 4-84 Cut And Append To Bu er Copy To Bu er Copy And Append To Bu er Paste Before Paste After Paste Over HP EDIT Commands DRAFT 9/3/97 13:43
Decrypt Decrypt Purpose Default Syntax Restores encrypted text to its original state. None This command does not have a default key assignment. You can either assign a key to the command using the Assign Key command or issue the command using Execute Editor Command. Description This command decrypts one or more lines of a le by restoring previously encrypted text to its original readable state, provided that you specify the correct encryption key.
Decrypt To decrypt more than one line of text using the default encryption key: 1. Move the cursor to a position anywhere on the rst line of the text block to be decrypted. 2. Either specify a numeric value as the count select a block. This value represents the number of lines that HP EDIT is to decrypt. 3. Issue Execute Editor Command (E). HP EDIT displays the prompt Command: on the message line. 4. Type decrypt beside the prompt and press 4Return5. HP EDIT decrypts the lines.
Decrypt With Key Decrypt With Key Purpose Default Syntax Uses a speci ed encryption key to restore encrypted lines to a readable state. None This command does not have a default key assignment. You can either assign a key to the command using the Assign Key command or issue the command using Execute Editor Command. Description This command decrypts one or more lines of a le by restoring previously encrypted text to its original readable state.
Decrypt With Key To decrypt more than one line of text: 1. Move the cursor to a position anywhere on the rst line of the text block to be decrypted. 2. Either type a count or select a block. This value represents the number of lines that HP EDIT is to decrypt. 3. Issue Execute Editor Command (E). HP EDIT displays the prompt Command: on the message line. 4. Type decrypt with key beside the prompt and press 4Return5. HP EDIT displays the prompt Key: on the message line. 5.
Define Macro Define Macro Purpose Default Syntax Description Command Process Saving Defined Macros Restrictions De nes a macro using a line of text. z This command enables you to de ne a macro that you have created on a line within a le. The command provides a manual approach for de ning macros, whereas the Begin Capture and Capture Macro commands provide an automated, interactive approach for de ning macros.
Define Macro 2. Macro Name This consists of the single key or pre xed key assigned to the macro that is to be used to subsequently execute the macro. The pre xed key is indicated with a dollar sign ($) following the assigned key. A control key is indicated by a caret (^) preceding the assigned key. You can automatically execute a macro whenever an editing session begins by naming it ^@ and saving it to the default EDCONFIG le. The macro ^@ is known as the Autostart macro.
Define Macro Procedure Examples To de ne a macro from text: 1. Insert a new line in text by executing the Insert Line (I) command. 2. Type in a macro beginning at the cursor position at the far left column, using the appropriate macro syntax discussed in the last section. 3. Press / and 4Return5 to exit Text Entry mode and enter Command mode. 4. Press the z key. HP EDIT deletes the macro de nition from the screen and stores it for subsequent execution.
Define Macro 3. Press / and 4Return5 to exit Text Entry mode and enter Command mode. 4. Press the z key. HP EDIT deletes the macro from the screen and stores it for subsequent execution. HP EDIT also displays the following message: Macro defined To de ne a non-preemptive macro named B that appends Begin: to the end of a line: 1. Insert a new line in text by executing the Insert Line (I) command. 2. Type the following macro beginning at the start of the line: mB=; Begin:/^m 3.
Define Macro 4. Press the z key. HP EDIT deletes the macro from the screen and stores it for subsequent execution.
Define Multiple Macros Purpose Default Syntax Description Command Process De nes several macros from contiguous lines of text. 4ESC5 z This command enables you to de ne several macros that you have created on separate, adjacent lines within a le. The command provides a manual approach for de ning macros, whereas the Begin Capture and Capture Macro commands provide an automated, interactive approach for de ning macros.
Define Multiple Macros To create a chain of macros, you create individual macros; each macro performs a portion of the desired task. You chain the macros by having each macro go to or call the next macro. An example of chaining appears in the Examples section. Macro Syntax Procedure Examples Refer to the De ne Macro command for complete syntax information. To de ne several macros from text: 1. Insert a new line in text by executing the Insert Line (I) command. 2.
Define Multiple Macros To de ne a chain of macros that appends three lines of text: 1. Insert a new line in text by executing the Insert Line (I) command. 2. Type in the following macros on three separate lines: ma=AThis line will be connected to/^mMb mb=Athis line and the next by/^mMc mc=Achaining each line./^mQ 3. Press / and 4Return5 to exit Text Entry mode and enter Command mode. 4. Move the cursor to the rst macro of the group. 5. Press 4ESC5, then press the z key.
Define Replace Pattern Define Replace Pattern Purpose Default Syntax Description Enables you to de ne a replacement pattern for subsequent search and replace commands. = This command enables you to de ne a replacement pattern so that you can execute subsequent search and replace commands. You can specify a replacement pattern consisting of a string up to 80 characters in length. You can also specify an empty replacement pattern.
Define Replace Pattern 3. Press the 4Return5 key. HP EDIT retains the prompt and the empty replacement pattern is placed within the parentheses. The replacement pattern is now stored for subsequent search and replace commands. Examples To de ne a replacement pattern consisting of the word EQUATE: 1. Press the = key. HP EDIT displays the following prompt on the message line: Replace with () : _ 2. Type the word equate at the cursor position.
Define Replace Pattern From Macro Define Replace Pattern From Macro Purpose Default Syntax Description Command Process Syntax Considerations Enables you to de ne a replace pattern within an executing macro. $= This command, when executed within a macro, suspends a currently executing macro and enables you to de ne a replace pattern by responding to a prompt. When you execute the macro, HP EDIT temporarily suspends macro execution and prompts you for replacement text of up to 80 characters.
Define Replace Pattern From Macro 3. Press / and 4Return5 to exit Text Entry mode and enter Command mode. 4. Execute the De ne Macro (z) command. HP EDIT removes the macro from the screen and stores it for subsequent execution. HP EDIT also displays Macro de ned on the message line. 5. Issue the Execute Macro (m) command. HP EDIT displays Specify macroname on the message line. 6. Press 4ESC5. HP EDIT displays Specify meta-macroname on the message line. 7. Press the R key. HP EDIT prints See message line...
Define Replace Pattern From Text Define Replace Pattern From Text Purpose Default Syntax De nes a pattern from text for subsequent search and replace commands. None This command does not have a default key assignment. You can either assign a key to the command using the Assign Key command or issue the command using Execute Editor Command.
Define Replace Pattern From Text current replacement pattern on the message line. Press 4Return5 to preserve the current replacement pattern. Example To edit the current replacement pattern of INTEGR: 1. Issue Execute Editor Command (E). HP EDIT displays the following prompt on the message line: Command: _ 2. Type insert replace pattern beginning at the cursor position and press 4Return5. HP EDIT inserts integr above the current line. 3.
Define Search Pattern Define Search Pattern Purpose Default Syntax Description Command Process Enables you to de ne a search pattern for subsequent search and replace commands. f This command enables you to de ne a search pattern so that you can execute subsequent search commands or search and replace commands. You can specify a search pattern consisting of a string up to 80 characters in length.
Define Search Pattern You can insert pattern-matching characters before, within, or after the search pattern. You can also use more than one pattern-matching character, or multiples of the same character, within the search pattern. If you want HP EDIT to interpret a pattern-matching character literally, you can precede the character with a back slash ( ).
Define Search Pattern [~ ] # Procedure Matches any character not in the set within the brackets. The pattern within the brackets can consist of a single character, a series of single characters, or a range of characters. For instance, if you want to search for all four-character strings that start with th and end with n except for thin , you could specify th[~i]n as the search pattern. Matches any single digit. To de ne a search pattern: 1.
Define Search Pattern To de ne a search pattern consisting of the letter A followed by any four characters: 1. Press the f key. HP EDIT displays the following prompt on the message line: Search for () : _ 2. Type the following text as shown: Search for () : a????_ 3. Press 4Return5. To de ne a search pattern consisting of any line ending with a pattern beginning with the letter a, followed by zero or more letter b's, followed by a single letter z: 1. Press the f key.
Define Search Pattern From Macro Define Search Pattern From Macro Purpose Default Syntax Description Command Process Syntax Considerations Enables you to de ne a search pattern within an executing macro. $f This command, when executed within a macro, suspends a currently executing macro and enables you to de ne a search pattern by responding to a prompt.
Define Search Pattern From Macro Example To construct, de ne, and execute a macro that pauses for you to de ne a search pattern: 1. Insert a new line in text by executing the Insert Line (I) command. 2. Type in the following macro beginning at the cursor position: mS=ASee message line.../^m$fA...Search pattern defined/^m 3. Press / and 4Return5 to exit Text Entry mode and enter Command mode. 4. Execute the De ne Macro (z) command.
Define Search Pattern From Text Define Search Pattern From Text Purpose Default Syntax De nes a pattern from text for subsequent search and replace commands. None This command does not have a default key assignment. You can either assign a key to the command using the Assign Key command or issue the command using Execute Editor Command.
Define Search Pattern From Text 4. Press 4Return5. HP EDIT displays Search pattern de ned on the message line. The search pattern is now stored for subsequent search commands. You can check the search pattern contents by executing the De ne Search Pattern (f) command. HP EDIT displays the current search pattern on the message line. Press 4Return5 to retain the current search pattern. To de ne a search pattern using character blocks: 1. Move the cursor to the point you want the search pattern to begin. 2.
Define Search Pattern From Text 5. Type de ne search pattern from text beginning at the cursor position and press 4Return5. HP EDIT displays the following message: Search pattern defined: T[A-Z][A-Z][A-Z][A-Z][A-Z] The modi ed search pattern is now stored for subsequent search commands.
Define Sort Key Columns Purpose Default Syntax Description Procedure De nes column boundaries for the sort commands. 4ESC5 k This command de nes left and right column boundaries for the key eld used by the Sort Ascending and Sort Descending commands. When you use one of the sort commands, HP EDIT sorts each line based on the string value of the key located between the column boundaries. When you issue this command, HP EDIT prompts for left and right column boundary values.
Delay Delay Purpose Default Syntax Pauses for a speci ed period of time before proceeding with the next operation. None Since default keys are not assigned to this command, you may either assign a key to the command using the Assign Key command, or you can access the command by using the command Execute Editor Command. Refer to reference information on these commands elsewhere in this manual for descriptions about command usage.
Delay Example To construct and execute macro P, which displays the message BEGINNING SECOND PASS . . . for three seconds: 1. Assign the q key to the Delay command, using the Assign Key (K) command. 2. Insert a new line in text by executing the Insert Line (I) command. 3. Type the following text: mP=$"Beginning second pass...^mqqq 4. Press / and 4Return5 to exit Text Entry mode. 5. Execute the De ne Macro (z) command.
Delete All Macros Delete All Macros Purpose Default Syntax Description Deletes all currently de ned macros. 4ESC5 4CTRL5 d This command deletes all currently de ned macros, which consist of: Macros de ned during the current session and Macros de ned before the current session that were saved to the EDCONFIG le or another con guration le and then read in during the current session with the Load Con g File command. Procedure Related Commands DRAFT 9/3/97 To delete all macros: 1. Press 4ESC5. 2.
Delete Character Purpose Default Syntax Description Deletes a character from a line. 2 3 n d where n is a count that represents the number of characters to delete beginning at the cursor position. The default value of n is 1. This command deletes one or more characters or blank spaces from a line of text. When you execute the command, HP EDIT deletes the character or blank space where the cursor is currently positioned and shifts the remaining text on the line one column to the left.
Delete Character Example To delete the following cursor character: This words has an unwanted character. 1. Move the cursor to the position shown above. 2. Press the d key. HP EDIT deletes the letter s as shown: This word_has an unwanted character.
Delete Leading Blanks Purpose Default Syntax Description Procedure Removes leading blank characters. 2 3 n 4ESC5 where n is a count that represents the number of lines in which leading blanks are to be removed. The default value of n is 1. This command removes leading blank characters from the speci ed number of lines and left justi es the lines. To remove leading blank characters from a single line: 1.
Delete Leading Blanks The leading blanks in these lines will be removed.
Delete Line Purpose Default Syntax Description Deletes a line from the le. 2 3 n D where n is a count that represents the number of lines to delete beginning at the cursor position. The default value of n is 1. This command deletes one or more lines from the current le session. HP EDIT deletes the line where the cursor is currently positioned and moves the following line up to the cursor position.
Delete Line 1. Move the cursor anywhere on the second line as shown. 2. Type the number 2 as the count and press 4Return5. 3. Press the D key. HP EDIT deletes the lines and retains the rst and fourth lines as shown: This line will remain. This line will also remain.
Delete Macro Purpose Default Syntax Description Procedure Deletes a speci ed macro. 4ESC5 D This command deletes a macro when you provide a valid macro name. A valid macro name consists of the key that you assigned to the speci ed macro using the Capture Macro or De ne Macro command. To delete a macro: 1. Press 4ESC5, then press the D key. HP EDIT displays Specify macroname on the message line. If the key assigned to the macro is pre xed by the Meta key, proceed to step 2. If not, skip to step 3. 2.
Delete Pattern Delete Pattern Purpose Default Syntax Description Deletes text matching the search pattern. 4ESC5 d This command deletes text that matches the search pattern. Before this command can function, you rst must de ne a search pattern with the De ne Search Pattern command. The search pattern can consist of a string of up to 80 characters. Once you have de ned the search pattern, you can use the Search Forward or Search Backward commands to locate the text pattern you want to delete.
Delete Pattern Related Commands 4-124 De ne Search Pattern Search Backward Search Forward HP EDIT Commands DRAFT 9/3/97 13:43
Delete Word Delete Word Purpose Default Syntax Description Deletes a word from a line. 2 3 n 4CTRL5 d where n is a count that represents the number of words to delete beginning at the cursor position. The default value of n is 1. This command deletes one or more words from a line of text. The e ect of the command on text depends on how a word is de ned. Refer to the next section for the de nition of a word.
Delete Word [~ ] Procedures Words consist of any non-space characters separated by spaces. To delete a single word: 1. Move the cursor to the rst character of the word to be deleted. 2. Press and hold 4CTRL5, then press the d key. HP EDIT deletes the word and shifts the remaining text left to the cursor position. To delete several words: 1. Move the cursor to the rst character of the rst word of the group to be deleted. 2.
Describe Describe Purpose Provides a brief command description. None Default Syntax This command does not have a default key assignment. You can either assign a key to the command using the Assign Key command or issue the command using Execute Editor Command. Description Command Process Options DRAFT 9/3/97 This command provides information about a speci ed command, including syntax, a brief description, and basic procedure.
Describe Attempts to execute the entire or partial command name speci ed. If HP EDIT cannot execute the command as speci ed, it displays the portion that it recognizes. You must then supply the remaining minimum number of characters necessary for HP EDIT to execute the command. 4Return5 For instance, if you only type for and press 4Return5, HP EDIT completes the word to forward and moves the cursor beyond this word.
Describe Example To obtain a brief description for the Paste After and Paste Before commands: 1. Issue Execute Editor Command (E). HP EDIT displays the following prompt on the message line: Command: _ 2. Type describe and press 4Return5. HP EDIT displays the Command Description screen and prompt as shown: 3. Type paste after at the cursor position and press 4Return5 HP EDIT displays the following information for the command and moves the cursor to the bottom of the text: 4.
Describe 5. Press 4CTRL5 y to exit the Command Description screen and return to the editing session.
Display Message Display Message Purpose Default Syntax Description Command Process Syntax Considerations Displays a message during execution of a macro. 4ESC5 " This command, when executed within a macro along with accompanying message text, displays a message on the message line during macro execution. To construct a macro that displays a message during macro execution, you rst incorporate this command and accompanying macro message text within the macro.
Display Message Example To construct and execute macro P, which displays the message BEGINNING SECOND PASS . . . for three seconds: 1. Assign the q key to the Delay command, using the Assign Key (K) command. 2. Insert a new line in text by executing the Insert Line (I) command. 3. Type the following text: mP=$"Beginning second pass...^mqqq 4. Press / and 4Return5 to exit Text Entry mode. 5. Execute the De ne Macro (z) command.
Downshift Character Downshift Character Purpose Default Syntax Description Converts one or more alphabetic characters to lowercase. 2 3 n v where n is a count that represents the number of characters to convert to lowercase. The default value of n is 1. This command converts one or more alphabetic characters on the cursor line from uppercase to lowercase by scanning the number of characters speci ed. HP EDIT does not convert non-uppercase characters, such as digits.
Downshift Character Example To convert the rst ten characters of the following line to lowercase: ABC123defGHI 1. Move the cursor to the rst character of the line as shown. 2. Type the number 10 as the count and press 4Return5. 3. Press the v key.
Downshift Line Downshift Line Purpose Default Syntax Description Converts one or more lines to lowercase. 2 3 n V where n is a count that represents the number of lines to convert to lowercase. The default value of n is 1. This command converts all the uppercase alphabetic characters on one or more lines to lowercase. HP EDIT does not convert non-uppercase characters, such as digits.
Downshift Line Example To convert the following line to lowercase: ABC123defGHI 1. Move the cursor anywhere on the line as shown. 2. Press the V key.
Downshift Word Downshift Word Purpose Default Syntax Description Converts the alphabetic characters in one or more words to lowercase. 2 3 n 4CTRL5 v where n is a count that represents the number of words to convert to lowercase. The default value of n is 1. This command converts any uppercase alphabetic characters in one or more words on the cursor line to lowercase. Non-uppercase alphabetic characters remain unchanged.
Downshift Word Procedures To convert one uppercase word to lowercase: 1. Move the cursor to the rst character of the word you want to convert. 2. Press and hold 4CTRL5, then press the v key. HP EDIT converts the word and moves the cursor to the rst character of the next word. To convert more than one uppercase word to lowercase: 1. Move the cursor to the rst character of the group of words you want to convert. 2. Type a count, or use the Set Mark (`) and Set Distance To Mark (#) commands to set the count.
Edit Line Number Edit Line Number Purpose Default Syntax Description Enables you to renumber a line of text. 4CTRL5 e This command enables you to change the line number of the current line of text. You can change line numbers only if the current le is numbered and the Display Line Numbers option is yes. The default for this option is yes for COBOL-numbered les and no for standard-numbered les. Refer to \Line Numbering" in chapter 2 for complete information on this subject.
Edit Line Number Examples To edit the second line number of the following standard-numbered le: 14 15 16 Move the cursor to the following line to edit this line number between lines 14 and 16. 1. Move the cursor anywhere on the second line as shown. 2. Press and hold 4CTRL5, then press the e key. HP EDIT erases the current line number and moves the cursor to the rst column of the line as shown: 14 16 Move the cursor to the following line to edit this line number between lines 14 and 16. 3. Type 15.
Encrypt Encrypt Purpose Default Syntax Secures text by making one or more lines of a le unreadable. None This command does not have a default key assignment. You can either assign a key to the command using the Assign Key command or issue the command using Execute Editor Command. Description This command encrypts one or more lines of a le. The purpose of encryption is to render a le or selected portions of a le unreadable, while preserving the integrity of the le contents.
Encrypt To encrypt a line of text using a speci ed encryption key: 1. Set the encryption key using the Set Encryption Key command. Refer to this command for instructions about selecting a user-de ned password key. 2. Move the cursor to a position anywhere on the line to be encrypted. 3. Issue Execute Editor Command (E). HP EDIT displays the prompt Command: on the message line. 4. Type encrypt beside the prompt and press 4Return5. HP EDIT encrypts the line.
Encrypt With Key Encrypt With Key Purpose Default Syntax Uses a speci ed encryption key to make text unreadable. None This command does not have a default key assignment. You can either assign a key to the command using the Assign Key command or issue the command using Execute Editor Command. Description This command encrypts one or more lines of a le. The purpose of encryption is to render a le or selected portions of a le unreadable, while preserving the integrity of the le contents.
Encrypt With Key To encrypt more than one line of text with a speci ed password key: 1. Move the cursor to a position anywhere on the rst line of the text block to be encrypted. 2. Type a count or select a block. This value represents the number of lines that HP EDIT is to encrypt. 3. Issue Execute Editor Command (E). HP EDIT displays the prompt Command: on the message line. 4. Type encrypt with key beside the prompt and press 4Return5. HP EDIT displays the prompt Key: on the message line. 5.
End of Line End of Line Purpose Default Syntax Description Procedure Moves the cursor to the end of the line. ] This command moves the cursor from its current position on a line of text to the last character of the line. To move the cursor, either: 1. Press the ] key. or 1. Press the Position Commands function key. 2. Press the End of Line function key.
Execute Editor Command Purpose Executes any valid HP EDIT command by name. E Default Syntax Description Command Process This command prompts for an HP EDIT command name and executes a valid entry. The primary purpose of this command is to enable you to execute commands that do not have keys assigned to them. However, you can use this command to execute any HP EDIT command, regardless of whether a key is assigned to it or not. When you execute the command, HP EDIT prompts you for the command name.
Execute Editor Command command begins with the word forward . If you then type ?, HP EDIT displays a list of possible entries. You would then press 4Return5 and supply the desired word that completes the command, which is either character, line, or word. Attempts to execute the entire or partial command name speci ed. If HP EDIT cannot execute the command as speci ed, it displays the portion that it recognizes.
Execute Editor Command Procedure Example To execute a command by name: 1. Press the E key, or press the MPE and Options function key, followed by the Execute Command function key. HP EDIT displays the prompt Command: on the message line. 2. Type a valid command name and press 4Return5. HP EDIT executes the named command. To execute the command Compress Blank Lines using the command completion keys: 1.
Execute Editor Command 4. Press the l key (representing lines ) at the cursor position and press 4Return5. HP EDIT executes the command.
Execute Macro Purpose Default Syntax Description Applications Runs a macro and returns to the current input level. 2 3 n m where n represents the number of times you want the macro to execute. The default value of n is 1. This command executes a preemptive or non-preemptive macro. In order to execute a macro from within a macro, you must use either this command or the Go To Macro command. A key assigned to a non-preemptive macro does not preempt the same key assigned to an HP EDIT command.
Execute Macro Procedure Example To execute a macro: 1. Press the m key. HP EDIT displays Specify macroname on the message line. If the key assigned to the macro is pre xed by the Meta key, proceed to step 2. If not, skip to step 3. 2. Press the 4ESC5 or $ key. HP EDIT displays Specify meta-macroname on the message line. 3. Press the key assigned to the macro that you want to execute. HP EDIT responds to a valid key by executing the corresponding macro.
Execute Macro Related Commands 4-152 Begin Capture Capture Macro De ne Macro De ne Multiple Macros Delete All Macros Delete Macro Go To Macro Insert All Macros Insert Macro Quit Macro Show Macros Use Current Key Assignment HP EDIT Commands DRAFT 9/3/97 13:43
Execute MPE Command Execute MPE Command Purpose Default Syntax Description Enables execution of certain MPE commands. : This command temporarily suspends editing and enables you to execute MPE commands and command les. On MPE XL you can also execute user de ned commands (UDCs). Executing MPE commands, command les, or UDCs will not end the current editing session. You can also execute commands that run programs (COB85XL, for example).
Execute MPE Command Example To display a list of les: 1. Press the : key. HP EDIT displays the following message and prompt at the top of an otherwise blank screen: Press RETURN to reenter editor :_ 2. Type listf and press 4Return5. HP EDIT displays output similar to the following: SAMPLE 1 SAMPLE2 SAMPLE3 :_ 3. Press 4Return5. HP EDIT returns to the editing session.
Exit Exit Purpose Default Syntax Description Concludes the current editing session. e This command concludes the current editing session by exiting HP EDIT and either returning to the parent session or the MPE command interpreter, depending on the current session type. You can exit the session if one of the following conditions has been met: You have not made any changes to the le. You have saved all changes with the Keep Text command.
Exit 2. Reply to the prompt by either typing y for yes or n for no. If you reply yes, HP EDIT returns you to the MPE command interpreter. If you reply no, HP EDIT cancels the command and returns you to the current editing session. You must then save the current le changes with the Keep Text command before exiting the session. To exit multiple sessions: 1. Execute the Activate Next Process 4CTRL5 n command repeatedly until the most recently created child session appears. 2. Press the e key.
Fill Character Fill Character Purpose Default Syntax Description Duplicates a character a speci ed number of times. 2 3 n 4ESC5 ' where n is a count that represents the number of character columns you want the character to ll using the remaining space on a line. The minimum useful value of n is 2 and its maximum value is 80. This command duplicates the current character the speci ed number of times and inserts the resulting string beginning at the current cursor position.
Find . Purpose Default Syntax Description Procedure Searches forward for the next period. 2 3 n . where n is a count that represents the n th period from the current cursor location. The default value of n is 1. This command causes HP EDIT to search forward in the le until it nds the next period or the period indicated by the count. When HP EDIT nds the n th period, it moves the cursor to that location and highlights the period if the Highlight Match parameter of the Set Options screen is enabled.
Find All Occurrences Find All Occurrences Purpose Default Syntax Description Procedure Provides a method for rapid movement to a line containing a search pattern. 2 3 n G where n is a count that speci es the numbers of lines to nd all occurrences of the search pattern. If you execute the Find All Occurrences command without a count, HP EDIT searches the entire le. This command allows rapid movement to a line containing the search pattern.
Find All Occurrences Related Commands 4-160 Find Blank Space Find Character Find . Find Previous Blank Space Find Previous Character Find Previous .
Find Blank Space Find Blank Space Purpose Default Syntax Description Searches forward for an occurrence of one or more blank characters. 2 3 n _ where n is a count that represents the n th blank space from the current cursor location. The default value of n is 1. This command causes HP EDIT to search forward in the le until it nds the next occurrence of one or more contiguous blank characters or the nth blank space indicated by the count.
Find Character Purpose Default Syntax Description Searches forward for the speci ed character. 2 3 n F where n is a count that represents the n th occurrence of the speci ed character from the current cursor location. The default value of n is 1. This command causes HP EDIT to prompt for a character and search forward in the le until it nds the next occurrence of this character or the n th occurrence indicated by the count.
Find Character 3. Press the s key. HP EDIT moves the cursor to the seventh occurrence of the letter s as shown: This is a sample line. This is the second sample line. Related Commands DRAFT 9/3/97 Find All Occurrences Find Blank Space Find Matching Delimiter Find . Find Previous Blank Space Find Previous Character Find Previous .
Find Matching Delimiter Purpose Default Syntax Description Searches for the matching delimiter of a delimiter pair. , This command searches for the delimiter matching the delimiter where the cursor is currently positioned. Recognized delimiters are: { } [ ] ( ) When HP EDIT nds the matching delimiter, it moves the cursor to that location. HP EDIT may search forward or backward, depending on whether the cursor is positioned on the rst or second delimiter of the pair.
Find Matching Delimiter Related Commands DRAFT 9/3/97 Find All Occurrences Find Blank Space Find Character Find . Find Previous Blank Space Find Previous Character Find Previous .
Find Previous . Purpose Default Syntax Description Searches backward for the previous period. 2 3 n 4ESC5 . where n is a count that represents the n th occurrence of a previous period from the current cursor location. The default value of n is 1. This command causes HP EDIT to search backward in the le until it nds the previous period or the n th previous period indicated by the count. When HP EDIT nds the previous or speci ed period, it moves the cursor to that location and highlights it.
Find Previous Blank Space Find Previous Blank Space Purpose Default Syntax Description Searches backward for the previous occurrence of one or more consecutive blanks. 2 3 n 4ESC5 _ where n is a count that represents the n th blank space from the current cursor location. The default value of n is 1. This command causes HP EDIT to search backward in the le until it nds the previous group of one or more blank characters, or the n th occurrence of a blank space indicated by the count.
Find Previous Character Purpose Default Syntax Description Searches backward for the speci ed character. 2 3 n 4ESC5 F where n is a count that represents the n th occurrence of the speci ed character from the current cursor location. The default value of n is 1. This command causes HP EDIT to prompt for a character and search backward in the le until it nds the previous occurrence of the character speci ed or the n th occurrence of the character indicated by the count.
Find Previous Character 2. Press 4ESC5, then press the F key. HP EDIT displays the following prompt: Specify search character 3. Press the s key. HP EDIT moves the cursor to the seventh previous occurrence of the letter s as shown: This is a sample line. This is the second sample line. Related Commands DRAFT 9/3/97 Find All Occurrences Find Blank Space Find Character Find Matching Delimiter Find . Find Previous Blank Space Find Previous .
Forward Character Purpose Default Syntax Description Procedures Moves the cursor one or more characters to the right. 2 3 n 4Spacebar5 where n is a count that represents the number of characters to the right the cursor is to move. The default value of n is 1. This command moves the cursor one or more characters to the right of its current position.
Forward Line Forward Line Purpose Default Syntax Description Moves the cursor down one or more lines. 2 3 2 3 n + or n 4Return5 where n is a count that represents the number of lines the cursor is to move down. The default value of n is 1. This command moves the cursor one or more lines below its current position. If the desired line contains text, the cursor moves to the rst non-blank character. If the desired line contains no text, the cursor moves to the rst column of the line.
Forward Word Purpose Default Syntax Description Word Definition Moves the cursor to the next word. 2 3 n w where n is a count that represents the number of words to the right the cursor is to move. The default value of n is 1. This command moves the cursor to the rst character of the next word. The cursor moves to the next line when: The cursor is positioned at the last word of a line and you enter the command.
Forward Word Procedures To move the cursor to the beginning of the next word: 1. Press the w key. To move the cursor more than one word to the right, either: 1. Type a count representing the number of words you want the cursor to move. 2. Press the w key. HP EDIT moves the cursor the speci ed number of words. or 1. Press the w key repeatedly until the cursor is positioned at the desired location. Examples To move the cursor to the beginning of the word HERE: Move the cursor here. 1.
Global Search And Replace Backward Purpose Default Syntax Description Searches backward to the beginning of the le and replaces text. 4ESC5 { This command searches backward in the le and globally replaces all occurrences of the current search pattern with the current replacement pattern. The Global Search And Replace Forward command functions essentially the same as the Search And Replace Backward command with the + option.
Global Search And Replace Backward c. Displays X occurrences were replaced on the message line, where X equals the number of occurrences replaced.
Global Search And Replace Forward Purpose Default Syntax Description Searches forward to the end of the le and replaces text. 4ESC5 } This command searches forward in the le and replaces all occurrences of the current search pattern with the current replacement pattern. The command functions virtually the same as the Search And Replace Forward command with the + option.
Global Search And Replace Forward Related Commands DRAFT 9/3/97 De ne Replace Pattern De ne Replace Pattern From Text De ne Search Pattern De ne Search Pattern From Text Global Search And Replace Backward Insert Replace Pattern Insert Search Pattern Search And Replace Backward Search And Replace Forward Search Backward Search Forward HP EDIT Commands 13:43 4-177
Go To Column/Mark Purpose Default Syntax Description Column Function Moves the cursor to a speci ed column within a line or to a text mark. 2 3 n 4ESC5 g where n is a count that represents a mark number from 1 to 11. This command serves a dual purpose. You can either use the command to move the cursor to another column within the current cursor line, or you can use the command to move the cursor to a location that has been previously marked with the Set Mark command.
Go To Column/Mark screen column 10, which is the second column of text past the line number. This corresponds to the eighth character in the actual text line. If numbers are not displayed, HP EDIT treats the invisible numbers as six column positions. The resultant screen column is six less than the speci ed text column. Mark Function Procedure If you want to move the cursor to a text mark, you supply the mark number as a count before entering the command.
Go To Column/Mark To move the cursor to text column 10 in the following standard-numbered line: 12 Move the cursor in this line. 1. Press 4ESC5, then press the g key. HP EDIT displays the following prompt: Column? 2. Type the number 10 and press 4Return5. HP EDIT moves the cursor to text column 10 (screen column 20) as shown: 12 Move the cursor in this line. To move the cursor to text column 10 in the following COBOL-numbered line: 1.7 Move the cursor in this line. 1. Press 4ESC5, then the g key.
Go To Line/Mark Go To Line/Mark Purpose Default Syntax Description Line Function Moves the cursor to a speci ed line or to a text mark. 2 3 n g where n is a count that represents a mark number from 1 to 11. This command provides you with two methods of moving the cursor to a line. The method you select depends on whether you want to specify a particular line number or a line that has been previously marked with the Set Mark command.
Go To Line/Mark 2. Press the g key. HP EDIT moves the cursor to the line where the marked text is located.
Go To Macro Go To Macro Purpose Default Syntax Runs a macro at the current input level. [n ]M where n is a count that represents the number of times you want the macro to execute. The default value of n is 1. Description Command Application This command executes a preemptive or non-preemptive macro. In order to execute a non-preemptive macro or preemptive macro from within a macro, you must use either this command or the Execute Macro command.
Go To Macro 4. Press the key assigned to the macro that you want to execute. HP EDIT responds to a valid key entry by executing the corresponding macro. Example To construct, de ne, and execute a chain of macros that appends three lines of text: 1. Insert a new line in text by executing the Insert Line (I) command. 2. Type in the following chain of macros on three separate lines: ma=AThis line will be connected to/^mMb mb=Athis line and the next by/^mMc mc=Achaining each line./^mQ 3.
Go To Macro Related Commands DRAFT 9/3/97 Begin Capture Capture Macro De ne Macro De ne Multiple Macros Delete All Macros Delete Macro Execute Macro Insert All Macros Insert Macro Quit Macro Show Macros Use Current Key Assignment HP EDIT Commands 13:43 4-185
Help Purpose Default Syntax Description Using The Help System Accesses the Help system.
Help Commands by Topic If you need information about a speci c editor topic, select the Commands by Topic screen, which is shown below: d a c b When this screen appears, you can select a topic for which you need information, or you can view the next screen for a list of advanced topics. When you select a topic, HP EDIT provides one or more screenfuls of information about the topic.
Help d a c b As you scroll the list, HP EDIT rst shows all of the assigned single key commands in alphabetical order. HP EDIT then shows the remaining assigned pre xed key commands in alphabetical order. It is not necessary to scroll through the entire list to perform another function.
Help Brief description Basic procedure After you have read the information for a speci ed command, you can do one of the following: Enter another command name to read another command description Return to the Main Help screen Exit the Help system Key Description If you want a brief description of a command by key assignment, you press the desired key assigned to a command.
Help Procedure Related Commands 4-190 To access the Main Help screen and select a Help category: 1. Press either the h key, H key, ? key, or Help function key, if enabled. HP EDIT suspends the editing session and displays the Main Help screen. 2. Select one of the Help categories by pressing the number corresponding to the category, or by pressing the appropriate function key. HP EDIT displays the help screen or screen for the speci ed category.
Insert All Key Assignments Insert All Key Assignments Purpose Default Syntax Inserts a list of all key assignments in the current le. None This command does not have a default key assignment. You can either assign a key to the command using the Assign Key command or issue the command using Execute Editor Command. Description This command inserts a list of all assigned keys with the names of corresponding commands above the current line.
Insert All Key Assignments 2. Type insert all key assignments and press 4Return5. HP EDIT displays Inserting key assignments on the message line. After pausing brie y, HP EDIT inserts the list above the cursor line, revealing the bottom entries of the list. You can scroll to the top of the list by executing the Swap With Previous Location (4ESC5 @) command.
Insert All Macros Insert All Macros Purpose Default Syntax Description Inserts all macro de nitions above the cursor line. 4ESC5 Z This command inserts all current macro de nitions above the cursor line, enabling you to view all macros or edit and rede ne one or more macros. This command is bene cial if you cannot recall keys assigned to macros, or if you want to modify several macros at one time. When you execute the command, HP EDIT inserts all macros in alphabetical order above the cursor line.
Insert All Macros 3. Move the cursor to the position shown on the second macro: Three current macros will be inserted mc=iHow are you?/^m mx=iHello there/^m mz=iHello!/^m above this line. 4. Execute the Insert Character (i) command to access Text Entry mode. 5. Press the ! key, then press / and 4Return5 to return to Command mode. 6. Rede ne this modi ed macro by executing the De ne Macro (z) command. HP EDIT deletes the macro from the screen and stores it as an executable macro.
Insert Character Insert Character Purpose Default Syntax Description Command Process Enables a user to insert text on a line. 2 3 n i This command places the editor in Text Entry mode and enables you to insert text on the current line preceding the character under the cursor. When you execute this command, all of the original text beginning at the insert location shifts to the right when you enter text.
Insert Character 1. Move the cursor to the position shown above and press the i key. HP EDIT invokes Text Entry mode. 2. Type reaching and press the space bar. 3. Press / and 4Return5 to return to Command mode. HP EDIT inserts the new text as shown: Insert text before reaching_this location.
Insert Character From Macro Insert Character From Macro Purpose Default Syntax Description Command Process Enables you to insert text at the cursor position within an executing macro. $i This command, when executed within a macro, suspends a currently executing macro and enables you to insert text starting at the current character. When the macro pauses for your input, HP EDIT enables you to insert text beginning at the cursor position.
Insert Character From Macro Example To construct, de ne, and execute a macro that pauses for you to insert text before the current character: 1. Insert a new line in text by executing the Insert Line (I) command. 2. Type in the following macro beginning at the cursor position: mi=AInsert a charactr/^m^H$i; to correct the text./^m Note that the ^H signi es a backspace. 3. Press / and 4Return5 to exit Text Entry mode and enter Command mode. 4. Execute the De ne Macro (z) command.
Insert Character From Macro Related Commands DRAFT 9/3/97 Append Line From Macro Append To Character From Macro Append To End Of Line From Macro Append To Word From Macro De ne Replace Pattern From Macro De ne Search Pattern From Macro Insert Character Insert Line From Macro Replace Character From Macro Replace Line From Macro Replace Word From Macro Overwrite From Macro HP EDIT Commands 13:43 4-199
Insert Date Purpose Default Syntax Inserts the current date and time. None This command does not have a default key assignment. You can either assign a key to the command using the Assign Key command or issue the command using Execute Editor Command. Description Procedure Related Commands 4-200 This command time stamps your le by inserting the current date and time on a separate line above the current text line. To insert the date and time: 1.
Insert Filename Insert Filename Purpose Default Syntax Inserts the current le name. None This command does not have a default key assignment. You can either assign a key to the command using the Assign Key command or issue the command using Execute Editor Command. Description This command inserts the current le name into text as a new line above the current line. You can use this command in conjunction with the Change Filename From Text command to edit a le name.
Insert Line Purpose Default Syntax Description Enables a user to add text above the current line. I This command places the editor in Text Entry mode and enables you to add text starting at the beginning of a new line. When you execute this command, HP EDIT moves the cursor to the rst column of a new line above the current line, enabling you to add unlimited text. You can add subsequent lines by pressing 4Return5 without preceding it with the / key.
Insert Line 2. Type This new text precedes the next line. and press / and 4Return5 to return to Command mode. HP EDIT adds the new text as shown: This new text precedes the next line. Text will be added above this line.
Insert Line From Macro Purpose Default Syntax Description Command Process Syntax Considerations Enables you to insert a new line within an executing macro. $I This command, when executed within a macro, suspends a currently executing macro and enables you to insert a new line above the current line. When the macro pauses for your input, HP EDIT moves the cursor to the rst column of a new line above the current line, enabling you to add new text.
Insert Line From Macro Example To construct, de ne, and execute a macro that pauses for you to insert a new line above the current line: 1. Insert a new line in text by executing the Insert Line (I) command. 2. Type in the following macro beginning at the cursor position: mI=AInsert a line/^m$I; new text./^m 3. Press / and 4Return5 to exit Text Entry mode and enter Command mode. 4. Execute the De ne Macro (z) command. HP EDIT removes the macro from the screen and stores it for subsequent execution. 5.
Insert Line From Macro Related Commands 4-206 Append Line From Macro Append To Character From Macro Append To End Of Line From Macro Append To Word From Macro De ne Replace Pattern From Macro De ne Search Pattern From Macro Insert Character From Macro Insert Line Replace Character From Macro Replace Line From Macro Replace Word From Macro Overwrite From Macro HP EDIT Commands DRAFT 9/3/97 13:43
Insert Macro Insert Macro Purpose Default Syntax Description Inserts a macro de nition above the cursor line. Z This command inserts a speci ed macro above the cursor line, enabling you to edit and then rede ne the macro. For instance, you may want to modify an existing macro by adding or deleting text, rather than deleting the macro and rekeying the entire text. You would rst execute this command to insert the macro, then you would edit it as desired.
Insert Macro 3. Move the cursor to the slash (/), then execute the Insert Character (i) command to access Text Entry mode. 4. Type there! beginning at the cursor position as shown: mH=AHello there!/^m 5. Press / and 4Return5 to return to Command mode. 6. Rede ne this modi ed macro by executing the De ne Macro (z) command. HP EDIT deletes the macro from the screen, stores it as an executable macro, and displays Macro de ned on the message line. 7.
Insert Replace Pattern Insert Replace Pattern Purpose Default Syntax Inserts the current replacement pattern into text. None This command does not have a default key assignment. You can either assign a key to the command using the Assign Key command or issue the command using Execute Editor Command. Description This command inserts the current replacement pattern into text as a new line above the current line.
Insert Replace Pattern 2. Type insert replace pattern beginning at the cursor position and press 4Return5. HP EDIT inserts the replacement pattern as shown: integer The current replacement pattern will be inserted above.
Insert Search Pattern Insert Search Pattern Purpose Default Syntax Inserts the current search pattern into text. None This command does not have a default key assignment. You can either assign a key to the command using the Assign Key command or issue the command using Execute Editor Command. Description This command inserts the current search pattern into text as a new line above the current line.
Insert Search Pattern 2. Type insert search pattern beginning at the cursor position and press 4Return5. HP EDIT inserts the search pattern as shown: ab*z$ The current search pattern will be inserted above.
Join File Join File Purpose Default Syntax Description Join Process Join Applications Inserts the text from one le into another. J This command merges another le into the current le by inserting the joined le above the cursor line. When you execute the command, HP EDIT prompts you for the le name. You then specify a le name and press 4Return5. If you specify an invalid name, HP EDIT displays Not able to open the le on the message line.
Join File the le is joined, X lines joined appears on the message line, where X equals the number of lines in the joined le. To join an existing le into a newly created le: 1. Create the new le using the desired le name. If you are currently in the MPE command interpreter, run HP EDIT and specify the new le name. If you are currently in an editing session, use the Text File command and specify the new le name. 2.
Join File Related Commands DRAFT 9/3/97 Join Lines Join Lines And Justify HP EDIT Commands 13:43 4-215
Join Lines Purpose Default Syntax Description Join Process Merges the text of two or more lines. 2 3 n j where n is a count that represents the number of lines following the cursor line to be joined to the cursor line. The default value of n is 1. This command merges the text of two or more lines by joining words from succeeding lines to the end of previous lines. HP EDIT merges text in word blocks by joining as many words after the end of the cursor line as space permits.
Join Lines Procedures To join two lines: 1. Move the cursor anywhere on the rst line. 2. Press the j key. HP EDIT joins as many words from the second line as possible within the join length boundary. To join several lines, either: 1. Move the cursor anywhere on the rst line of the group of lines to be joined. 2. Press the j key repeatedly until the last line of the group has been joined. 1. 2. 1. 2. Examples or Enter a count.
Join Lines 1. Move the cursor to a column anywhere on the rst line. 2. Press the j key twice. HP EDIT joins the three lines as shown: The following lines will be joined and left adjusted to the first line.
Join Lines And Justify Join Lines And Justify Purpose Default Syntax Description Procedures Merges and right justi es the text of two or more lines. 2 3 n 4ESC5 j Where n is a count that represents the number of lines following the cursor line to be joined and justi ed. The default value of n is 1. The function of this command is identical to the Join Lines command except that this command right justi es the joined lines so that both the left and right margins are even.
Join Lines And Justify Examples To join the following lines with a join length of 50: This sample line will be joined to the next line and right justified when you execute the command. 1. Move the cursor anywhere on the rst line. 2. Press 4ESC5 and the j key. HP EDIT joins and right justi es the lines as shown: This sample line will be joined to the next line and right justified when you execute the command.
Keep Text Keep Text Purpose Default Syntax Description Command Process Saves the current text to a speci ed le. 2 3 n k where n is a count that represents the number of lines you want to save. If you do not specify a value for n , HP EDIT saves the entire le. This command saves some or all of the current text to either the current le name or a le name you specify.
Keep Text Automatic Keep Function You can activate an automatic keep function (Autokeep) by specifying a value for the Autokeep Interval eld using the Set Options command. Although HP EDIT automatically records changes in a recovery le, Autokeep provides an additional method for handling unexpected system failures. When an Autokeep occurs, HP EDIT saves the entire le to the current le name without prompting for keyboard input.
Keep Text Examples To save changed text to a le named NEW: 1. Press the k key. HP EDIT displays the following message: Type Return to save file, CTRL-Y to cancel, or enter a different filename Saving text to file OLD 2. Type the le name new beginning at the cursor position.
Keep Text Note that the type of le shown in parenthesis depends on whether the le is unnumbered, standard-numbered, variable, or COBOL-numbered.
Load Config File Load Config File Purpose Default Syntax Description Reads in a speci ed con guration le. 4ESC5 l This command reads in a speci ed con guration le created with the Save Con g File command. A con guration le consists of one or more of the following components: User-de ned options settings Non-default key assignments Macro de nitions Several con guration les can exist, all of which can be read in using this command during a given session.
Load Config File 2. Type savekey at the cursor position and press 4Return5. HP EDIT displays the following message: Reading SAVEKEY..._ After HP EDIT updates the current con guration based on the con guration le contents, the message disappears and the cursor returns to its former position in the le.
Mark Character Block Start Mark Character Block Start Purpose Default Syntax Description Procedure Marks the beginning of a character block. x This command marks the beginning of an implicit or explicit character block. A character block consists of text between any two characters. To mark an implicit character block: 1. Move the cursor to either the beginning or end of where you want the character block. 2. Press the x key. 3. Move the cursor to the other end of the character block. 4.
Mark Line Block Start Purpose Default Syntax Description Procedure Marks the beginning of a line block. X This command marks the beginning of an implicit or explicit line block. A line block consists of all the text on and between any two lines. To mark an implicit line block: 1. Move the cursor to the beginning or end of where you want the line block. 2. Press the X key. 3. Move the cursor to the other end of the line block. 4. Execute the command you want to perform on this particular block. 5.
Meta Meta Purpose Default Syntax Description Provides access to the Meta commands. 4ESC5 or $ This command enables you to: Execute the group of commands known as Meta commands or pre xed commands Execute preemptive macros pre xed by the Meta key The only purpose of the Meta command is to pre x the next key that you press. Consequently, the Meta command is often referred to as the Meta key. The Meta key precedes the other key or keys assigned to Meta commands or preemptive macros.
Open Window Purpose Default Syntax Description Command Process Splits the HP EDIT screen into two text windows. W This command establishes another text window at the cursor position. The command enables you to view two di erent portions of the same le or two di erent les, and then edit one or both windows. This feature is useful in performing cut and paste operations or in visually joining two distant portions of a le for comparison or reference purposes.
Open Window Limitations You cannot view or open more than two windows at one time. If you attempt to open another window while the screen is already divided, the message Only two windows can be open at one time appears. You can open another window beginning at any line between the second line from the top or second line from the bottom of the current window. If you execute the command from the rst or last line of the window, the message Upper window too small or Lower window too small appears.
Open Window Related Commands 4-232 d a c b Close Window Size Window HP EDIT Commands DRAFT 9/3/97 13:43
Overwrite Overwrite Purpose Default Syntax Description Enables a user to write over existing text. 2 3 n o where n is a count that represents the column where overwriting is to begin. The default value of n is the current column position. This command places HP EDIT in Text Entry mode and enables you to replace characters by typing over them. Text not written over remains unaltered. You can write over subsequent lines by pressing 4Return5 without preceding it with the / key.
Overwrite Example To write over the following line beginning at the word WILL: The end of this line will be written over. 1. Move the cursor to the position shown or type 22 as the count and press the o key. 2. Type replaces the previous text. beginning at the cursor position. 3. Press / and 4Return5 to return to Command mode. HP EDIT writes over the previous text and replaces it with the new text as shown: The end of this line replaces the previous text.
Overwrite From Macro Overwrite From Macro Purpose Default Syntax Enables you to overwrite text within an executing macro. $o where n is a count that represents the column where overwriting is to begin. The default value of n is the current column position. Description Command Process Syntax Considerations This command, when executed within a macro, suspends a currently executing macro and enables you to overwrite text.
Overwrite From Macro Example To construct, de ne, and execute a macro that pauses for you to overwrite text: 1. Insert a new line in text by executing the Insert Line (I) command. 2. Type in the following macro beginning at the cursor position: mo=AOverwrite word/^mb$o; to change the text./^m 3. Press / and 4Return5 to exit Text Entry mode and enter Command mode. 4. Execute the De ne Macro (z) command. HP EDIT removes the macro from the screen and stores it for subsequent execution. 5. Press the m key.
Overwrite From Macro Related Commands DRAFT 9/3/97 Append Line From Macro Append To Character From Macro Append To End Of Line From Macro Append To Word From Macro De ne Replace Pattern From Macro De ne Search Pattern From Macro Insert Character From Macro Insert Line From Macro Overwrite Replace Character From Macro Replace Line From Macro Replace Word From Macro HP EDIT Commands 13:43 4-237
Paste After Purpose Default Syntax Description Pastes text after the current line. p This command inserts a copy of the current Cut/Paste bu er text after the line or character where the cursor is currently positioned. The bu er contents remain unchanged after you execute this command, and you can use this command repeatedly during your editing session to insert multiple copies of the bu er without altering the bu er contents.
Paste After 1. Move the cursor anywhere on the rst line as shown. 2. Press the p key, or press the Cut/Paste function key, followed by the Paste After function key. HP EDIT inserts a copy of the bu er contents after the rst line as shown: The buffer contents will be inserted after this line to complete this sentence.
Paste Before Purpose Default Syntax Description Pastes text before the current line. P This command inserts a copy of the current Cut/Paste bu er text before the line or character where the cursor is currently positioned. The bu er contents remain unchanged after you execute this command, and you can use this command repeatedly during your editing session to insert multiple copies of the bu er without altering the bu er contents.
Paste Before 1. Move the cursor anywhere on the second line as shown. 2. Press the P key, or press the Cut/Paste function key, followed by the Paste Before function key. HP EDIT inserts a copy of the bu er contents before the second line as shown: The buffer contents will be inserted before the second line to complete this sentence.
Paste Over Purpose Default Syntax Description Overlays the cut/paste bu er onto the current text. 2 3 n 4ESC5 p where n is a count that represents the column where overlaying is to begin. This command overlays the contents of the cut/paste bu er onto text beginning at the current cursor position or at the column speci ed by a count value. One practical application of this command would be to overlay and merge tabular and/or columnar data from di erent lines.
Paste Over 1. Move the last three lines to the cut/paste bu er using the Cut to Bu er command. 2. Move the cursor to the fourth column of the rst line, or move the cursor to the rst line and specify a count of 4. 3. Press 4ESC5 and the p key.
Print Text Purpose Default Syntax Description Prints a le or a speci ed number of lines in a le. 2 3 n 4ESC5 P where n is a count that represents the number of lines to print from the current cursor location. This command sends the le or a block of text to the printer. There are three ways to use the Print Text command. Prints the count lines beginning with the current line the cursor is on, if a count is speci ed. Prints the current block, if a block is speci ed.
Print Text printed with 8-column formatted numbers), and unnumbered lines are printed with their record numbers right-justi ed to column 6, with columns 7 and 8 left blank. Otherwise the non-numeric portion of each line is printed starting in column 1. The default value is yes. d. The Print header lines option determines whether or not one-line headers are printed at the top of each page. When you press h, this option toggles between yes and no.
Quit Macro Purpose Default Syntax Description Forces a currently executing macro to terminate. Q This command, when executed within a macro, stops a currently executing macro. This function enables you to add comments without a ecting the macro contents. Consequently, the command can be regarded as a separator between a macro and accompanying macro comments. You can also use this command to preserve blanks at the end of a macro, since HP EDIT ordinarily strips trailing blanks from de ned macros.
Quit Macro Related Commands DRAFT 9/3/97 Begin Capture Capture Macro De ne Macro De ne Multiple Macros Delete All Macros Delete Macro Execute Macro Go To Macro Insert All Macros Insert Macro Show Macros Use Current Key Assignment HP EDIT Commands 13:43 4-247
Refresh Line Purpose Default Syntax Description Redisplays the current line. 4ESC5 * This command redisplays a line in which part or all of the text appears to have been altered for possibly one of the following reasons: An MPE message has appeared on the screen. You have accidentally pressed the Clear Line terminal key.
Refresh Screen Refresh Screen Purpose Default Syntax Description Redisplays the current screen. * This command redisplays the current screen in which part or all of the text appears to have been altered. Some of the possible reasons for the alteration are: An MPE message appears on the screen. You accidentally pressed the Clear Display terminal key or similar terminal key. Data communications interference has produced garbled characters on the screen.
Renumber Lines Purpose Default Syntax Description Enables renumbering of several lines of text. 4ESC5 r This command enables you to renumber a series of consecutive lines. You can renumber the lines only if the current le is numbered. Refer to \Line Numbering" in chapter 2 for complete information on this subject. Command Process Requirements When you execute the command, HP EDIT prompts you for the range of lines to renumber, the new starting line number, and the desired increment for renumbering.
Renumber Lines a b c d = = = = the the the the previous first number previous last number new first number new last number To renumber a block of lines: 1. Select a line block of text. 2. Press 4ESC5, then press the r key. HP EDIT displays New starting line number? on the message line. 3. Enter the new starting line number and press 4Return5. HP EDIT displays Increment to use? on the message line. 4. Enter the number with which you want the number series to be incremented.
Renumber Lines 4. Type the number 1.1 at the cursor position and press 4Return5. HP EDIT displays the following message: Increment to use? _ 5. Type the number .1 at the cursor position and press 4Return5. HP EDIT displays the following message and changes the line numbers as shown below: d a c b The number sequence on the message line (1/5|> 1.1/1.5) means that the previous line numbers of 1 through 5 are renumbered 1.1 through 1.5.
Replace Character Replace Character Purpose Default Syntax Description Enables a user to delete and insert new text on a line. 2 3 n r where n is a count that represents the number of characters to delete before entering Text Entry mode. The default value of n is 1. This command combines the functions of the Delete Character and Insert Character commands. HP EDIT deletes a character or characters beginning at the cursor position and places HP EDIT in Text Entry mode, enabling you to insert text.
Replace Character 1. Move the cursor to the position shown above and press the r key. HP EDIT deletes the letter A, places HP EDIT in Text Entry Mode, and moves the cursor as shown: Replace character _with character B. 2. Type B and press / and 4Return5 to return to Command mode. HP EDIT inserts the text as shown: Replace character B with character B.
Replace Character From Macro Replace Character From Macro Purpose Default Syntax Enables you to replace one or more characters in text from an executing macro. None This command does not have a default key assignment. You can either assign a key to the command by using the Assign Key command or issue the command using the Execute Editor command.
Replace Character From Macro Procedure Example To execute this command within a macro: 1. Construct the macro containing this command using proper macro syntax. 2. If you are replacing a block of characters, select a character block. 3. Execute the macro by pressing the m key. HP EDIT displays Specify macroname on the message line. If the macro is preemptive, press the macro de ne key. 4. Type the macro name as speci ed in the macro.
Replace Character From Macro 7. Type the letter w at the cursor position, then press / and 4Return5. HP EDIT completes the line as shown: This sentence is now correct.
Replace Line Purpose Default Syntax Description Procedure Enables a user to delete and insert a new line. 2 3 n R where n is a count that represents the number of lines to delete before entering Text Entry mode. The default value of n is 1. This command combines the functions of the Delete Line and Insert Line commands by deleting the current line or several lines beginning at the current line and replacing them with a blank line, enabling you to add text in Text Entry mode. To replace a line: 1.
Replace Line From Macro Replace Line From Macro Purpose Default Syntax Enables you to replace one or more lines of text from an executing macro. None This command does not have a default key assignment. You can either assign a key to the command using the Assign Key command or issue the command using Execute Editor Command. Description This command, when executed within a macro, suspends a currently executing macro and enables you to substitute a line of text with other text.
Replace Line From Macro Procedure Example To execute this command within a macro: 1. Construct the macro containing this command using proper macro syntax. 2. If you are replacing a line block, select the block you want to replace. 3. Execute the macro by pressing the m key. HP EDIT displays Specify macroname on the message line. If the macro is preemptive, press the macro de ne key. 4. Type the macro name as speci ed in the macro.
Replace Line From Macro Related Commands DRAFT 9/3/97 Append Line From Macro Append To Character From Macro Append To End Of Line From Macro De ne Replace Pattern From Macro De ne Search Pattern From Macro Insert Character From Macro Insert Line From Macro Overwrite From Macro Replace Character From Macro Replace Line Replace Word From Macro HP EDIT Commands 13:43 4-261
Replace Word Purpose Default Syntax Description Word Definition Enables a user to delete a word and replace it with new text. 2 3 n 4CTRL5 r where n is a count that represents the number of words to delete before entering Text Entry mode. The default value of n is 1. This command combines the functions of the Delete Word and Insert Character commands.
Replace Word 2. Press and hold 4CTRL5 while pressing the r key, or press the Edit Commands function key, followed by the Replace Word function key. HP EDIT deletes the word and places HP EDIT in Text Entry mode. 3. Add text as needed. HP EDIT adds the new text and shifts the original text to the right. 4. Press / and 4Return5 when you have nished adding text to return to Command mode. Example To replace LINE WILL BE: This line will be replaced. 1.
Replace Word 2. Type sitively, press the space bar, then press / and 4Return5 to return to Command mode.
Replace Word From Macro Replace Word From Macro Purpose Default Syntax Enables you to replace one or more words in text from an executing macro. None This command does not have a default key assignment. You can either assign a key to the command using the Assign Key command or issue the command using Execute Editor Command. Description This command, when used within a macro, suspends a currently executing macro and enables you to substitute a word or words with other text.
Replace Word From Macro Word Definition HP EDIT enables you to specify the type of characters that constitute an HP EDIT word. There are four possible word de nitions. You can specify a de nition other than the default value by changing the value of the Word Category parameter from the Set Options screen. The following word de nition options are available: [a-zA-Z0-9 '-] Words consist of upper and lowercase letters, digits, underscores, apostrophes, and hyphens.
Replace Word From Macro 2. Type in the following macros beginning at the cursor position: mR=EReplace Word From ^m mr=AThis sentence is not/^mbmR; correct./^m 3. Press / and 4Return5 to exit Text Entry mode and enter Command mode. 4. Move the cursor to the rst macro and execute the De ne Multiple Macros (4ESC5 z) command. HP EDIT deletes the macros from the screen and stores them for subsequent execution. 5. Press the m key. HP EDIT displays the following prompt on the message line: Specify macroname 6.
Reset All Key Assignments Purpose Default Syntax Resets all single and Meta keys to their original default assignments. None This command does not have a default key assignment. You can either assign a key to the command using the Assign Key command or issue the command using Execute Editor Command. Description This command resets single and Meta keys reassigned with the Assign Key command to their default command assignments.
Reset Key Assignment Reset Key Assignment Purpose Default Syntax Resets a single or Meta key to its original default assignment. None This command does not have a default key assignment. You can either assign a key to the command using the Assign Key command or issue the command using Execute Editor Command. Description This command resets a single or Meta key reassigned with the Assign Key command to its default command assignment.
Reset Key Assignment Example To reset the e key to the Exit command: 1. Issue Execute Editor Command (E). HP EDIT displays the following prompt on the message line: Command: _ 2. Type reset key assignment and press 4Return5. HP EDIT displays the following prompt on the message line: Reset which key? _ 3. Press the e key. HP EDIT displays the following prompt on the message line: Is key prefixed by Meta? _ 4. Press the n key.
Right Justify Line Right Justify Line Purpose Default Syntax Description Right justi es text on a line. 2 3 n 4ESC5 J where n is a count that represents the number of lines to justify beginning at the cursor line. The default value of n is 1. This command right justi es one or more lines of text between the left margin and the current right margin column. HP EDIT adds blank spaces between words until the last non-blank character occupies the right margin column.
Right Justify Line To right justify a line using another join length: 1. Execute the Set Options command (O). 2. Press the j key to modify the Join Length eld. 3. Enter the numeric value representing the right margin column and press 4Return5. 4. Press 4Return5 to return to your editing session. 5. Move the cursor to a column anywhere on the line to be right justi ed. 6. Press 4ESC5 and the J key. HP EDIT right justi es the text between the left margin and the user-de ned right margin.
Run Program Run Program Purpose Default Syntax Description Command Process Run Modes Procedures DRAFT 9/3/97 Runs another program from HP EDIT. & This command temporarily suspends editing and enables you to execute another program in foreground or background mode without having to conclude the editing session. This function enables you to run system programs as well as user and application programs.
Run Program 4. Type a number for the Parm value and press 4Return5, or do not type a number and simply press 4Return5 for a Parm of zero. HP EDIT runs the program. After the program nishes executing, the prompt discussed in Step 1 reappears. You can either enter another program name or return to the editing session by pressing 4Return5. To run a program in background mode: 1. Press the & key, or press the MPE and Options function key, followed by the Run Program function key.
Run Program 3. Type an Info string, if desired, and press 4Return5. HP EDIT displays the PARM prompt below the Info parameter: Press Return to cancel :RUN cobolii& INFO= PARM=_ 4. Type an appropriate Parm value, if desired, and press 4Return5. HP EDIT starts the program and displays the following prompt: Press Return to cancel :RUN _ 5. Press 4Return5 to resume the editing session.
Run TDP Formatter Purpose Default Syntax Description Command Process Submits current text to the TDP formatter. 4ESC5 & This command suspends editing and enables you to submit the current text le or a block of the text le to the TDP formatter. You can view the formatted le online or submit the formatted le for printing. When you execute this command, HP EDIT saves the current le or block of text in a le named EDTEMP0. This le becomes the input le for the TDP formatter.
Run TDP Formatter Example To format a 100 line le and save the output to TEXTFILE: 1. Press 4ESC5 and the & key. HP EDIT displays the following message: Keeping file for formatting (unnumbered)... Type Return to format file, CTRL-Y to cancel, or enter a different filename Send formatted output to $STDLIST 2. Type text le beginning at the cursor position and press 4Return5. HP EDIT invokes the TDP formatter, which formats the text.
Save Config File Purpose Default Syntax Description Saves the current editing option values in EDCONFIG. 4ESC5 s This command saves added or altered con guration values to the default EDCONFIG con guration le or another speci ed con guration le. The saved values can consist of current Set Options editing parameter values, non-default key assignments, and macro de nitions. You can create as many unique con guration les as desired.
Save Config File Example To save a newly changed key assignment to a le called SAVEKEY: 1. Press 4ESC5 and the s key. HP EDIT displays the following message on the message line: Press CTRL-Y to cancel. Save configuration to EDCONFIG 2. Type savekey at the cursor position, press the space bar once, then press 4Return5. HP EDIT displays the following message: Writing SAVEKEY..._ After HP EDIT saves the changes to the named le, the message disappears and the cursor returns to its former position in the le.
Scroll Backward Purpose Default Syntax Description Scrolls text down, moving the cursor toward the beginning of the le. 2 3 n S where n is a count that represents the number of lines the le is to scroll backward. The default value of n is 20. This command scrolls down the text on the screen. Scrolling backward is equivalent to moving toward the top of the le. You can specify any value as a scroll size before executing the command.
Scroll Backward Related Commands DRAFT 9/3/97 Scroll Forward Scroll Left Scroll Right Set Options HP EDIT Commands 13:43 4-281
Scroll Forward Purpose Default Syntax Description Scrolls text up, moving the cursor toward the end of the le. 2 3 n s where n is a count that represents the number of lines the le is to scroll forward. The default value of n is 20. This command scrolls up the text on the screen. Scrolling forward is equivalent to moving toward the bottom of the le. You may specify any value as a scroll size before executing the command.
Scroll Forward Related Commands DRAFT 9/3/97 Scroll Backward Scroll Left Scroll Right Set Options HP EDIT Commands 13:43 4-283
Scroll Left Purpose Default Syntax Description Cursor Position Scroll Size Options Scrolls text to the right, moving the cursor toward the left margin. 2 3 n 4escape5 L where n is a count that represents the number of lines the le is to scroll each time the Scroll Left command is executed. The default value of n is 60. This command scrolls text so that the cursor moves toward the left margin. Scroll Left is activated only when your les are wider than the 80 columns visible on the HP EDIT screen.
Scroll Left Related Commands DRAFT 9/3/97 Scroll Backward Scroll Forward Scroll Right Set Options HP EDIT Commands 13:43 4-285
Scroll Right Purpose Default Syntax Description Cursor Position Scroll Size Options Scrolls text to the left, moving the cursor toward the right margin. 2 3 n 4escape5 R where n is a count that represents the number of lines the le is to scroll each time the Scroll Right command is executed. The default value of n is 60. This command scrolls text so that the cursor moves toward the right margin. Scroll Right is activated only when your les are wider than the 80 columns visible on the HP EDIT screen.
Scroll Right Related Commands DRAFT 9/3/97 Scroll Backward Scroll Forward Scroll Left Set Options HP EDIT Commands 13:43 4-287
Search And Replace Backward Purpose Default Syntax Description Command Process Searches backward and replaces text. { This command searches backward in the le or in a block of text and replaces one or more occurrences of the current search pattern with the current replacement pattern. HP EDIT rst searches for text that matches the search pattern.
Search And Replace Backward Replaces this occurrence and continues searching. Space Skips this occurrence and continues searching. r Replaces this occurrence and stops searching. + Replaces this occurrence and all subsequent occurrences. Any other key Skips this occurrence and aborts all further searching. 4Return5 Procedure To search backward and replace text: 1. Prede ne the search and replace patterns using the De ne Search Pattern and De ne Replace Pattern commands. 2.
Search And Replace Backward 7. Press the r key to replace this occurrence and stop searching. HP EDIT displays 1 occurrence was replaced on the message line and replaces the word subroutine with the word program as shown: This program consists of 30 lines.
Search And Replace Forward Search And Replace Forward Purpose Default Syntax Description Command Process Searches forward and replaces text. } This command searches forward in the le or in a block of text and replaces one or more occurrences of the current search pattern with the current replacement pattern. HP EDIT rst searches for text that matches the search pattern.
Search And Replace Forward Procedure To search forward and replace text: 1. Prede ne the search and replace patterns using the De ne Search Pattern and De ne Replace Pattern commands. 2. Ensure that the cursor is positioned anywhere before the rst character to be searched and replaced or within the selected block of text you wish to search. To search the entire le, move the cursor to the top of the le. 3.
Search And Replace Forward Related Commands DRAFT 9/3/97 De ne Replace Pattern De ne Replace Pattern From Text De ne Search Pattern De ne Search Pattern From Text Global Search And Replace Backward Global Search And Replace Forward Insert Replace Pattern Insert Search Pattern Search And Replace Backward Search Backward Search Forward HP EDIT Commands 13:43 4-293
Search Backward Purpose Default Syntax Description Command Process Searches backward for text matching the search pattern. 2 3 n \ where n is a count indicating the n th previous occurrence of the search pattern. The default value of n is 1. This command searches from the current cursor location toward the top of a le or block of text for text that matches the search pattern.
Search Backward To search backward for a speci c occurrence of the search pattern: 1. Specify a count that represents the n th previous occurrence of the search pattern that you want HP EDIT to nd from the current cursor location. 2. Press the key, or press the Search/Replace function key, followed by the Search Backward function key. HP EDIT moves the cursor to the rst character of the n th occurrence and highlights the entire matched text.
Search Forward Purpose Default Syntax Description Command Process Searches forward for text speci ed by the search pattern. 2 3 n / where n is a count indicating the n th forward occurrence of the search pattern. The default value of n is 1. This command searches from the current cursor position within a block or le to the end of the block or le for text that matches the search pattern.
Search Forward To sequentially search forward within a block for the search pattern: 1. Ensure that the cursor is positioned within the block. 2. Go to step 2, above. To search forward for a speci c occurrence of the search pattern: 1. Specify a count that represents the n th forward occurrence of the search pattern that you want HP EDIT to nd from the current cursor location. 2. Press the / key, or press the Search/Replace function key, followed by the Search Forward function key.
Select Block Purpose Default Syntax Description Procedure Selects or reselects an explicit character or line block. B Use this command to select an explicit line block or character block. You can also reselect a block that you have cancelled using the Select Block command. To select an explicit line or character block: 1. After selecting one end of the block using either the x (Mark Character Block Start) or X (Mark Line Block Start) keys, move the cursor to the other end of the selected block. 2.
Set Distance To Mark Set Distance To Mark Purpose Default Syntax Description Command Process Sets the count as the distance to a speci ed mark. 2 3 n # where n represents a mark number from 1 to 11. The default value of n is 1. This command sets the count to a value equal to the number of lines between the current cursor location and the speci ed mark. The count includes the current line.
Set Distance To Mark 3. Press the # key, or press the Cut/Paste function key, followed by the Count Lines function key. HP EDIT displays the distance between the cursor position and the mark as a count on the message line.
Set Distance To Previous Location Set Distance To Previous Location Purpose Default Syntax Description Sets the count to the previous location mark. 4ESC5 # This command sets the count to a value equal to the number of lines between the current cursor location and mark 11, the previous location mark. Note that the count includes the cursor line. For instance, the distance from the previous location mark on the second line and the cursor on the third line is two, rather than one.
Set Encryption Key Purpose Default Syntax De nes the password key for text encryption and decryption. None This command does not have a default key assignment. You can either assign a key to the command using the Assign Key command or issue the command using Execute Editor Command. Description This command allows you to specify an alphanumeric string as a password key for the Encrypt or Decrypt commands.
Set Mark Set Mark Purpose Default Syntax Description Command Process Command Applications Sets a place marker at the current line. 2 3 2 3 n ` or n ' where n represents a mark number from 1 to 11. The default value of n is 1. This command sets a place marker at the speci ed line location. Marks enable you to execute other commands that either move the cursor or perform block operations, such as cutting and pasting.
Set Mark Recalling Set Marks During the course of an editing session, you may not be able to recall where you have set one or more marks. To view all of the marks currently set, access the Editor Statistics screen by executing the Show Editor Statistics command.
Set Options Set Options Purpose Default Syntax Description Command Process Alters one or more editing parameters. O This command accesses the Set Options screen, which enables you to alter the default settings of one or more of the 21 editing parameters. HP EDIT suspends the current editing session and displays the options screen. You can alter the value of an option by pressing the letter key preceding the option. The resulting action depends on the type of option speci ed.
Set Options d a c b Set Options Screen Auto indent Default value = No If yes, indents each text input line to align to the rst non-blank character of the previous line. For instance, if you use the space bar to move to the fth column of a new line and then begin entering text, HP EDIT indents subsequent lines entered to the fth column.
Set Options Display line numbers Default value = No If yes, HP EDIT displays line numbers if the current le is numbered. Reading in a COBOL le automatically changes the value to yes. Highlight match Default value = Yes If no, HP EDIT does not highlight text found during searches in reverse video. Ignore case Default value = Yes If yes, HP EDIT does not di erentiate between upper and lower case characters when performing searches.
Set Options Autokeep interval Default value = 0 If zero, disables the automatic keep feature. If between 1 and 10000, HP EDIT automatically keeps the le whenever you execute this number of text-altering commands since the last automatic keep. Forward/back scroll size Default value = 20 HP EDIT moves the text this number of lines up when you execute the Scroll Forward command and moves the text this number of lines down when you execute the Scroll Backward command.
Set Options Keep le type Default value = None HP EDIT automatically keeps the current le in its present state as unnumbered, standard numbered, COBOL numbered, or variable. You can alter this option to suit your needs if you want to keep the current le in another format. For instance, if you were editing a standard numbered le and wanted to keep it as an unnumbered le, you would specify unnumbered as the setting for this option.
Set Options Word category Default value = [a-zA-Z0-9 '-] If the default value, HP EDIT considers words to consist of upper and lowercase letters, digits, underscores, apostrophes, and hyphens. Words are separated by spaces and any non-alphanumeric characters besides the underscore, apostrophe, and hyphen. If [a-zA-Z0-9 ], words consist of upper and lowercase letters, digits, and underscores. Words are separated by spaces and any non-alphanumeric characters besides the underscore.
Set Options To display the options screen and alter options: 1. Press the O key, or press the MPE and Options function key, followed by the Set Options function key. HP EDIT suspends the editing session and displays the options screen. 2. Alter an option by pressing the key preceding the option to be changed. If you press one of the keys associated with an option in the left column, HP EDIT toggles from no to yes or from yes to no.
Set Options 3. Type the number 10 and press 4Return5. HP EDIT saves this number as the new value as shown: [t] Tab spacing: 10 If you decide not to change the tab spacing, you could simply press 4Return5 to abort the process and retain the original tab spacing of 5. 4. Press 4Return5 to return to the editing session. To change the new le type from unnumbered to COBOL numbered: 1. Press the O key, or press the MPE and Options function key, followed by the Set Options function key.
Shift End Of Line Left Shift End Of Line Left Purpose Default Syntax Description Shift Count Requirements Procedures Shifts a selected portion of text on a line to the left. 2 3 n 4ESC5 < where n is a count that represents the number of lines to shift to the left. The default value of n is 1. This command shifts a portion of text on a line or lines a predetermined number of columns to the left.
Shift End Of Line Left To shift a portion of a line more than one column to the left: 1. Execute the Set Options (O) command. 2. Press the s key to modify the Shift Count eld. 3. Enter the desired numeric value representing the number of columns to shift and press 4Return5. 4. Press 4Return5 to return to your editing session. 5. Move the cursor to the character column where you want to shift the remaining text on the line to the left. 6. Press 4ESC5, then press the < key.
Shift End Of Line Right Shift End Of Line Right Purpose Default Syntax Description Shift Count Requirements Procedures Shifts a selected portion of text on a line to the right. 2 3 n 4ESC5 > where n is a count that represents the number of lines to shift to the right. The default value of n is 1. This command shifts a portion of text on a line or lines a predetermined number of columns to the right.
Shift End Of Line Right To shift a portion of a line more than one column to the right: 1. Execute the Set Options (O) command. 2. Press the s key to modify the Shift Count eld. 3. Enter the desired numeric value representing the number of columns to shift and press 4Return5. 4. Press 4Return5 to return to your editing session. 5. Move the cursor to the character column where you want to shift the remaining text on the line to the right. 6. Press 4ESC5, then press the > key.
Shift Line Left Shift Line Left Purpose Default Syntax Description Shifts a line of text to the left. 2 3 n < where n represents the number of lines to shift to the left. The default value of n is 1. This command shifts a line or lines of text a predetermined number of columns to the left. The number of columns shifted is determined by the Shift Count variable, which has a default value of 1.
Shift Line Left 5. Move the cursor to a column anywhere on the line to be shifted. Ensure that no characters occupy the speci ed number of columns at the beginning of the line. 6. Press the < key. HP EDIT shifts the line the speci ed number of columns to the left.
Shift Line Right Shift Line Right Purpose Default Syntax Description Shift Count Requirements Procedures Shifts a line of text to the right. 2 3 n > where n represents the number of lines to shift to the right. The default value of n is 1. This command shifts a line or lines of text a predetermined number of columns to the right. The number of columns shifted is determined by the shift count variable, which has a default value of 1.
Shift Line Right 4. Press 4Return5 to return to your editing session. 5. Move the cursor to a column anywhere on the line to be shifted. Ensure that no characters occupy the speci ed number of columns at the end of the line. 6. Press the > key. HP EDIT shifts the line the speci ed number of columns to the right.
Show All Key Assignments Show All Key Assignments Purpose Default Syntax Displays all single keys and pre xed keys assigned to commands. None This command does not have a default key assignment. You can either assign a key to the command using the Assign Key command or issue the command using Execute Editor Command. Description This command displays all single keys and pre xed keys currently assigned to commands along with their associated command names.
Show All Key Assignments 2. Type show all key assignments and press 4Return5. HP EDIT suspends the editing session and displays a list similar to the following: d a c b Note that a caret (^) represents the 4CTRL5 key, which you press and hold before pressing the key that follows the caret. 3. Press any key to scroll subsequent screens. 4. Press 4Return5. HP EDIT returns to the editing session.
Show Editor Statistics Show Editor Statistics Purpose Default Syntax Description Variable Definitions Displays status information on the current editing session. 4ESC5 ? This command displays a screen that provides le names and sizes, mark settings, and other miscellaneous variables. When you execute the command, HP EDIT suspends the current editing session and displays the Editor Statistics screen.
Show Editor Statistics Recovery le Shows the name of the le that stores a copy of the current le for recovery purposes in case of system failures. The recovery le is always larger than the edit le because the temporary le also stores all the changes made during the editing session. Block location Shows the current block selection. De ned macros Shows the number of macros de ned in this editing session and the number that are preemptive, if any.
Show Editor Statistics Sort key columns Shows the range of columns that HP EDIT uses as a sort key eld when it performs one of the sort commands. Marks set Shows which marks are currently set and lists the corresponding line and column locations. Procedure Related Commands DRAFT 9/3/97 To display the Editor Statistics screen and return to the session: 1. Press 4ESC5, then press the ? key. HP EDIT suspends the editing session and displays the Editor Statistics screen. 2.
Show Key Assignment Purpose Default Syntax Shows the command to which a single key or pre xed key is assigned. None This command does not have a default key assignment. You can either assign a key to the command using the Assign Key command or issue the command using Execute Editor Command. Description This command shows the command to which a single key or a pre xed key is currently assigned. The speci ed key can be either a default key or a key that has been reassigned with the Assign Key command.
Show Key Assignment 2. Type show key assignment and press 4Return5. HP EDIT displays the following prompt on the message line: Show which key? _ 3. Press the b key. HP EDIT displays the following prompt on the message line: Is key prefixed by Meta? _ 4. Press the n key.
Show Macros Purpose Default Syntax Shows all currently de ned macros. None This command does not have a default key assignment. You can either assign a key to the command using the Assign Key command or issue the command using Execute Editor Command. Description This command shows all currently de ned macros and their corresponding names (key assignments). When you execute the command, HP EDIT suspends the current editing session and displays a screen that shows the macros.
Show Macros Example To show three currently de ned macros: 1. Issue Execute Editor Command (E). HP EDIT displays the following prompt on the message line: Command: _ 2. Type Show Macros and press 4Return5. HP EDIT suspends the editing session and displays the following screen that shows the macros and their associated names: Current macro definitions are: A= AName:/^m$AAThank you!/^m I= AInsert a line/^m$I; new text./^m z= 3+1$t2D+$T5+ 3. Press 4Return5 to return to your editing session.
Show Reassigned Keys Purpose Default Syntax Description Displays all single keys and pre xed keys reassigned to commands. 4ESC5 K This command displays all single keys and pre xed keys that have been reassigned to commands with the Assign Key command. When you execute the command, HP EDIT suspends the editing session and displays a message on a separate screen indicating that it is searching a keymap. HP EDIT displays the reassigned keys and associated commands when it nds them.
Show Reassigned Keys Related Commands DRAFT 9/3/97 Assign Key Insert All Key Assignments Reset All Key Assignments Reset Key Assignment Show All Key Assignments Show Key Assignment HP EDIT Commands 13:43 4-331
Size Window Purpose Default Syntax Description Command Applications Command Usage Adjusts the current window size. 2 3 n 4ESC5 w where n represents the number of lines desired as the window size. This command enables you to adjust the size of either a single window or the current window of a two-window screen. Refer to the Open Window command for information about using multiple windows.
Size Window To enlarge the size of a window: 1. Move the cursor anywhere within the window that you do not want to increase. 2. Type a number as the count representing this window size minus the number of lines you want to increase in the other window. For instance, if the size of this window is 12 and you want to increase the size of the other window by 5, type 7 as the count. 3. Press 4ESC5 and the w key. HP EDIT decreases this window size to 7. 4.
Sort Ascending Purpose Default Syntax Sorts lines in ascending order. None This command does not have a default key assignment. You can either assign a key to the command using the Assign Key command or issue the command using Execute Editor Command. Description This command sorts a speci ed number of lines in ascending order. When you execute this command, HP EDIT sorts the lines using prede ned left and right column boundaries to de ne the sort key eld.
Sort Ascending 4. Type sort ascending and press 4Return5.
Sort Descending Purpose Default Syntax Sorts lines in descending order. None This command does not have a default key assignment. You can either assign a key to the command using the Assign Key command or issue the command using Execute Editor Command. Description This command sorts a speci ed number of lines in descending order. When you invoke this command, HP EDIT sorts the lines using prede ned left and right column boundaries to de ne the sort key eld.
Sort Descending Third Second First Related Commands DRAFT 9/3/97 De ne Sort Key Columns Sort Ascending HP EDIT Commands 13:43 4-337
Start/Stop Timers Purpose Default Syntax Displays the amount of elapsed CPU time and clock time. None This command does not have a default key assignment. You can either assign a key to the command using the Assign Key command or issue the command using Execute Editor Command. Description This command logs the amount of time that elapsed between executions of this command and displays the data in milliseconds for CPU time and seconds for wall clock time.
Swap Characters Swap Characters Purpose Default Syntax Description Procedure Example Swaps the cursor character with the next character. ~ This command exchanges a cursor character or blank space with the adjacent character or blank space to the right of the cursor. You can execute the command anywhere on a line except when the cursor is on the last character of the line.
Swap Cursor With Mark Purpose Default Syntax Description Command Application Swaps the cursor with the speci ed mark. 2 3 n @ where n represents a mark number from 1 to 11. The default value of n is 1. This command exchanges the cursor with a speci ed mark from 1 to 11. When you execute this command, HP EDIT moves the cursor to the line and column where the speci ed mark was located and moves the mark to the line and column formerly occupied by the cursor.
Swap Cursor With Mark Example Related Commands DRAFT 9/3/97 To swap the cursor with mark 2 and then return to the original cursor position: 1. Type the number 2 as the count. HP EDIT displays this number on the message line. 2. Press the @ key. HP EDIT moves the cursor to mark 2 and moves mark 2 to the position formerly occupied by the cursor. 3. After you have nished viewing the needed information, type the number 2 as the count. HP EDIT displays this number on the message line. 4.
Swap Lines Purpose Default Syntax Description Procedure Example Swaps a line with the next line. 4ESC5 ~ This command exchanges the current line with the following line. To swap lines: 1. Move the cursor to any column of the line to be swapped with the next line. 2. Press 4ESC5 and the ~ key. HP EDIT swaps the positions of the two lines. To swap the following lines: this line. This line should precede 1. Move the cursor to any column on the rst line as shown. 2. Press 4ESC5 and the ~ key.
Swap With Previous Location Swap With Previous Location Purpose Default Syntax Description Command Process Command Applications Swaps the cursor with the previous location mark. 4ESC5 @ This command swaps the cursor with mark 11, the previous location mark. The previous location mark assists you in viewing text at another location in the le and then easily returning you to the previous location to continue editing.
Swap With Previous Location Procedure Related Commands 4-344 To swap the cursor with the previous location and then return: 1. Press 4ESC5 and the @ key. HP EDIT moves the cursor to its previous location (mark 11) and sets mark 11 to the previous location of the cursor. 2. Repeat step 1 to return the cursor and mark 11 to their previous locations.
Swap Words Swap Words Purpose Default Syntax Description Word Definition Swaps a word with the next word. % This command exchanges the current word or portion of a word with the adjacent word to the right of the cursor. HP EDIT enables you to specify the type of characters that constitute an HP EDIT word. There are four possible word de nitions. You can specify a de nition other than the default value by changing the value of the Word Category parameter from the Set Options screen.
Swap Words Example To swap the last two words in the following sentence: The last two words are in the order wrong. 1. Move the cursor to the letter o as shown. 2. Press the % key. HP EDIT swaps the words as shown: The last two words are in the wrong order.
Tab Tab Purpose Default Syntax Description Command Process Command Application Options Procedure Related Commands DRAFT 9/3/97 Moves the cursor forward to the next tab stop. 4Tab5 This command enables you to move the cursor to predetermined, evenly spaced locations within a given line. These tab locations are determined by the value of the Tab Spacing eld of the Set Options screen.
Terminate True Clause Purpose Default Syntax Description Requirements Syntax Considerations Terminates a conditional section within a macro. $T This command, when used within a macro, enables you to conditionally execute selected portions of macros, depending on the value of a settable ag. This command is intended to be used in conjunction with the Test/Set/Clear Flag ($t) command. When HP EDIT encounters this command, it continues executing the remainder of the macro.
Terminate True Clause Examples To construct, de ne, and execute a conditional macros: 1. Insert a new line in text by executing the Insert Line (I) command. 2. Type the following macro beginning at the start of the line: mX=3+$t2D+$T5+ 3. Press / and 4Return5 to exit Text Entry mode and enter Command mode. 4. Press the z key. HP EDIT removes the macro from the screen and stores it for subsequent execution. 5. Press the m key.
Test And Execute Macro Purpose Default Syntax Description Executes a macro as a subroutine if the ag is set. $m This command, when used within a macro, combines the functions of the Test/Set/Clear Flag command and the Execute Macro command. This command enables you to conditionally execute a speci ed macro, depending on the value of a settable ag. If the value of the ag is true, this command executes the named macro immediately following this command.
Test And Execute Macro 3. Press / and 4Return5 to exit Text Entry mode and enter Command mode. 4. Move the cursor to the rst macro and execute the De ne Multiple Macros (4ESC5 z) command. HP EDIT deletes the macros from the screen and stores them for subsequent execution. 5. Issue the Execute Macro command (m). HP EDIT displays the following prompt on the message line: Specify macroname 6. Press the f key.
Test And Go To Macro Purpose Default Syntax Description Executes a macro if the ag is set. $M This command, when used within a macro, combines the functions of the Test/Set/Clear Flag command and the Go To Macro command, enabling you to conditionally execute a speci ed macro, depending on the value of a settable ag. If the value of the ag is true, this command executes the named macro immediately following this command. This provides a method of conditionally chaining to a macro from within a macro.
Test And Go To Macro 3. Press / and 4Return5 to exit Text Entry mode and enter Command mode. 4. Move the cursor to the rst macro and execute the De ne Multiple Macros (4ESC5 z) command. HP EDIT deletes the macros from the screen and stores them for subsequent execution. 5. Issue the Execute Macro (m) command. HP EDIT displays the following prompt on the message line: Specify macroname 6. Press the F key.
Test/Set/Clear Flag Purpose Default Syntax Description Tests, sets, clears, or complements the ag used in conditional macros. 2 3 n $t where n represents the value of the ag. There is no default value for n. This command, when used within a macro and not preceded by a count, enables you to conditionally execute selected portions of macros, depending on the value of a settable ag. When executed in this manner, the command is intended to be used in conjunction with the Terminate True Clause command.
Test/Set/Clear Flag Other Methods of Modifying the Flag Search commands and search and replace commands modify the ag value. Successful searches set the ag to true. Failed searches, including user-aborted searches, clear the ag to false. You can also set the ag by using certain operators available with the HP EDIT calculator. Seven calculator operators can set, clear, or complement the ag. Refer to the Calculate command for further information.
Test/Set/Clear Flag Note that more than one conditional section can exist in a conditional macro. Procedures To set the ag: 1. Type 1 4ESC5 t at the keyboard . HP EDIT displays Flag set on the message line. or 2. Insert 1$t in a macro where you want to set the ag. To clear the ag: 1. Type 2 4ESC5 t at the keyboard . HP EDIT displays Flag cleared on the message line. or 2. Insert 2$t in a macro where you want to set the ag. To complement the ag: 1.
Test/Set/Clear Flag 3. Press / and 4Return5 to exit Text Entry mode and enter Command mode. 4. Execute the De ne Macro (z) command. HP EDIT deletes the macro from the screen and stores it for subsequent execution. 5. Issue the Execute Macro (m) command. HP EDIT displays the following prompt on the message line: Specify macroname 6. Press the z key. HP EDIT moves the cursor down three lines and tests the ag when it encounters the imbedded Test/Set/Clear Flag command.
Test/Set/Clear Flag 6. Press the f key. HP EDIT tests the ag and inserts the text Flag is set into your le. This indicates that the value of the ag is true. If you want to change the value to false (clear the ag), proceed to step 7. 7. Type the number 2 as the count and execute the Test/Set/Clear Flag command at the keyboard level by pressing 4ESC5 and the t keys. HP EDIT displays the message Flag cleared on the message line. 8. Issue the Execute Macro (m) command.
Text File Text File Purpose Default Syntax Description Reads in a speci ed le. t This command reads in a speci ed existing le or enables you to edit a new le. When you execute the command, HP EDIT responds appropriately depending on whether you saved all changes made to the current le. If you saved the current le, HP EDIT prompts you for a le name. If you did not save the current le, HP EDIT asks whether you want to discard your editing changes.
Text File 4. Reply yes (y) to the prompt or press 4Return5. HP EDIT clears the text bu er, enabling you to begin editing in the new le. Note that the new le is not saved until you subsequently execute the Keep Text command. Example To read in the le named FILE2 from the current le named FILE1: 1. Press the t key. HP EDIT displays the prompt File: on the message line as shown: d a c b 2.
Text File 3. Press 4Return5.
Top of File Purpose Default Syntax Description Procedure Related Commands 4-362 Moves the cursor to the top of the le. ( This command moves the cursor from its current position to the rst column of the rst line. To scroll to the top of the le, either: 1. Press the ( key, or press the Position Commands function key, followed by the Top of File function key.
Undo All Undo All Purpose Default Syntax Description Cancels all text-altering commands. 4ESC5 U This command cancels all text-altering commands executed since the last Keep Text or Text File command was issued. When you execute the command, the le returns to its previous state before any of the text-altering commands were executed. Since this command is also a text-altering command, you can execute Undo Last Command or the Undo Sequentially command to cancel the e ect of this command.
Undo Last Command Purpose Default Syntax Description Cancels the previous text-altering command. u This command cancels the most recently executed text-altering command and returns the le to its previous state. Since this command is also a text-altering command, you can execute the command again to cancel the e ect of this command or any other undo command. This feature is useful if you mistakenly cancelled the previous command and want to restore the text changes.
Undo Sequentially Undo Sequentially Purpose Default Syntax Description Sequentially cancels previous text-altering commands. U This command cancels a previously executed text-altering command, except for Undo Last Command. You can use the command to cancel any or all changes made to a le since the last Keep Text or Text File command was executed.
Upshift Character Purpose Default Syntax Description Converts one or more alphabetic characters to uppercase. 2 3 n ^ where n represents the number of characters to convert to uppercase. The default value of n is 1. This command converts one or more alphabetic characters on the cursor line from lowercase to uppercase by scanning the number of characters speci ed. HP EDIT does not convert non-uppercase characters, such as digits.
Upshift Character 3. Press the ^ key.
Upshift Line Purpose Default Syntax Description Converts one or more lines to uppercase. 2 3 n 4ESC5 ^ where n represents the number of lines to convert to uppercase. The default value of n is 1. This command converts one or more lines from lowercase to uppercase, and moves the cursor to the rst column of the rst line following the capitalized lines. HP EDIT does not convert non-uppercase characters, such as digits.
Upshift Line 2. Press 4ESC5 and the ^ key.
Upshift Word Purpose Default Syntax Description Converts one or more words to uppercase. 2 3 n 4CTRL5 ^ where n represents the number of words to convert to uppercase. The default value of n is 1. This command converts one or more words on the cursor line from lowercase to uppercase, and moves the cursor to the rst character of the next word. If the cursor is not positioned on the rst character of a word, HP EDIT does not upshift characters to the left of the cursor.
Upshift Word Procedures To convert one lowercase word to uppercase: 1. Move the cursor to the rst character of the word you want to convert. 2. Press 4CTRL5 and the ^ key. HP EDIT converts the word and moves the cursor under the rst character of the next word. To convert more than one lowercase word to uppercase: 1. Move the cursor to the rst character of the group of words you want to convert. 2. Specify a count representing the number of words you want to convert. 3. Press 4CTRL5 and the ^ key.
Use Current Key Assignment Purpose Default Syntax Description Temporarily disables preemptive macros. " This command interprets the next key pressed as a command, rather than a preemptive key assigned to a macro. When you de ne a macro using the De ne Macro command or Capture Macro command, you can specify that the assigned key preempt the same key assigned to an HP EDIT command.
Use X Register Use X Register Purpose Default Syntax Description Specifying A Count Sets or retrieves the X register. 2 3 n $x where n represents a count that, if speci ed, moves to the X register. This command enables you to pass integers to and from macros and the HP EDIT calculator X register. The X register resides at the top of a four-register computational stack accessible through the Calculate command.
Use X Register To retrieve the X register value: 1. Press 4ESC5 and the x key. HP EDIT displays the value of the X register as a count on the message line. Examples To interactively delete the next n lines, where n represents the current X register value: 1. Press 4ESC5 and the x key. HP EDIT displays the value of the X register as the count on the message line. 2. Execute the Delete Line (D) command. HP EDIT deletes the number of lines displayed as the count.
Use Y Register Use Y Register Purpose Default Syntax Description Specifying A Count Sets or retrieves the Y register. 2 3 n $y where n represents a count that, if speci ed, moves to the Y register. This command enables you to pass integers to and from macros and the HP EDIT calculator Y register. The Y register resides directly below the X register on the four-register computational stack.
Use Y Register To retrieve the Y register value: 1. Press 4ESC5 and the y keys. HP EDIT displays the value of the Y register as a count on the message line. Examples To interactively delete the next n lines, where n represents the current Y register value: 1. Press 4ESC5 and the y key. HP EDIT displays the value of the Y register as the count on the message line. 2. Execute the Delete Line (D) command. HP EDIT deletes the number of lines displayed as the count.
A Error Messages This appendix lists all HP EDIT error messages and explains the cause of each message. Some of the explanations also provide suggested corrective action. The letter combination of XXX represents a parameter, such as a number or command. 010 Line too long - not replacing There was insu cient room on the line to replace the search pattern with the replace pattern. Consequently, HP EDIT did not replace the search pattern. 020 File not joined You aborted a join le operation.
EDIT error. 080 The current line is blank You attempted to upshift or downshift text on a blank line.
090 The cursor was above the first line You attempted to issue a command while the cursor was above the rst line of text on the screen. 100 The cursor was below the last line You attempted to issue a command while the cursor was below the last line of text on the screen. 110 There is no next character to swap An attempt was made to swap the last character on the line. As there is no next character on the line, the swap cannot take place.
190 There is no more text to delete on this line You attempted to delete or replace text beyond the end of the line. 200 Could not get collating sequence table for this language This is not a user error. HP EDIT encountered an error while attempting to retrieve the collating table for the language of the text. The collating table contains the language-speci c ordering of the characters. Please report this HP EDIT error.
This is not a user error. HP EDIT encountered an error while attempting to retrieve the upshift table for the language of the text. The upshift table contains language-speci c lowercase information. Please report this HP EDIT error. 270 User lacks Process Handling (PH) capability MPE requires that a user have Process Handling (PH) capability in order to run programs from within HP EDIT.
280 Requested program does not exist HP EDIT could not nd the requested program. You may have misspelled the program name. 290 Invalid program name requested MPE considers the requested program name invalid. 300 Received error #XXX attempting to create process HP EDIT encountered an error while attempting to run the requested program. XXX is the error number MPE returned to HP EDIT. 310 Unable to locate the command You pressed a key that does not correspond to any currently de ned HP EDIT command.
380 Recovery file is incomplete You attempted to recover a le using an incomplete recovery le. 390 Invalid recovery command: "XXX" in record XXX This is not a user error. While attempting to recover a le, HP EDIT encountered an invalid command XXX in record XXX of the recovery le. Please report this HP EDIT error. 400 Cannot access input file This is not a user error. HP EDIT encountered an error while getting information about the le being read in. Please report this HP EDIT error.
This is not a user error. HP EDIT encountered a problem while attempting to open the recovery le. XXX is the error number MPE returned to HP EDIT. Please report this HP EDIT error. 490 Could not reopen recovery file This is not a user error. HP EDIT encountered a problem while attempting to reopen the recovery le. Please report this HP EDIT error. 500 Received error XXX attempting to create recovery file This is not a user error. HP EDIT encountered a problem while attempting to create the recovery le.
570 Received error XXX attempting to open file for recovery This is not a user error. HP EDIT encountered an error while attempting to open the recovery le. XXX is the error number MPE returned to HP EDIT. Please report this HP EDIT error. 580 Received error XXX while reading input file This is not a user error. HP EDIT encountered an error while attempting to read from the input le. XXX is the error number MPE returned to HP EDIT. Please report this HP EDIT error.
HP EDIT did not nd the correct macro initiator. Refer to the De ne Macro command for information about correct macro syntax. 660 Received error codes XXX and XXX calling PROCINFO This is not a user error. HP EDIT encountered a problem while attempting to activate a child editing session. XXX and XXX are the error numbers MPE returned to HP EDIT. Please report this HP EDIT error.
670 Cannot read configuration file HP EDIT could not read in the con guration le because you speci ed a non-existent le name. 680 Valid mark numbers are 1 - XXX HP EDIT supports marks 1 - XXX. The current value of XXX is 11. 690 Cannot save configuration to file This is not a user error. HP EDIT encountered an error while attempting to save the HP EDIT con guration le. Please report this HP EDIT error.
You have not de ned the Meta-macro XXX. Possibly the con guration le containing the macro was not loaded into HP EDIT. 780 Macro XXX does not exist You have not de ned the macro XXX. Possibly the con guration le containing the macro was not loaded into HP EDIT. 790 Not found HP EDIT did not nd the character you were trying to locate. 800 You have a next session active You attempted to exit the current session before terminating a child session.
MPE rejected one or more components of the requested le name. You may have misspelled the le name. 870 Received a file system error while attempting to save file (HPED 870,XXX) This is not a user error. HP EDIT received le system error XXX while attempting to save the le. Please report this HP EDIT error.
880 Could not open keepfile This is not a user error. HP EDIT encountered an error while attempting to open the le where the text is to be written. Please report this HP EDIT error. 890 Could not purge the old file. Kept to temporary file instead The old le could not be purged. Instead, HP EDIT kept the text to a temporary le with the same name. Possibly the le was being accessed by another program at the same time. 900 Invalid exponent This is not a user error. HP EDIT encountered an invalid exponent.
970 Trailing blanks is a read-only variable HP EDIT prohibits you from altering the Trailing Blanks calculator variable. 980 Maximum line length is a read-only variable HP EDIT prohibits you from altering the Maximum Line Length calculator variable.
990 Unknown calculator function: XXX HP EDIT does not recognize XXX as a calculator function. 1000 Invalid variable or register name: XXX HP EDIT does not recognize XXX as a calculator variable or register name. 1010 Cannot divide by zero You cannot use the calculator to divide by zero. 1020 Integer overflow at input character XXX The character at position XXX caused an integer over ow. Using a smaller number will eliminate this problem.
1090 File is empty There is no text in the le to delete or replace.
1100 Internal error - illegal token type XXX This is not a user error. HP EDIT encountered an illegal character in the text you typed in. Please report this HP EDIT error. 1110 Cursor must be on the first character of a matching string The cursor must be on the rst character of a matching string for the Delete Pattern command to function properly. 1120 Search pattern is invalid The Search pattern contains pattern-matching characters that HP EDIT cannot properly interpret.
longer than those that follow in the le. 1200 Text typed out of bounds ignored HP EDIT ignored some of the text typed outside of the valid screen area. 1210 Macro does not exist You attempted to execute an unde ned macro.
1220 Macros nested too deep The executing macro has exceeded the maximum nesting level allowable for macros. The maximum nesting level is 10. 1230 Macro too long, truncated to XXX characters HP EDIT can insert only the rst XXX characters of the macro and cannot display any characters beyond that point. 1240 Received error XXX attempting to open capture file This is not a user error. HP EDIT failed to open the capture le. MPE returned the error code XXX. Please report this HP EDIT error.
The le has more than XXX lines, which is the maximum HP EDIT can handle. HP EDIT discards the excess lines. 1330 Record XXX is beyond the end of the file HP EDIT attempted to read a record beyond the end of the le. XXX is the invalid record number. Please report this HP EDIT error. 1340 Line XXX (record XXX) is not a text record HP EDIT encountered line XXX that corresponds to record XXX, which is not a text record. Please report this HP EDIT error.
EDIT error. 1420 Reached maximum number of lines The le has reached the maximum number of lines HP EDIT can handle. Additional lines cannot be added.
1430 Could not read the help catalog directory This is not a user error. HP EDIT encountered an error while attempting to read the help catalog directory. Please report this HP EDIT error. 1440 Could not get information about the help catalog This is not a user error. HP EDIT encountered an error while attempting to get information about the help catalog. Please report this HP EDIT error. 1450 No user labels in the help catalog This is not a user error. The help catalog has an improper format.
This is not a user error. HP EDIT could not open the help catalog: XXX. The help system cannot be accessed without rst opening the help catalog. Please report this HP EDIT error.
1540 Could not read the number of help topics This is not a user error. HP EDIT encountered an error while attempting to read the number of help topics from the help catalog. Please report this HP EDIT error. 1550 Received error XXX when attempting to open function key file This is not a user error. HP EDIT encountered an error while attempting to open the le where the function keys are preserved. XXX is the error MPE returned to HP EDIT. Please report this HP EDIT error.
This is not a user error. HP EDIT encountered an error while attempting to read from the le where the function keys are preserved. XXX is the error MPE returned to HP EDIT. Please report this HP EDIT error.
1620 Received error XXX when attempting to reopen function key file This is not a user error. HP EDIT encountered an error while attempting to reopen the le where the function keys are preserved. XXX is the error MPE returned to HP EDIT. Please report this HP EDIT error. 1630 Unable to read catalog message XXX1:XXX2 (HPED 1630, XXX3) This is not a user error. HP EDIT could not locate a message in the message catalog. XXX1 is the set for the missing message. XXX2 is the number of the missing message.
The text language you speci ed through the NLDATALANG JCW is not recognized by the system. HP EDIT will default to the language being used for the user interface. This error could be due to the fact that you entered an invalid language number or that the language in question is not con gured on your system. XXX is the error MPE returned to HP EDIT. 1680 Unable to get the decimal separator character'' This is not a user error.
1690 Unable to construct the help catalog filename (HPED 1690, XXX) This is not a user error. HP EDIT could not construct the help catalog le name. Without the le name, the on-line help system is inaccessible. XXX is the error MPE returned to HP EDIT. Please report this HP EDIT error. 1700 No more room in recovery file to join in the file There isn't enough room left in the HP EDIT recovery le to join in the le.
in order to complete the keep operation. Please report this HP EDIT error. 1770 Cannot open this file in the temporary domain This is not a user error. HP EDIT was unable to create a temporary with the same name as the current le. HP EDIT needs to create this le in order to complete the keep operation. Please report this HP EDIT error.
1780 Encountered invalid line number at record XXX An invalid line number was encountered at record XXX while attempting to save an unnumbered le as numbered. The number may be invalid or it may be out of sequence. 1790 The line number entered was too large You entered a line number which is beyond the range supported by HP EDIT. Try re-entering a smaller line number value.
1880 This does not appear to be a supported Asian terminal The terminal you are using is not recognized as one which is supported for Asian-language editing. Although, you may continue editing Asian text with this terminal, there is a possibility that you will get unpredictable results.
1890 Unable to get the Asian character attributes (HPED 1890, XXX) This is not a user error. HP EDIT was unable to get the character attribute information needed for Asian-language editing. XXX is the error number that MPE returned to HP EDIT. Please report this HP EDIT error. 1900 An illegal Asian character was found in the text HP EDIT found an invalid Asian character in the text. This error could be the result of editing a le of a language di erent from that speci ed with the NLDATALANG JCW.
The character \XXX" is reserved for HP EDIT's internal use and is not valid as the Text Entry exit key.
2540 Text Entry exit key is limited to being one character The Text Entry exit key must be a single character. 2550 File too large to copy to recovery file The le exceeds the maximum size allowed by HP EDIT. 2560 Could not invoke spelling checker. HPSPELL must be installed The HPSPELL product must be installed on your system in order to invoke the spelling checker.
B Alphabetical List of Commands Command Name Activate Next Process Activate Previous Process Append Line Append Line From Macro Append To Character Append To Character From Macro Append To End Of Line Append To End Of Line From Macro Append To Word Append To Word From Macro Command Name Command Keys Cursor Line To Bottom 4CTRL5 n 4CTRL5 Cancel Block Capture File Capture Macro Center Text Change Filename Change Filename From Text Check Spelling DRAFT 9/3/97 13:43 Clear To Beginning Of Line Clear To End
Command Name Command Command Keys Keys Insert Replace Pattern Downshift Character v Downshift Line V Insert Search Pattern Downshift Word 4CTRL5 Join File J v Join Lines j Edit Line Number 4CTRL5 Join Lines and Justify 4ESC5 j e Keep Text k Encrypt Load Con g File 4ESC5 l Encrypt With Key x Mark Character Block End of Line ] Start Execute Editor Command E Mark Line Block Start X Execute Macro m Meta 4ESC5 Execute MPE Command : Open Window W Exit e Overwrite o Fill Character 4ESC5 ' Overwrite From Macro $o F
Command Name Search And Replace Backward Search And Replace Forward Search Backward Search Forward Select Block Set Distance To Mark Set Distance To Previous Location Set Encryption Key Set Mark Set Options Shift End of Line Left Shift End of Line Right Shift Line Left Shift Line Right Show All Key Assignments Show Editor Statistics Show Key Assignment Show Macros Show Reassigned Keys Size Window Sort Ascending Sort Descending Start/Stop Timers Note DRAFT 9/3/97 Command Name Command Keys Swap Characters
C Command Reference Tables The tables in this appendix list all commands according to function and provide the default key assignment, a brief de nition, and the page number where you can obtain reference information for a particular command. The tables are very useful during an editing session when you want to perform a certain function but are uncertain about which HP EDIT commands you can use to perform the function.
Cursor And Window Commands Moving The Cursor Within The Current Window Key Command De nition Forward Character Moves cursor forward [count] characters w Forward Word Moves cursor forward [count] words + Forward Line Movescursor forward [count] lines Back Character Moves cursor to the left [count] characters b Back Word Moves cursor to the left [count] words - Back Line Moves cursor backwards [count] lines Cursor To Top Moves cursor to top line of display 4SPACE5 4BKSP5 4CTRL5 t 4C
Scrolling And Positioning Text Key Command De nition s Scroll Forward Scrolls screen (or [count] lines) forward S Scroll Backward Scrolls screen (or [count] lines) backward 4ESC5 L Scroll Left Scrolls screen (or [count] columns) 4ESC5 R Scroll Right Scrolls screen (or [count] columns) Cursor Line To Top Moves current line to top of display window Cursor Line To Center Moves current line to center of display window Cursor Line To Bottom Moves current line to bottom of display window 4
Text Entry Commands Appending Text Key Command De nition Append To Character Switches to Text Entry mode and appends text after the current character Append To Word Switches to Text Entry mode and appends text to end of current word ; Append To End Of Line Switches to Text Entry mode and appends text to end of current line A Append Line Switches to Text Entry mode and appends text on a new line below the current line a 4CTRL5 4ESC5 a Inserting Text Key Command De nition i Insert Chara
Overwriting Text Key o DRAFT 9/3/97 Command Overwrite De nition Switches to Text Entry mode and overwrites text beginning at cursor Command Reference Tables 13:43 C-5
Text Alteration Commands Deleting Text Key Command Delete Character d 4CTRL5 d Delete Word De nition Deletes [count] characters Deletes [count] words D Delete Line Deletes [count] lines L Clear To Beginning Of Line Deletes from cursor to start of line except for the current character l Clear To End Of Line Deletes from cursor to end of line including the current character 4ESC5 - Delete Leading Blanks Deletes leading blanks, if any 4ESC5 d Delete Pattern Deletes the current string o
Sorting Text Key 4ESC5 Command k De nition De ne Sort Key Columns Prompts for range of columns to be compared during the sort Sort Ascending Sorts [count] lines of text in ascending order Sort Descending Sorts [count] lines of text in descending order Encrypting Text Key Command De nition Set Encryption Key De nes password key used to encrypt and decrypt text Encrypt Encrypts [count] lines of text Encrypt With Key Encrypts [count] lines with speci ed encryption key Decrypt Decrypts [coun
Formatting Text Joining And Justifying Key Command j De nition Join Lines Joins next [count] lines with current line 4ESC5 j Join Lines And Justify Joins next [count] lines with current line and right justi es 4ESC5 J Right Justify Line Right Justi es [count] lines according to join length margin variable Shifting Text Key Command < > De nition Shift Line Left Shifts [count] lines to the left Shift Line Right Shifts [count] lines to the right 4ESC5 < Shift End Of Line Left Shifts
Swapping Text Key Command De nition ~ Swap Characters Swaps current character with next character on line % Swap Words Swaps current word with next word on line Swap Lines Swaps current line with following line ~ 4ESC5 Compressing Blanks Key Command De nition Compress Blank Space Compresses multiple blank spaces into single blanks Compress Blank Lines Compresses multiple blank lines into single blank lines Filling A Line Key Command ' 4ESC5 Fill Character De nition Replicates cur
Text Location Commands Finding Characters Key Command De nition G Find All Occurrences Locates all occurrences of a given character F Find Character Locates next occurrence of a given character Find Previous Character Locates previous occurrence of a given character Find Blank Space Locates next [count] occurrence of a blank space Find Previous Blank Space Locates previous [count] occurrence of a blank space Find . Locates next [count] occurrence of a period Find Previous .
Searching For And Replacing Text Key Command De nition / Search Forward Searches forward for de ned search pattern n Search Backward Searches backward for de ned search pattern g Search And Replace Forward Searches forward for search pattern, then prompts for replacement action f Search And Replace Backward Searches backward for search pattern, then prompts for replacement action 4ESC5 g Global Search And Replace Forward Searches forward for search pattern and replaces all occurrences wit
Block Selection Commands Block Selection Commands Key 4CTRL5 Command X Cancel Block De nition Cancels a block selection. x Mark Character Block Start Marks the beginning or end of a character block. X Mark Line Block Start Marks the beginning or end of a line block. B Select Block Selects or reselects a character or line block.
Accessing Processes And Programs Key Command De nition 4CTRL5 n Activate Next Process Activates child editing session 4CTRL5 p Activate Previous Process Activates parent editing session ! Break To MPE Accesses MPE command interpreter : Execute MPE Command Prompts for and programmatically executes speci ed MPE commands Run TDP Formatter Accesses TDP text formatter and executes TDP \FINAL" command on contents of editing session Run Program Executes speci ed MPE programs Start/Stop Timers
Getting Help Key Command ? De nition Help Accesses Help system Describe Describes speci ed commands Refreshing The Screen Key 4ESC5 Command * * De nition Refresh Line Rewrites current line of display Refresh Screen Rewrites entire display Printing Text Key 4ESC5 Command P Print Text De nition Prints a line, block, or le of text on a printer.
Configuration Commands Customizing And Configuring The Editing Environment Key Command O De nition Set Options Accesses screen of user con gurable editor options 4ESC5 s Save Con g File Saves editing environment to default or named con guration le 4ESC5 l Load Con g File Loads speci ed con guration le 4ESC5 ? Show Editor Statistics Displays statistics on editing session Controlling Key Assignments Key K 4ESC5 DRAFT 9/3/97 K Command De nition Assign Key Assigns key sequence to nam
Macro Commands Key Command 4ESC5 ( Begin Capture Begins capturing keyboard input 4ESC5 ) Capture Macro Uses captured input for macro de nition Capture File Saves captured input to named le De ne Macro Uses text on current line for macro de nition De ne Multiple Macros Uses text on each successive line as a separate macro de nition m Execute Macro Executes named macro M Go To Macro Branches to and executes named macro Show Macros Displays all de ned macros Display Message Prompts fo
Commands Used Within Macros Pausing Macro For Input Key Pauses macro execution and prompts for text to append after the current character Append To Word From Macro Pauses macro execution and prompts for text to append after the current word A Append Line From Macro Pauses macro execution and prompts for text to append after the current line 4$5 ; Append To End Of Line From Macro Pauses macro execution and prompts for text to append at the end of the current line 4$5 i Insert Character From Ma
Using Conditional Expressions Key Command De nition 4ESC5 t Test/Set/Clear Flag Sets or clears conditional ag or begins a \true clause" in a macro 4ESC5 T Terminate True Clause Terminates true clause established with Test/Set/Clear and resumes unconditional macro execution 4ESC5 m Test And Execute Macro Tests ag and executes named macro if ag is set to true 4ESC5 M Test And Go To Macro Tests ag and branches to named macro if ag is true Performing Calculations Key C-18 Command De niti
D Using HP EDIT with 16-bit Characters This appendix describes the di erences between editing ASCII (8-bit) characters and editing Asian (16-bit) using HP EDIT. Purpose Except as noted in this appendix, all features of HP EDIT are as described in the HP EDIT Reference Manual . Hardware Requirements HP EDIT processes 16-bit characters on MPE/XL systems and operates in Native Mode.
Software Requirements HP EDIT requires either the availability of the Native Language Input/Output (NL I/O) subsystem when used in HP 16 mode or a terminal that can be con gured to operate in HP 15 mode. In order to run HP EDIT, the program le must reside in a user group that has Process Handling (PH), and Data Segment (DS) capabilities. This requirement will be met if you place HP EDIT in the PUB.SYS group as recommended. The user must have Save File (SF) capability.
Definition of a Word HP EDIT has two de nitions for a word. A series of 8-bit characters. (As de ned by the word category on the Options Page.) or A single 16-bit character. HP EDIT uses these de nitions when performing the following commands: Append to Word Back Word Delete Word Forward Word Replace Word Swap Words Command Mode Key Assignments Cursor Movement Using the TAB Key You cannot assign 16-bit Asian characters to a command key.
Text Entry Mode Inserting Text Overwriting Text A 16-bit character will not t in the 80th column on the screen since each Asian character takes up two columns. If you try to insert a 16-bit character in the 80th column, the character will automatically move to the next line. While in text entry mode, you can enter 8-bit and 16-bit text in any sequence. Inserting 16-bit characters will make the end of the line move two columns (the width of a 16-bit character) to the right for each character inserted.
For example, given the following two lines on the screen: NNNNNNNNNNNNNNNNNNNNNNNNNNNNNNNNNNNNNNNNNNNN Start of line.... End of line off the screen Next line.... NNNNNNNNNNNNNNNNNNNNNNNNNNNNNNNNNNNNNNNNNNNN off the screen When you enter the 16-bit character \[]", the screen changes to look like the following example. NNNNNNNNNNNNNNNNNNNNNNNNNNNNNNNNNNNNNNNNNNNN Start of line.... End of lin off the screen []xt line....
Most HP EDIT commands process both 16-bit text and 8-bit text as described in the HP EDIT Reference Manual (HP part number 30316-90001). This section describes the commands that operate di erently. Command Descriptions Assign Key Calculate This command works only with 8-bit characters, including Japanese Katakana characters. The following table shows how the R, @, ;, and : calculator variables are di erent when editing 16-bit text.
Delete Leading Blanks Display Message Encrypt Commands Delete Leading Blanks does not delete 16-bit blank characters; it deletes USASCII blanks. When you edit a le with Asian text, the Display Message Command displays a prompt for a few seconds, then blanks out the message line to allow you to enter a string. The three Encrypt commands are: Encrypt Encrypt With Key Set Encryption Key The Encrypt and Encrypt With Key commands do not encrypt 16-bit characters or 8-bit Katakana characters.
Paste Commands The three Paste commands are: Paste After Paste Before Paste Over Paste After and Paste Before commands process 8-bit and 16-bit characters. When you use the Paste Over command and a 16-bit character straddles a column where text is to be pasted over, the portion of the character to the left of the column will be changed to a USASCII blank. Run TDP Formatter Search And Replace Commands The TDP Formatter does not support 16-bit text.
Upshift/Downshift Commands The six Upshift/Downshift commands are: Upshift Character Upshift Line Upshift Word Downshift Character Downshift Line Downshift Word Upshift and Downshift commands have no e ect on Asian characters.