
StorageWorks Modular Smart Array 500 System Maintenance and Service Guide
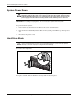
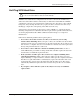
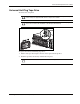
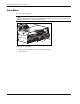
Table Of Contents
- HP StorageWorks Modular Smart Array 500 System Maintenance and Service Guide
- Notice
- Contents
- About This Guide
- Chapter 1: Illustrated Parts Catalog
- Chapter 2: Removal and Replacement Procedures
- Safety Considerations
- System Power Down
- Hard Drive Blank
- Hot-Plug SCSI Hard Drive
- Universal Hot-Plug Tape Drive
- Bezel Blank
- HP StorageWorks Modular Smart Array 500 Controller
- Battery-Backed Cache Module
- Blower
- Hot-Plug Power Supply
- 2-Port and 4-Port Shared Storage Modules
- Interconnect Blank
- Power Button/LED Assembly
- MSA500 System Chassis and Backplane
- Chapter 3: Diagnostic Tools
- Chapter 4: Component Identification
- Front Panel Components
- Enclosure LEDs
- Rear Panel Components
- Power Supply/Blower Assembly LEDs
- 2-Port Shared Storage Module Components
- 2-Port Shared Storage Module LEDs
- 4-Port Shared Storage Module Components
- 4-Port Shared Storage Module LEDs
- Controller Components
- SCSI IDs
- Hot-Plug SCSI Hard Drive LEDs
- Hot-Plug SCSI Hard Drive LED Combinations
- Chapter 5: Specifications
- Index
Removal and Replacement Procedures
HP StorageWorks Modular Smart Array 500 System Maintenance and Service Guide 2-11
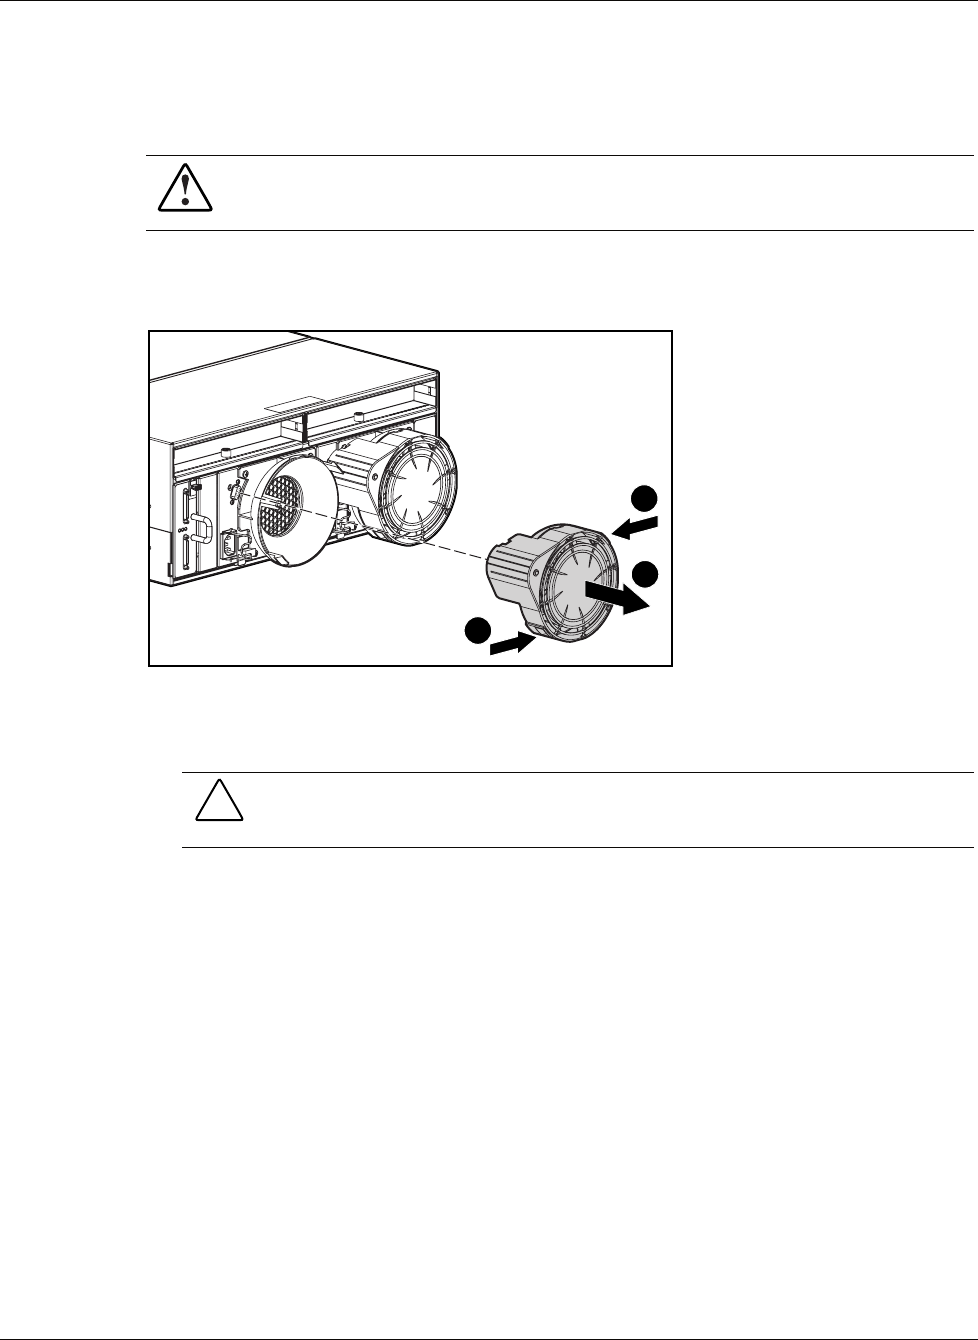
Blower
To remove the component:
WARNING: The blower blades rotate at a high speed. Avoid touching the rotating
blades when removing the blower.
NOTE: The power supply is designed so that removing a blower does not adversely affect system
performance. However, do not remove a blower until the replacement blower is available.
1
1
2
To replace the blower:
1. Align the guidepost on the blower with the connector on the power supply.
CAUTION: Do not press on the center section of the blower because this action can
damage the blades. Press only on the outer edge of the blower.
2. Slide the blower into the connector until it locks into place.
3. Be sure the following conditions occur:
— The blower begins operating immediately.
— The power supply/blower assembly LED is green.