
HP Smart Array Cluster Storage System

Installation and Operation
2-14 HP Smart Array Cluster Storage System User Guide
HP CONFIDENTIAL
Writer: Rob Weaver File Name: c-ch2 Installation and Operation
Codename: Aurora Part Number: 240333-003 Last Saved On: 11/6/02 1:03 PM
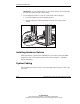
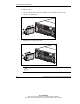
For information about connecting DC power cords, refer to “DC Power Supply
Option” in Chapter 3.
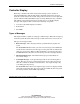
System Power Up
Observe the following guidelines before powering up the system:
• Be sure that all components are powered down.
• Always install all components of the storage system and connect components to
the supported interconnect options.
• Install hard drives in the Smart Array Cluster Storage system so the controller
can identify and configure them at power up.
CAUTION: You must power up the Smart Array Cluster Storage system before
powering up the servers. It may take up to 2 minutes for the system to completely
power up. Wait until the display provides the “Startup Complete” message.
To power up the system:
1. Complete server hardware installation and cabling. Refer to the server
documentation.
2. Connect the SCSI cables and power cords to the Smart Array Cluster Storage
system. Refer to “System Cabling” in this chapter.
IMPORTANT: When the power cord is connected to the AC or DC source, the system
automatically enters standby mode and provides power to certain system components.
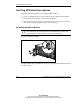
3. Press the Power On/Standby button on the Smart Array Cluster Storage system
and observe the system power LED and controller display. When the system goes
from standby to full power, the system power LED illuminates solid green, and
the display provides a “Startup Complete” message.
4. Power up the servers. Refer to the server documentation.