
User's Manual
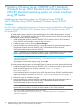
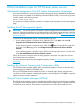
3. On the Before you begin page, verify that your destination server and network environment
are prepared for the role and feature you want to install, and then click Next.
4. On the Select installation type page, select Role-based or feature-based installation and then
click Next.
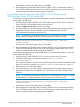
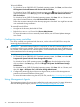
5. On the Select destination server page, select either select a server from the server pool or
Select a virtual hard disk option and then click Next.
6. On the Select server roles page, select Hyper-V.
7. To add the tools that you use to create and manage virtual machines, click Add Features. On
the Adde Roles and Features wizard, click Next.
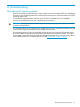
8. Click Next.
9. Read the note carefully and click Next.
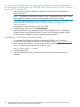
10. On Create Virtual Switches page, select the network adopter to communicate with virtual
switches.
11. On Virtual Machine Migration page, select Allow this server to send and receive live migrations
of virtual machines and Authentication protocol, if needed.
12. Click Next.
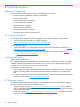
13. On Default Store page, change the Default location for virtual hard disk and Virtual machine
configuration files, if needed and click Next.
14. On the Confirm installation selections page, select Restart the destination server automatically
if needed and then click Install.
15. Reboot the server once the installation is complete.
When installation is finished, verify the installation by clicking the All Servers link from the left
pane of Server Manager, then select a server from right pane of Server Manager, on which
you installed Hyper-V, and view the Roles and Features title on the page for the selected server.
Installing Hyper-V (For Windows Server 2012 R2 Standard) 31