
Using Microsoft ImageX with RDP to Capture and Deploy Windows Server Images on HP Integrity Servers

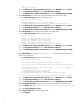
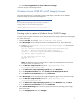
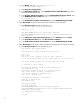
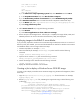
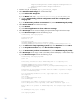
Table Of Contents
echo HPSP not found
set /a returncode=0
:end
del temp.txt
exit /b %returncode%
b) In the Choose the script operating system field, select Windows and click Next.
c) In the Script Run Location field, select On the client computer.
d) In the Automation pre-boot environment field, select WinPE Managed (64 bit).
7. Add a Distribute Software task to re-install minimal ISP components. Follow these steps:
a) In the Name field, enter .\hpfeatures\ws7-ia64-en_us\oem\sysprep-post.cmd.
b) Select Copy all directory files.
8. Add a Power Control task, using the following parameters:
a) Select Restart.
b) Select Force applications to close without a message.
9. Execute the job on the managed server. After the job is completed, the images of ESP, HPSP, and
MSDATA partitions are stored in the Altiris shared directory ready to be deployed.
Deploying images to the BL8x0 i2 server blades
If you previously captured a Windows Server 2008 R2 image installed with Version 6.2 or earlier of
RDP or by some other method, you must install the HP HW Device INF file for Windows Server 2008
and 2008 R2 offline in the OS image. Follow these steps:
1. Create a temp folder. For example: C:\File
2. Mount the WIM file (for example, w2k8r2image.wim) to the local file with the following
command:
ImageX /mountrw w2k8r2image.wim 1 C:\File
3. Inject the drivers with the PEimg tool with the following command:
PEimg /inf=patch_path\hphwdevice2.inf C:\File
4. Commit the changes to the WIM file with the following command:
ImageX /unmount /commit C:/File
5. Deploy the WIM file to the BL8x0 i2 server blades.
Creating a job to deploy a Windows Server 2008 R2 image
To create a job to deploy a Windows Server 2008 R2 image using the Microsoft ImageX tool, follow
these steps:
1. Copy the \hpfeatures\ws7-ia64-en_us\sysprep.xml file and rename it. For example,
sysprep-deploy.xml.
2. Edit the sysprep-deploy.xml file, substituting the original Altiris tags with the following ones
(in blue text):
<settings pass="specialize">
<component name="Microsoft-Windows-Shell-Setup"
processorArchitecture="ia64" publicKeyToken="31bf3856ad364e35"
language="neutral" versionScope="nonSxS"
xmlns:wcm="http://schemas.microsoft.com/WMIConfig/2002/State"
xmlns:xsi="http://www.w3.org/2001/XMLSchema-instance">
<ComputerName>@@compname@@</ComputerName>
<ProductKey>@@productkey@@</ProductKey>
9