
Installation Guide, Windows Server 2008 SP2 v7.0
I/O, storage, intended use, and so on. See your System Administrator and the operating
system online help.
31. Installation of the OS is complete.
After installing the OS, perform these tasks next:
1. “Install the Integrity Support Pack (ISP)” (page 57)
2. “Activate the OS” (page 49)
3. “Apply OS Updates Using the Smart Update Media” (page 51)
4. “Enable Windows Components” (page 52)
5. “Verify System Device Drivers and Register for Updates” (page 53)
6. To determine whether you need to perform any additional tasks, see “Miscellaneous
Installation Issues” (page 54).
Then, see the sections describing configuration of the management tools, and perform these
tasks:
1. “Configure System Management Homepage” (page 62)
2. “Configure and Verify the WBEM Providers” (page 60)
3. “Verify Installation of the nPartition Management Tools” (page 63)
Install from a GUI Console
This section describes how to install the OS using a GUI console and the EFI-Based Setup Utility
(EBSU). EBSU provides an easy-to-use interface to complete the following tasks:
• flash the firmware
• partition the hard disk
• install diagnostic tools
• configure storage controllers
• run other EFI utilities.
To run EBSU, follow these steps:
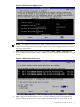
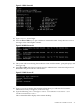
1. Power on the server. The server boots to EFI.
You can use the EFI Boot Manager from the Enhanced interface (gray background) or the
Legacy interface (black background).
2. Load the HP Smart Setup media into the server DVD drive.
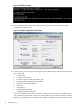
3. From the EFI Boot Manager Boot Menu, select Internal Bootable DVD, and press Enter.
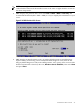
EBSU displays the Welcome screen.
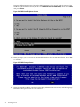
4. Click OK and press Enter.
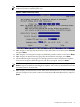
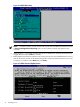
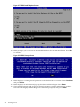
5. From the Main Menu, select Express Setup and press Enter.
Install from a GUI Console 37