
Installation (Smart Setup) Guide, Windows Server 2003, v6.2

3. If Windows Setup cannot find a system partition, when you are prompted, press Enter to
continue. Windows creates a partition and then prompts you to format it.
4. Select the partition on which to install the OS and press Enter. Windows formats the partition
if necessary, checks the partition for errors, and begins to copy the OS files.
5. Monitor the copy process until it completes. You can monitor installation progress from the
SAC command prompt by using these three channels: setuplog.txt, setupact.log,
and setuperrlog. For more information, see the Windows Server 2003 and Windows Server
2008 Administration and User Guide.
Upon completion, Windows Setup counts down to a reboot. Allow the system to reboot.
Specify Server Settings
When the system boots, Windows displays a screen indicating that an EMS channel (MP remote
port) is present. It can take 2 to 15 minutes for the mouse and keyboard to start operating in this
mode.
To set up Windows Server 2003 after initial boot from the local console, complete the following
steps:
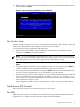
1. When prompted to enter server settings, click OK.
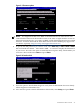
2. In the Windows Setup Wizard, enter the following setup information:
a. In the License Agreement window, click Accept and then click Next.
b. In the Regional and Language Options window, click Next.
c. In the Your Product Key window, enter the product key located on the label attached
to the server.
d. In the Licensing Modes window, select the license you purchased.
e. In the Administrator Password window, enter the server name and a password.
f. In the Date and Time window, select the time zone, and click Next.
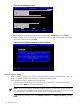
The server reboots to the EFI Boot Manager.
3. From the EFI Boot Menu, select Windows Server 2003. The server boots to Windows.
4. Log in to the system with the administrator password you specified earlier.
5. After installing the OS, install the HP Support Pack (from the HP Smart Setup media) and
install the OS updates from Microsoft (from the HP Smart Update media).
Install from PXE
When a PXE-enabled client connected to the network boots up, the computer initiates a network
service request. A DHCP discover packet is sent to the network requesting the IP address of an
available WDS server. The DHCP server responds to the request by providing an IP address to
the client. Any available WDS server can respond with its IP address and the name of the boot
file the client should request if the client selects that WDS server for service.
To install Windows Server 2003 from PXE, complete the following steps:
1. From EFI, select the Boot Manager.
2. At the Boot Manager, select the Boot Options menu.
3. From the list of available boot sources, select the NIC to boot from and press Enter.
4. At the PXE boot status window, press Enter to continue.
5. At the login screen, enter a valid user name and password, and press Enter.
6. At the OS selection screen, select the OS to be installed and press Enter to start the installation.
7. Complete the installation by following the instructions on the screen.
Install from PXE 35