
Installation (Smart Setup) Guide, Windows Server 2003, v5.1

c. In the Your Product Key window, enter the product key. The product key is located on
the label attached to the server.
d. In the Licensing Modes window, select the license you purchased.
e. In the Administrator Password window, enter the server name and a password.
f. In the Date and Time window, select the appropriate timezone, and click Next.
The server reboots to the EFI Boot Manager and then boots up Windows Server 2003. You can
now log in to the server using the administrator password you selected.
Applying OS updates
Install all the OS updates and security updates from the HP Smart Update DVD. You can find
the Smart Update DVD in the Integrity Essentials Foundation Pack kit along with the Smart
Setup CD.
To apply the OS updates using the HP Smart Update DVD, complete the following steps:
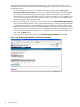
1. Insert the HP Smart Update DVD. The Smart Update screen appears. Click the QFEs for
SP1 or QFEs for SP2 tab (whichever applies).
2. Use the links on the left navigation bar to go directly to Operating System Updates, Security
Updates, Clustering Updates, or Documents.
3. To install all operating system updates, click Install... in the Operating System Updates
section. The HP Package Setup screen appears.
4. Click Install. The HP Setup screen appears. Click Install to continue with the installation or
click Close to exit setup. When you click Install, a command window appears, listing each
update as it installs. Sometimes these are very large updates and can take several minutes
each to install.
5. When prompted, click Reboot to complete the installation. HP recommends rebooting after
each QFE bundle installs to ensure correct installation.
6. To install all Security updates, click Install... in the Security Updates section. The HP Package
Setup screen appears.
7. Click Install. The HP Setup screen appears. Click Install to continue with the installation,
or click Close to exit setup. When you click Install, a command window appears, listing
each update as it installs. Sometimes these are very large updates and can take several
minutes each to install.
8. When prompted, click Reboot to complete the installation. HP recommends rebooting after
each QFE bundle installs to ensure correct installation.
9. At any time, if you want to read a more detailed description about a particular update, click
on its Knowledge Base (KB) ID number and you are linked to the relevant article on the
Microsoft website.
10. Install the Clustering Updates in the same manner, but only if your server will function as
a node in a cluster.
11. After installing all desired updates, use the Microsoft Windows Update functionality in the
operating system (Start > Help and Support > Support Tasks > Windows Update) to
check for any updates that have been issued since your Smart Update media was released.
You can also run QFE Check, which is included with each Smart Component (when you
extract the Smart Component bundle).
NOTE: You can also extract Smart Components to your hard drive and install the QFEs
individually, but HP recommends installing them as a group, as described above.
Enabling Windows components
This section describes installation of the Windows components that enable networking.
Applying OS updates 41