
Installation (Smart Setup) Guide, Windows Server 2003, v5.1
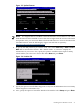


1. From the headless console, log in to the MP using a terminal emulator such as HyperTerminal
or PuTTY.
2. Boot the server to EFI.
3. Because Windows Server 2003 cannot create a boot entry if one already exists, you must
delete the existing boot entry. To delete the boot entry:
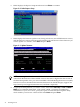
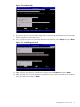
a. Do one of the following:
• If you are using the Enhanced EFI Boot Manager Menu (grey background), select
EFI Boot Manager Menu > Boot Configuration > Remove Boot Entry.
• If you are using the Legacy EFI Boot Manager Menu (black background), select
EFI Boot Manager Menu > Boot Option Maintenance Menu > Delete Boot
Option(s).
b. Arrow down to select the Windows Server 2003 boot entry to delete and press Enter.
NOTE: The next step applies to factory-installed systems that require the use of the HP
Reinstallation media only. If the Windows boot entries are not all deleted, the boot file
bootxxx.efi is not created.
4. Insert the HP Reinstallation media in the DVD drive of the target system.
IMPORTANT: If you are installing an HP Virtual Machines (HPVM) Windows guest, you
also need to issue an IN command (for “insert”) from the HPVM console menu every time
you insert a disc. If you forget to do this, the server does not recognize the disc and appears
to hang.
NOTE: With rx2660, rx3600, rx6600, and BL860c servers, you can also use Virtual Media
(vMedia) as the source of the reinstallation image.
5. Reboot the server.
6. At the MP> prompt, on the headless console, enter the CO command to launch the live console.
NOTE: With rx2660, rx3600, rx6600, and BL860c servers, you can also use Remote Serial
Console to perform this step.
7. Select EFI Boot Manager menu > Internal Bootable DVD and press Enter. The server boots
from the HP Reinstallation media.
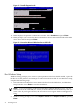
8. At the SAC> prompt, enter the cmd command.
9. Switch to a new command channel by pressing Esc+Tab.
10. At the x:\ia64\system32> prompt invoke the installation menu by entering txtrestore.
A Warning message appears stating that all data, including the partition table, will be lost
upon reinstallation.
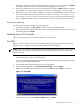
11. Select Y to continue.
12. Select the desired partition size (33 GB is recommended). The maximum partition size is
limited to the size of the drive. Select Y to continue.
NOTE: The installation process copies files to the hard disk. Do not power off the server
during the installation.
13. When the installation process completes, press any key to reboot the server.
14. The local console displays a screen indicating that the EMS was detected. When prompted
to use the local console, do not click OK.
15. Return to the headless console and perform system setup as indicated in the following
section.
38 Installing the OS