
Setup and Install
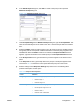
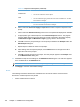
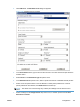
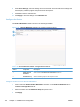
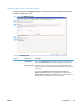
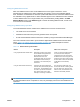


Table 3-30 Addressing tab (continued)
Callout Component Description
3 Network Contacts Click to select the Enable Network Contacts (use LDAP server) check box,
and then follow the steps below.
●
Network Directory Server (LDAP) (Step 1). Use the following controls to
designate the LDAP server.
◦ Type the hostname or IP address in theLDAP Server Address text
box or click AutoFind to have DSS find the LDAP server address.
◦
Click to select the Use a secure connection (SSL) check box.
◦ Tye the port number in the Port text box.
●
Server Authentication Requirements (Step 2). Click to select one of the
following options.
◦ Server does not require authentication.
◦
Server requires authentication.
●
LDAP Database Search Settings (Step 3). Use the following controls to
configure the search settings.
◦
Type in the Path to Start Search (BaseDN, Search Root) or click
Auto Find to have DSS find the path.
◦
Select a Source for Attribute Names or click Auto Find to have
DSS find the source.
◦ Type in the attribute to match the recipient's name, e-mail address,
and fax number.
◦
In the Advanced Search Options section, Select theMaximum
LDAP Addresses and the Maximum Search Time from the drop-
down menus, and then type in the LDAP Filter Condition in the text
box.
●
Test for LDAP Retrieval (Step 4). Type in at least 3 characters to test the
retrieval of address book entries using the LDAP setup, and then click
Test.
● Sync Schedule (Step 5 ). Select a sync schedule from the drop-down
menu, or click Sync now. The last replication shows in the text box.
4 Address Book
Manager
Click this button to launch the Address Book Manager. For more information,
see
Address Book Manager on page 125.
Configuring Personal Contacts feature
When the Enable Personal Contacts check box on the Addressing tab is selected, users can gain
access to their personal Outlook contacts address books at the device. Exchange Contacts support is
only available if authentication is enabled and the authentication method is set to Microsoft Windows.
See
Authentication on page 67 for more information.
128 Chapter 3 Installation and configuration ENWW