
Setup and Install
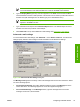

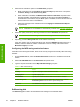

NOTE If authentication is enabled, the Default 'From' Address group box is disabled.
The e-mail address of the authenticated user is used for the From e-mail address.
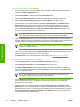
6. Type the Display Name (optional). This name appears in the From: text box when the MFP
user first initiates a send-to-e-mail operation. This text box can be used to provide instructions to
the MFP user (with messages such as "Please type your e-mail address here").
NOTE If the display name is not provided, the default sender is the e-mail address that
appears in the From: text box.
7. Type a default e-mail subject into the Default Subject text box. The default subject is used if
the MFP user does not provide an e-mail subject.
8. Click Advanced to set up some additional e-mail settings. See
Advanced e-mail settings.
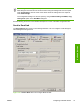
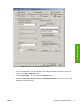
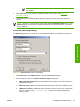
Advanced e-mail settings
To use the advanced e-mail settings, click Advanced... on the Send to e-mail tab. The advanced
settings specify default e-mail message contents and default e-mail attachment settings.
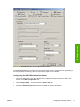
Figure 3-28 Advanced E-mail Settings dialog box
The Message Text appears in the body of all e-mail messages that are sent from the device. Select
one of the following options:
●
Use the Built-in Message: The built-in default message is shown in the Message box in the
screen shot above. This message appears in one of the supported languages.
●
Use a Custom Message: In the Message text box, type the message text for the e-mail
message. The limit is 1,024 characters.
ENWW Configuring individual devices 75
Software features