
User Manual
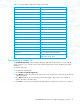


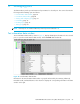

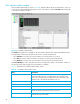

Table Of Contents
- Contents
- About this guide
- Using McDATA Web Server/Element Manager
- Managing Fabrics
- Securing a fabric
- Security consistency checklist
- Connection security
- User account security
- Remote authentication
- Device security
- Edit Security dialog
- Create Security Set dialog
- Create Security Group dialog
- Create Security Group Member dialog
- Editing the security configuration on a switch
- Viewing properties of a security set, group, or member
- Security Config dialog
- Archiving a security configuration to a file
- Activating a security set
- Deactivating a security set
- Configured Security data window
- Active Security data window
- Fabric services
- Rediscovering a fabric
- Displaying the event browser
- Working with device information and nicknames
- Zoning a fabric
- Zoning concepts
- Managing the zoning database
- Managing the active zone set
- Managing zones
- Merging fabrics and zoning
- Securing a fabric
- Managing switches
- Managing user accounts
- Configuring RADIUS servers
- Displaying switch information
- Configuring port threshold alarms
- Paging a switch
- Setting the date/time and enabling NTP client
- Resetting a switch
- Configuring a switch
- Archiving a switch
- Switch binding
- Restoring a switch
- Restoring the factory default configuration
- Downloading a support file
- Installing Product Feature Enablement keys
- Installing firmware
- Displaying hardware status
- Managing ports
- Glossary
- Index
McDATA® 4Gb SAN Switch for HP p-Class BladeSystem user guide 85
4 Managing ports
The data windows provide port information and port statistics for selected ports. This section describes the
following tasks that manage ports and devices:
• Port information data window, page 85
• Port statistics data window, page 88
• Viewing and configuring ports, page 91
• Port binding, page 95
• Resetting a port, page 95
• Testing ports, page 95
NOTE: External ports are numbered 0 and 9; internal ports are numbered 1–8.
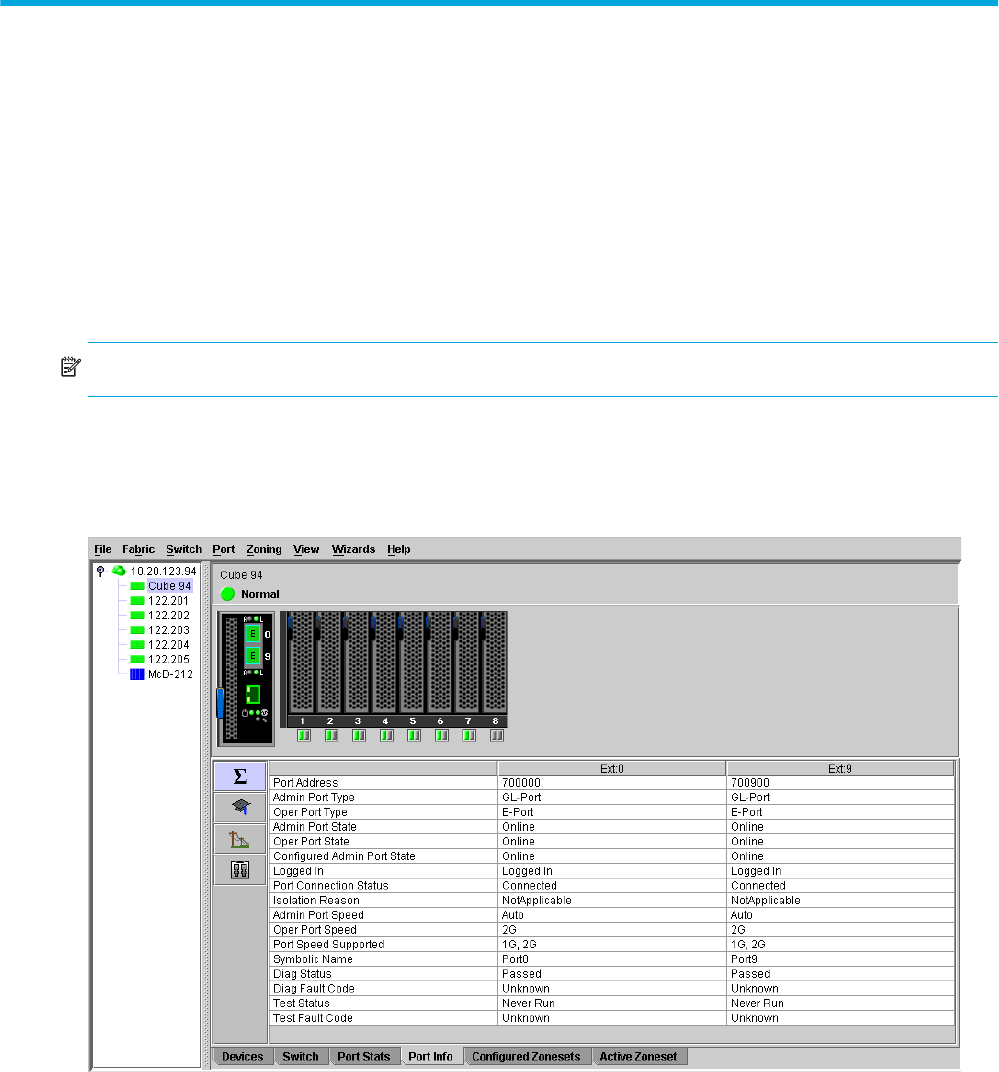
Port information data window
The Port Information data window, shown in Figure 39, displays detailed port information for the selected
ports. To open the Port Information data window, click the Port Info data window tab.
Figure 39 Port Information data window
Information in the Port Information data window is grouped and viewed by the Summary, Advanced,
Extended Credits, and Media buttons. Click a button to display the corresponding information in the data
window on the right.