
User Manual
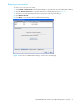
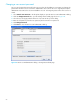

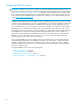

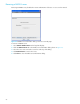


Table Of Contents
- Contents
- About this guide
- Using McDATA Web Server/Element Manager
- Managing Fabrics
- Securing a fabric
- Security consistency checklist
- Connection security
- User account security
- Remote authentication
- Device security
- Edit Security dialog
- Create Security Set dialog
- Create Security Group dialog
- Create Security Group Member dialog
- Editing the security configuration on a switch
- Viewing properties of a security set, group, or member
- Security Config dialog
- Archiving a security configuration to a file
- Activating a security set
- Deactivating a security set
- Configured Security data window
- Active Security data window
- Fabric services
- Rediscovering a fabric
- Displaying the event browser
- Working with device information and nicknames
- Zoning a fabric
- Zoning concepts
- Managing the zoning database
- Managing the active zone set
- Managing zones
- Merging fabrics and zoning
- Securing a fabric
- Managing switches
- Managing user accounts
- Configuring RADIUS servers
- Displaying switch information
- Configuring port threshold alarms
- Paging a switch
- Setting the date/time and enabling NTP client
- Resetting a switch
- Configuring a switch
- Archiving a switch
- Switch binding
- Restoring a switch
- Restoring the factory default configuration
- Downloading a support file
- Installing Product Feature Enablement keys
- Installing firmware
- Displaying hardware status
- Managing ports
- Glossary
- Index
McDATA® 4Gb SAN Switch for HP p-Class BladeSystem user guide 55
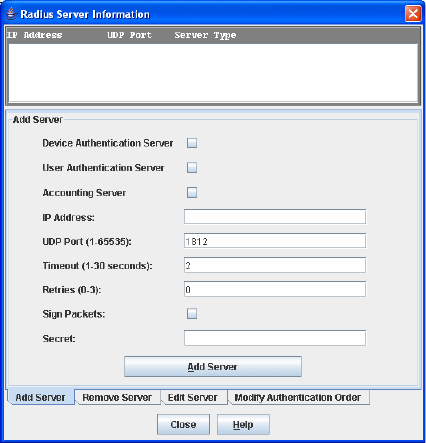
Adding a RADIUS server
A RADIUS server provides a method to centralize user and device authentication over a network.
Figure 22 RADIUS Server Information dialog—Add Server tab page
To add a RADIUS server:
1. Select Switch > Radius Servers in the faceplate display. The Radius Servers... option will not be
available unless the SSL service is enabled. See ”System services” on page 73 for information about
enabling the SSL service.
2. Click the Add Server tab in the Radius Server Information dialog shown in Figure 22.
3. Select Device, User, or Account for the server type.
4. Enter the remote IP address of the server in the IP Address field.
5. Enter the remote UDP port number of the Authentication RADIUS Server in the UDP Port field.
The RADIUS Accounting Server UDP port will always be the value of Device/User Authentication Server
UDP Port + 1. When enabled, the RADIUS Accounting Server audits user activity whether
UserAuthServer is enabled or not. The RADIUS Accounting Server default is False.
6. Enter the timeout value in seconds (minimum of 1 second, maximum of 30 seconds) in the Timeout
field. This is the number of seconds the RADIUS client will wait for a response from the RADIUS server
before retrying, or giving up on a request.
7. Enter the number of retries in the Retries field. This is the maximum number of times the RADIUS client
will retry a request sent to the primary RADIUS server.
8. Select Sign Packet to enable the switch to include a digital signature (Message-Authenticator) in all
RADIUS access request packets sent to the RADIUS server. A valid Message-Authenticator attribute will
be required in all RADIUS server responses.
9. Enter the server secret in the Secret field. A secret is required for all RADIUS servers. The secret is used
when generating and checking the Message-Authenticator attribute.
10.Click Add Server to add the server.
11.Click Modify Authentication Order tab, and verify that Device Authentication Order and User
Authentication Order options are set to Radius or Radius Local. See ”Modifying RADIUS server
authentication order” on page 58 for more information.
a. RADIUS—Only attempts to authenticate using the RADIUS server (another computer that provides
authentication).
b. RADIUS Local—Attempts to authenticate using the RADIUS server. If the switch can not contact the
RADIUS server due to a network or some other problem, the switch will authenticate using the local
password database.
12.Click Close to close the Radius Server Information dialog.