
Installing HP Insight Software 6.1 Update 1 on Windows Server 2008 R2 Failover Clusters with SQL Server 2008 for high availability

21
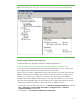
13.
Cluster Network Selection
:
a.
Select
IPv
4,
deselect
DHCP
and enter the
IP
Address
that
was
provisioned for the
SQL Server
2008 virtual server.
T
his white paper uses
16.92.155.185
. Enter the
Subnet Mask
. The
Network
entry must indicate the public network.
b.
Deselect
IPv6.
c.
Click
Next
.
14.
Cluster Se
curity Policy
: Accept the default value,
Use service SIDs
. Click
Next
.
D
omain groups are
intended for backward compatibility with earlier releases of Windows Server.
Note:
For information
about
service SIDs
and SQL service accounts, see
Setting
Up
Windows Service Accounts
at
http://msdn.microsoft.com/en
-
us/library/ms143504(v=SQL.100).aspx
.
15.
Server Configuration
:
Select
each of the following tabs to make selections.
a.
Service Accounts
tab: [1] Specify credentials for the SQL Server services listed. You
can
enter a
separate account/passw
ord for each individual service,
o
r
,
to
use the same
one for all
services, click
Use the same account for all SQL Server services
. To im
plement a best practice
and provide the least privilege for each account
,
you
must
separate
accounts.
[2]
Startup Type
is preset and cannot be changed during installation.
b.
Collation
tab: Specify any desired non
-
default collations for the database engine an
d analysis
services.
c.
Click
Next
.
16.
Database Engine Configuration
:
Select
each of the following tabs to make selections.
a.
Account Provisioning
tab: [1] in the
Authentication Mode
section, select
Windows
Authentication mode
. [2] In the
Specify SQL Server ad
ministrators
section, click
Add Current
User
, to add the SQL/IS Administrator account defined by this white paper. Add other
accounts if desired.
b.
Data Directories
tab: specify any desired non
-
default installation directories.
c.
FILESTREAM
tab: Check
Enable
F
ILESTREAM
for Transact
-
SQL access
.
Enabl
ing
FILESTREAM
for
file I/O streaming access
is not required.
d.
Click
Next
.
17.
Analysis Services Configuration
:
Select
each of the following tabs to make selections.
a.
Account Provisioning
tab: C
lick
Add Current User
, to
add the SQL/IS Administrator account
defined by this white paper. Add other accounts if desired.
b.
Data Directories
tab: S
pecify any desired non
-
default installation directories.
c.
Click
Next
.
18.
Repo
rting Services Configuration
: I
f the
Reporting Services
feature
is selected
,
make
the same
selections that were made
for
Analysis Services Configuration
.
19.
Error and Usage Reporting
: S
pecify the desired type of reporting services and
then
click
Next
.
20.
Cluster Installation Rules
runs tests and produces a results d
isplay. Verify that no tests
have
failed
and then click
Next
.
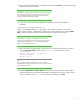
21.
Ready to Install
: V
erify the configuration presented and click
Install
.
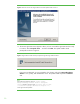
22.
Installation Progress
M
onitors the steps of installation and reports the installation result for each
selected feature. Re
view and
then
click
Next
.