
Installing and upgrading to HP Insight Software 6.3 on Windows Server 2008 R2 Failover Cluster with SQL Server 2008 for high availability

17
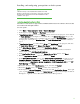
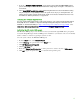
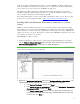
Upon completion of cluster creation you should see a screen similar to Fig ure 3.
Fig ure 3: Create Cluster Wizard Summary screen
Afte r the cluster has been successfully formed, continuing under the sa me account and with both
cluster nodes online, complete the following steps:
1. Click Sta r t, click Administrative Tools, click Computer Management, and then click Disk
Management. Select Online, then Initialize, and finally create New Simple Volumes…
for the remaining three shared disks. The volume type for shared disks must be
Basic. M BR o r G PT
partitions may be used.
2. In Failover Cluster Manager, add the three disks just configured, one at a time in the
following order: disk T:, disk S: and disk V: (as used in this white paper, refer to the
Storage
section above).
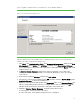
3. In the left pane, right-click Sto r a g e, and then click Add a disk.
4. Check the box of the disk to be added and click OK. The disk is added as Cluster Disk n under
Available Storage, located in the middle pane.
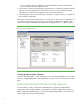
5. Ri g h t-click on the new cluster disk and then click Properties. Enter a new Resource Name that
will more easily identify the disk’s function, for example, DTC for disk T, and then click
OK. Thi s
will allow the proper disk to be selected more easily in the sections that follow.
6. Similarly in Failover Cluster Manager, rename the witness disk resource:
a. In the left pane, click on the name of the cluster
b. In the center pane, ensure that Core Cluster Resources is expanded.