
Installing and upgrading to HP Insight Software 6.2 on Windows Server 2008 R2 Failover Clusters with SQL Server 2008 for high availability

11
Administrator
credentials
used
by
this white
paper
Plea
s
e rev
i
ew
the creden
t
i
a
l
requi
r
emen
t
s
for the per
so
n who crea
t
es
the cl
u
ster a
n
d confi
g
u
r
es
clus
t
er
serv
i
c
es. Refer to “Failover
Cluster Ste
p
-
by
-
Step G
u
i
d
e: Conf
i
gu
r
ing
Acc
o
unts in
A
c
tive Di
re
cto
r
y,”
http://techne
t
.
micr
o
soft
.
c
o
m/en
-
us/
l
ibrary/cc73
1
00
2
(WS.10).aspx
and
then click the li
n
k to “Steps
for configu
r
ing the a
c
count for the person who installs
the
c
luster.”
Refer to
“Setting
Up
W
i
ndows Service Accounts,”
http://msdn.microsoft.com/e
n
-
us/
l
ibrary/ms143
5
04(v=
S
QL.10
0
).aspx
,
for informat
i
on on SQL Server 20
0
8 se
r
vice acc
o
un
t
s.
T
his
white p
a
per defines two l
o
gical
administrator
a
c
co
u
nts:
•
The Cluster Administrator
a
c
count
used to crea
t
e
the
c
lus
t
er.
Th
i
s a
c
c
o
unt must
m
e
et the a
c
c
ount
require
m
ents
described
in the d
o
cument
noted above for the person who
instal
l
s the c
l
us
t
er.
•
A SQL/IS A
d
ministrat
o
r acc
o
unt, u
s
ed to install and c
o
nfi
g
ure the
M
i
cr
o
soft S
Q
L Server and Ins
i
ght
Software
co
m
p
onents. Th
i
s
acc
o
unt m
u
st
meet the
sa
m
e require
m
en
t
s as the C
l
us
t
er Admin
i
stra
t
or
a
cc
o
unt.
In pra
c
tice
these may
be
separate
a
cc
o
unts
or the sa
m
e a
c
co
u
nt.
Note:
To
avoid
a
k
nown installation
problem,
do
not u
s
e a “space”
i
n the SQL/IS Adminis
t
rator
a
cc
o
u
nt
password.
Create
the
Failover
Cluster
Ensure both systems are powered on. Log in to one of them usi
n
g the Cluster
Ad
m
inistrat
o
r acc
o
unt.
Follow the fi
v
e steps as des
c
ribed
in “Ch
e
cklist:
Create
a
Failover
Cl
us
ter”
at
http://techne
t
.microsoft
.
com/en
-
us/
l
ibrary/cc75
5
00
9
.aspx
and
the
notes in
c
l
u
d
ed
in
T
able
2,
Create the Failover Cluster.
R
e
fer also to the
additional
information
on Failover
Clusters at
http://techne
t
.microsoft
.
com/en
-
us/
l
ibrary/cc75
4
48
2
.aspx
.
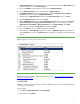
Table
2
:
Create
t
he
Failover
Clu
st
er
Step
#
Step
Descri
p
t
ion
Notes
1
Understand
t
he
R
equirements
f
or
Failover Clusters:
http://technet
.
m
i
crosoft.c
o
m/e
n
-
us/library/cc
7
71404.aspx
•
Use
Multi
-
path
I
/
O so
f
tware
if
av
a
ilable
f
or
y
o
ur
storage.
To
install
Multi
-
path
I/O
s
o
ftware,
per
f
orm
t
he following
ste
p
s
on
each cluster
node:
–
Install
t
h
e “M
u
lti
p
ath
IO”
feature
o
f Windows
Server
2008 R2.
–
Install
the
device
-
speci
f
i
c
module
(DS
M
)
for
y
o
ur
shared storage.
If
you
are using
an
HP
SAN,
do
w
nload
t
he appropriate
DSM
from
the
HP
website. Go
to
O
ther Multi
-
Pa
t
h S
o
ftware
-
Windo
w
s
–
Download drivers
and software
-
s
p
ecify product n
a
m
e
;
or,
go
to
ht
tp://we
l
come
.
hp.com
/
country
/
us/en/support
_
t
a
s
k
.htm
l
,
s
el
e
ct
“Download driv
er
s
and
software,”
and
search
f
or “Windows
MPIO
DS
M
.” Do
w
nlo
a
d
and
install
the
HP MPIO
D
SM
M
anager
from
t
he
s
ame
location. In
s
tall
t
h
e D
S
M
first,
a
nd
t
hen t
h
e
D
S
M M
a
nager.
2
Install
t
h
e Failover Clusteri
n
g
Feature:
http://tec
h
net
.
m
i
crosoft.c
o
m/
en
-
us/library/cc7705 06.as
p
x
•
Importan
t
:
a
f
ter
installi
n
g
the
Failover
Clusteri
n
g
fe
a
ture
on each
c
l
us
t
er
node,
insta
l
l
the
Microsoft
hotfix
described
in “The
Resource
H
o
sting
Subsystem
(Rhs
.e
xe)
proce
s
s
stops
unexp
e
ctedly
wh
en
you
start
a
cluster
resource in
Win
d
ows Server
2008
R2,”
refer
to
http://support.m
i
crosoft.c
o
m/kb/978527
.
HP
ne
e
ded
to apply
this
hot
f
ix
to attain
stable
o
peration
of
the
c
l
uster.
3
Conn
e
ct
networks
and
storage:
http://tec
h
net
.
m
i
crosoft.c
o
m/
en
-
us/library/cc7707 23.as
p
x
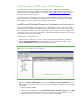
•
Importan
t
:
u
se
t
h
e Microsoft
Disk
Management
s
n
a
p
-
in
as described
to
“Online,” “Initial
i
ze”
and
th
e
n
cr
e
ate
a
“New
Sim
p
le
Vol
u
me…”
for
only
disk
W:
,
the
wit
n
ess
disk.
The vol
u
me
type
for
shar
e
d
disks
must
be
“Basic.” MBR
or
GPT partitions
may
be
used.
Wh
e
n
the
clus
t
er
is
c
r
eated
below,
there
i
s
n
o
user
control
o
f which
disk
is
se
le
cted
to
be
t
h
e wi
t
ness
disk. By
conf
i
gur
i
ng
on
l
y
disk
W:,
you
wi
l
l
force
it
t
o be
sel
e
cted.