
Installing and upgrading HP Insight Management 7.0 on Windows Server 2008 R2 Failover Clusters


39
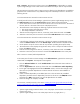
Creating the generic service resource: RSJRAS
1. Use the New Resource Wizard to create a generic service:
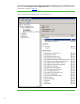
a. Select the RSJRAS service.
b. The Confirmation screen shows Service: RSJRAS (RSJRAS).
2. Add the following dependencies to the new resource’s properties: HP SIM Disk and RSScheduler.
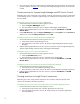
Creating the generic service resource: RSCentral
1. Use the New Resource Wizard to create a generic service:
a. Select the RSCentral service.
b. The Confirmation screen shows Service: RSCentral (RSCentral).
2. Add the following dependencies to the new resource’s properties: HP SIM Disk and RSJRAS.
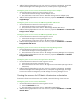
Creating the generic service resource: HP Matrix Infrastructure Orchestration
1. Use the New Resource Wizard to create a generic service:
a. Select the HP Matrix Infrastructure Orchestration service.
b. The Confirmation screen shows Service: HP Matrix Infrastructure Orchestration (hpio).
2. Add the following dependencies to the new resource’s properties: HP SIM Disk, HP Global
Workload Manager Central Management Server, HP Systems Insight Manager, HP Insight
Control virtual machine management, HP Storage Provisioning Manager Service, HP Logical
Server Automation, and RSCentral.
You have completed configuring the cluster resources for Systems Insight Manager and Insight
Management. See
Appendix A: Summary of Insight Management cluster resources for a summary of
the Insight Management cluster resources.
Bringing the virtual group containing the Insight Management resources
online
Before bringing the HP SIM group online, update HP SIM’s cluster settings using the following
procedure.
1. Log in to Windows on the primary system as SQL/IM Administrator.
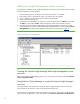
2. Open Failover Cluster Manager on the primary system, in the left pane click Services and
application, and confirm that the primary system owns the Systems Insight Manager group, in
this white paper cms-c2-hpsim.
3. Open a command prompt window and change the directory path to the Insight shared drive, in
this paper V:\.
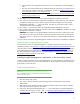
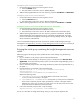
4. Execute the following commands at the command prompt:
mxglobalsettings –s –f ClusterIp=<CLUSTERvirtualserverIP>
mxglobalsettings –s –f
ClusterMemberIps=<CLUSTERNode1IP,CLUSTERNode2IP>
Replace the following values:
• <CLUSTERvirtualserverIP> with the IP address of the Cluster virtual server,
16.92.155.183 (cms-c2-cluster) in this paper.
• <CLUSTERNode1IP, CLUSTERNode2IP> with the public (or client) network IP addresses
of the cluster’s respective physical nodes, separated by a comma. In this paper these IP
addresses are 16.92.155.179 (cms-c2-n1) and 16.92.155.180 (cms-c2-n2). Do not enter
the private network IP addresses of the cluster nodes.
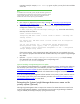
5. In the same command prompt window, verify the settings:
mxglobalsettings –ld ClusterIp ClusterMemberIps
Do not use a text editor to change these settings. Doing so may corrupt the properties file.