
Installing and upgrading HP Insight Management 7.0 on Windows Server 2008 R2 Failover Clusters


30
Installing Insight Management components on the primary system
Installing Insight Management 7.0
1. Shut down the secondary system and wait for it to complete. The Insight Management installation
process requires a reboot. If the second cluster system is active, all resources will automatically
fail over to that system, preventing a clean installation.
2. [ICG: Step 1] On the primary system, log into Microsoft Windows as the SQL/IM Administrator.
Note:
Be sure to log in with the same account used to install the SQL Server 2008
Enterprise instance.
3. [ICG: Step 2] Insert HP Insight Management DVD #1 into the DVD drive. If the DVD has an
AutoRun feature, the End User License agreement appears. If AutoRun is not enabled on the
primary system, execute autorun.exe from the DVD root directory. Read the End User License
agreement and continue following the installation instructions.
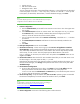
4. [ICG: Step 3] In you have not just done so, run the Insight Management Advisor… to confirm that
all the installation requirements are met. Select Filter… and then Customize. Select those products
you will be installing. Click OK and Run Now.
IMPORTANT:
Be sure .NET 3.5.1 software is installed BEFORE continuing with the HP
Insight Management installation. Allowing the HP Insight Management
Installer to install .NET 3.5.1 software during the installation process will
restart the clustered services disrupting access to the shared disk resulting in
an unsuccessful installation.
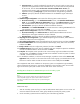
5. [ICG: Step 4] When ready, select Run Insight Installer…. Use the Customize button to select the
products you want. See
Table 1
. Select components that are supported and are suitable for your
purpose. If you are installing a CMS cluster that will be part of a federated CMS environment, see
the Primary CMS and Secondary CMS columns. After selecting components for installation, the
process for installing a federated or non-federated CMS cluster is the same.
6. [ICG: Step 5] The Insight Management DVD #2 Selection screen appears when you are installing
or upgrading components or suites that reside on DVD #2. The items to be installed from this DVD
appear onscreen.
a. To replace DVD #1 with DVD #2 manually when prompted, select Replace DVD #1 by DVD
#2 in the drive during the installation process, and then click Next.
b. If multiple DVD sources exist, the Insight Management Installer can also automatically access
each DVD as needed.
To use this option, enter the location of DVD #2 in the Specify an alternate drive for DVD #2
box, or click Browse to search for the DVD. Click Next.
7. [ICG: Step 7] On the Installation Directory screen, specify a directory on the Insight Management
shared disk; V:\ in this white paper. If the path to your directory does not exist, confirm path
creation when prompted.
8. [ICG: Step 9] On the Service Account credentials screen, enter the service account credentials of
the SQL/IM Administrator account.
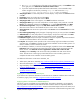
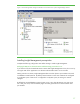
9. [ICG: Step 10] On the Database configuration screen, select Use existing Microsoft SQL Server
2008 R2 or 2008 SP1 or later (Enterprise, Standard or Express Editions). Ensure that the form
fields contain the correct entries:
a. The username, password, and domain.