
Installing and upgrading HP Insight Management 7.0 on Windows Server 2008 R2 Failover Clusters


24
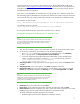
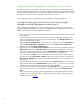
a. Run setup.exe. In the left pane of the SQL Server Installation Center, click Installation. Then
in the right pane, click Add node to a SQL Server failover cluster.
b. If you have experienced the problem described in KB953748, in the Command Prompt
window navigate to the directory containing setup.exe and execute the setup
/SkipRules=Cluster_VerifyForErrors /Action=AddNode command.
3. Setup Support Rules runs tests and produces a results display. Verify all tests are Passed and then
click OK.
4. Product Key: Enter your product key and click Next.
5. License Terms: Select the accept box and click Next.
6. Setup Support Files: If this screen appears, click Install. Installation commences.
7. Setup Support Rules again runs tests and produces a results display. Verify each test is marked
Passed, you understand and approve the Warning, or it is marked Not applicable. Click Next.
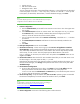
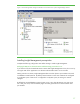
8. Cluster Node Configuration: Verify that the SQL Server instance name shown is correct. If not,
select the correct instance to be installed from the list on the screen. Click Next.
9. Service Accounts: Enter the account password for each Service where the Password field is white.
Click Next.
10. Error and Usage Reporting: Specify the types of reporting services you want, and then click Next.
11. Add Node Rules runs tests and produces a results display. Verify that no tests failed. Click Next.
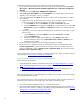
12. Ready to Add Node: Verify the configuration presented, and then click Install.
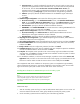
13. Add Node Progress monitors the steps of installation and upon completion reports the installation
result for each selected feature. Review and then click Next.
14. Complete: The Complete screen provides a link to the summary log for the installation and other
important notes. Click Close to complete the SQL Server installation on the secondary system. If a
reboot is needed, it will be noted on this screen.
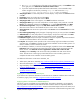
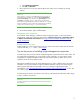
15. To validate the installation, in Failover Cluster Manager, expand the cluster and its Services and
application folder, and right-click the name of the cluster resource group representing this SQL
Server instance. Click Move this service or application to another node Move to node
secondary
, where
secondary
is the name of the node just added to the SQL Server failover
cluster. The SQL Server instance group should then failover to the secondary system. This
completes the SQL Server installation on the secondary system.
For additional information on SQL Server 2008 R2, see:
• What’s New (SQL Server 2008 R2),
http://msdn.microsoft.com/en-us/library/bb500435.aspx
• Microsoft White Papers,
http://msdn.microsoft.com/en-us/library/dd631807(v=SQL.10).aspx
• High Availability with SQL Server 2008 R2,
http://msdn.microsoft.com/en-
us/library/ff658546.aspx
• Getting Started with SQL Server 2008 Failover Clustering,
http://msdn.microsoft.com/en-
us/library/ms189134.aspx
Applying SP1 to SQL Server 2008 R2 Enterprise
If you did not use a slipstream distribution with the SQL Server 2008 R2 installation above and want
to install SP1, apply it now. See
http://support.microsoft.com/kb/2527041.
Applying updates to the SQL Server 2008 R2 Enterprise
SQL Server uses an Incremental Servicing Model (ISM). The model is described in An Incremental
Servicing Model is available from the SQL Server team to deliver hotfixes for reported problems at
http://support.microsoft.com/kb/935897/. Issues that have broad impact and are well- tested, such
as security issues, are packaged into General Distribution Releases and distributed through Microsoft
Update, Windows Update, or both.