
HP Insight Management 7.3 DMT White Paper


Start
order
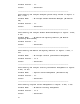
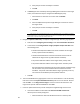
HP Insight Management component Service display name
11 HP Matrix OE configuration management HP Extensible Storage & Server Adapter
12 HP Matrix OE configuration management HP Storage Provisioning Manager Service
13 HP Matrix OE configuration management HP Logical Server Automation
14 HP Matrix OE infrastructure orchestration HP Matrix Infrastructure Orchestration
15 HP Matrix infrastructure chargeback HP Matrix infrastructure chargeback
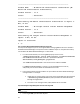
Post import operation tasks
Step 1: Verifying the import on the target CMS
HP recommends logging in to the target (new) CMS to verify the data has successfully migrated.
Verification of some key data on the target CMS can help ensure the migration was successful. If
the optional step to record key data items under the Exporting the source CMS configuration
data section was performed, use the item counts that were recorded to verify the following after
logging in to the target CMS as a user that has CMS-level administrator privileges. If verification
fails, attempt the export and import processes again.
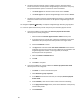
1. Verify that the All Systems list is the same size as the source system.
2. Verify that users are the same. See OptionsSecurityUsers and Authorizations.
3. Verify that scheduled tasks appear correctly. See Tasks and LogsScheduled tasks.
4. Verify the set of collections. From the left navigation page, select Customize to view all
collections and the details and verify that they appear correct.
Note: If you have issues activating a Logical Server after the import, see the Troubleshooting chapter in the HP Matrix
Operating Environment Logical Server Management User Guide at www.hp.com/go/matrixoe/docs.
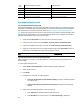
Step 2: Run data collection in overwrite mode and append mode
After a migration to a new host, run data collection in overwrite mode once, and later in the
append mode.
To create a Data Collection Task:
1. Select OptionsData Collection. The Data Collection page is displayed.
2. Select target systems.
3. Click [Next].
4. Specify how to save data, by selecting either :
• Overwrite existing data set (for detailed analysis). Provides a network snapshot
at a certain time
• Append new data set (for historical trend analysis). Provides trend and usage
analysis
5. Select one of the following options to execute the task:
• Click [Schedule] to schedule when the task should run.
• Click [Run Now] to run the task now. The Task Results Page is displayed
36