
Software for Linux Owner's manual

NOTE: The instructions given can be performed only with the Microsoft IE browser. The method to
obtain certificates varies with different browsers and different platforms.
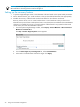
To obtain certificates by using Microsoft internet explorer's certificate cache, perform these steps:
1. From Microsoft Internet Explorer, navigate to the VM Host/vCenter Server web server using the
HTTPS protocol: https://servername. A security alert message is displayed with a warning
regarding the certificate's certifying authority.
2. Select View Certificate to open the Certificate properties page.
3. Click Install Certificate to launch the Certificate Import Wizard. Retain the default setting,
Automatically select the certificate store based on the type certificate.
4. Click Next to continue installing the certificate.
5. Click Finish. A security warning message is displayed regarding the certificate's certifying authority.
6. Click Yes to continue installating the certificate. The Certificate Import Wizard success message is
displayed.
7. Click OK on the certificate import wizard window. The Certificate properties page is enabled.
8. Click OK in the certificate dialog box. The Security Alert message is displayed.
9. Click Yes in the Security Alert message to continue with the original HTTPS request for the server
The server Welcome page is displayed. The Certificate is now installed in Internet Explorer’s
certificate cache.
10. Repeat the process for each host/vCenter Server that you will be registering in VMM to enable
secure communication.
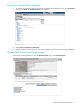
To export the cached certificates to a local directory, perform these steps:
1. From the Internet Explorer Tools menu, select Internet Options.
2. Select Content tab.
3. Select Certificates to open the Certificates manager.
4. Select the Trusted Root Certificate Authorities tab to display the list of trusted certificates. This list
should contain a certificate for each of the target servers selected as part of the Obtain certificates
by using, Microsoft Internet Explorer's certificate cache.
5. Scroll through the list of certificates to find the certificates.
• For ESX and ESXi systems, the certificate name matches the DNS name of the server.
• For VirtualCenter Server systems, the certificate name is VMware.
6. For each target server, perform these steps:
1. Select the certificate.
2. Click Export... to launch the Certificate Export Wizard.
3. Click Next to continue. The Export File Format dialog is displayed.
4. Enter a filename along with the complete path of the directory. For example,
C:\VMHost-Certs\servername.cer
NOTE: If you do not enter the complete path, the certificate gets stored in your Documents
and Settings folder.
5. Click Next to continue with the export. A Completing the Certificate Export Wizard page is
displayed, summarizing the information about the certificate.
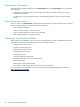
Import the Host/vCenter certificates into the VMM keystore
Import the host /vCenter certificates exported to a local directory to the VMM keystore using the
-importVmHostCertToVMMKeystore command from the VMM cli.
To import the Host/vCenter certificates into the VMM keystore, perform these steps:
1. Locate the CA certificate.
2. From the command prompt, run the following command:
vmcli –importServerCertToVMMKeystore <vmHost/vCenter cert exported path>
<vmHost/vCenter IPAddress/hostname>
26 Managing virtual machines