
HP StorageWorks Disk Array XP operating system configuration guide for HP-UX XP24000, XP12000, XP10000, SVS200, v01 (A5951-96018, June 2007)
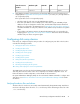

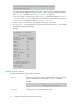
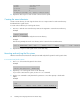

PV Name /dev/dsk/c0t6d0
VG Name /dev/vg06
PV Status available
:
Stale PE 0
IO Timeout (Seconds) 30 [New I/O timeout value]
4. Repeat the above steps for each new disk connected to the system.
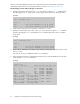
Creating the mount directories
Create a mount directory for each logical volume. Choose a unique name for each mount directory
that identifies the logical volume.
To create a mount directory for each logical volume:
1. Use mkdir with the new mount directory name as the argument to create the mount directory.
Example
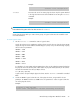
# mkdir /AHPMD-LU00
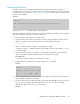
2. Use the ls –x command to verify the new mount directory.
Example
The following example shows the root directory as the location for the mount directories.
# ls -x AHPMD-LU00 bin dev device etc export floppy home hstsboof
3. Repeat above steps for each logical volume on the disk array.
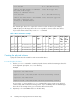
Mounting and verifying the file systems
After the mount directories have been created, mount and verify the file system for each logical volume.
To mount and verify the file systems:
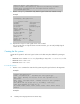
1. Use mount to mount the file system for the volume.
Example
# mount /dev/vg06/lvol1 /AHPMD-LU00
2. Repeat step 1 for each logical volume on the disk array.
If you need to unmount a file system, use the unmount command.
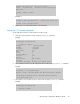
3. Use the bdf command to verify that the file systems are correct. The capacity is listed under
Kbytes.
Example
# bdf
Filesystem Kbytes used avail %used Mounted on
/ldev/vg00/lvol1 59797 59364 0 100% /
Installing and configuring HP-UX for the XP disk array30