
HP StorageWorks XP Disk Array Configuration Guide (T5278-96047, May 2011)

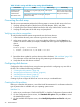
Table Of Contents
- XP Disk Array Configuration Guide
- Contents
- 1 Overview
- 2 HP-UX
- Installation roadmap
- Installing and configuring the disk array
- Installing and configuring the host
- Connecting the disk array
- Configuring disk array devices
- Verifying the device files and drivers
- Creating the device files
- Creating the physical volumes
- Creating new volume groups
- Creating logical volumes
- Creating the file systems
- Setting the I/O timeout parameter
- Creating the mount directories
- Mounting and verifying the file systems
- Setting and verifying the auto-mount parameters
- 3 Windows
- 4 Novell NetWare
- 5 NonStop
- 6 OpenVMS
- 7 VMware
- 8 Linux
- 9 Solaris
- Installation roadmap
- Installing and configuring the disk array
- Installing and configuring the host
- Connecting the disk array
- Configuring disk array devices
- Configuring for use with Veritas Volume Manager 4.x and later
- 10 IBM AIX
- 11 Citrix XenServer Enterprise
- 12 Troubleshooting
- 13 Support and other resources
- A Path worksheet
- B Path worksheet (NonStop)
- C Disk array supported emulations
- D Using Veritas Cluster Server to prevent data corruption
- E Reference information for the HP System Administration Manager (SAM)
- F HP Clustered Gateway deployments
- Glossary
- Index

Table 10 Fabric zoning and LUN security settings (Novell NetWare)
LUN SecurityFabric ZoningOS MixEnvironment
Must be used when multiple
hosts or cluster nodes connect
through a shared port
Not requiredhomogeneous (a single OS type present
in the SAN)
Standalone SAN
(non-clustered)
Clustered SAN
Multi-Cluster SAN
Requiredheterogeneous (more than one OS type
present in the SAN)
Connecting the disk array
The HP service representative performs the following steps to connect the disk array to the host:
1. Verifying operational status of the disk array channel adapters, LDEVs, and paths.
2. Connecting the Fibre Channel cables between the disk array and the fabric switch or host.
3. Verifying the ready status of the disk array and peripherals.
Verifying new device recognition
To verify that the NetWare system recognizes the new disk array devices:
1. In the NetWare directory, enter SERVER to get to the server console.
2. At the server console, enter LIST DEVICES to display all devices. Use the Pause key as
needed. The device number (for example, 0x000B) and device type are displayed for each
device:
Example
NetWare prompt> LIST DEVICES
1. 0x000B: [V6E0-A2-D7D:0] HP OPEN-3 rev:0111
2. 0x000C: [V6E0-A2-D7D:1] HP OPEN-3 rev:0111
:
:
3. Record the device number for each new device on the worksheet in “Path worksheet” (page 132).
This information will be useful later during disk partitioning and volume creation.
4. Verify that all new disk devices are listed.
Configuring disk devices
Configure the disks in the disk array using the same procedure for configuring any new disk on
the host. This includes the following procedures:
1. “Creating the disk partitions” (page 44)
2. “Assigning the new devices to volumes” (page 46)
3. “Mounting the new volumes” (page 47)
4. “Verifying client operations” (page 48)
Creating scripts to configure all devices at once can save you considerable time.
Creating the disk partitions
Before you create the disk partitions, consult the Novell documentation for confirmation about the
type of partition that is available with your operating system version.
NetWare 5.x
1. At the server console enter “LOAD NWCONFIG” to load the Configuration Options module.
2. On the Configuration Options screen, click Standard disk options and press Enter to access
the NetWare disk options.
3. On the Available Disk Options screen, select Modify disk partitions and Hot Fix and press
Enter.
44 Novell NetWare