
HP StorageWorks XP Disk Array Configuration Guide (T5278-96047, May 2011)
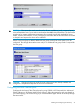
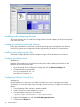
Table Of Contents
- XP Disk Array Configuration Guide
- Contents
- 1 Overview
- 2 HP-UX
- Installation roadmap
- Installing and configuring the disk array
- Installing and configuring the host
- Connecting the disk array
- Configuring disk array devices
- Verifying the device files and drivers
- Creating the device files
- Creating the physical volumes
- Creating new volume groups
- Creating logical volumes
- Creating the file systems
- Setting the I/O timeout parameter
- Creating the mount directories
- Mounting and verifying the file systems
- Setting and verifying the auto-mount parameters
- 3 Windows
- 4 Novell NetWare
- 5 NonStop
- 6 OpenVMS
- 7 VMware
- 8 Linux
- 9 Solaris
- Installation roadmap
- Installing and configuring the disk array
- Installing and configuring the host
- Connecting the disk array
- Configuring disk array devices
- Configuring for use with Veritas Volume Manager 4.x and later
- 10 IBM AIX
- 11 Citrix XenServer Enterprise
- 12 Troubleshooting
- 13 Support and other resources
- A Path worksheet
- B Path worksheet (NonStop)
- C Disk array supported emulations
- D Using Veritas Cluster Server to prevent data corruption
- E Reference information for the HP System Administration Manager (SAM)
- F HP Clustered Gateway deployments
- Glossary
- Index
Installing and configuring the host
This section explains how to install and configure Fibre Channel adapters (FCAs) that connect the
host to the disk array.
Loading the operating system and software
Follow the manufacturer's instructions to load the operating system and software onto the host.
Load all OS patches and configuration utilities supported by HP and the FCA manufacturer.
Installing and configuring the FCAs
Install and configure the Fibre Channel adapters using the FCA manufacturer's instructions.
Configuring NetWare client
NetWare 6.x
NetWare Client software is required for the client system. After installing the software on the
NetWare server, follow these steps:
1. Open the Novell Client Configuration dialog and click the Advanced Settings tab.
2. Change the following parameters:
Give up on Requests to Sas: 180
Net Status Busy Timeout: 90
Configuring NetWare ConsoleOne
NetWare 6.x
Novell NetWare v6.x requires a tool called ConsoleOne to work in a storage environment.
ConsoleOne is a free Java utility used to manage network resources. Configure ConsoleOne as
follows:
1. Ensure NetWare Client software is already installed.
2. Install ConsoleOne on the NetWare 6.x server.
3. From the NetWare Client, run ConsoleOne:
z:public/mgmt/consoleOne/1.2/bin/ConsoleOne
4. Right-click the Server icon, and select Disk Management Devices.
5. Scroll left to the Media tab.
42 Novell NetWare