
HP StorageWorks XP Disk Array Configuration Guide (T5278-96047, May 2011)
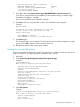
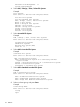
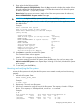

Table Of Contents
- XP Disk Array Configuration Guide
- Contents
- 1 Overview
- 2 HP-UX
- Installation roadmap
- Installing and configuring the disk array
- Installing and configuring the host
- Connecting the disk array
- Configuring disk array devices
- Verifying the device files and drivers
- Creating the device files
- Creating the physical volumes
- Creating new volume groups
- Creating logical volumes
- Creating the file systems
- Setting the I/O timeout parameter
- Creating the mount directories
- Mounting and verifying the file systems
- Setting and verifying the auto-mount parameters
- 3 Windows
- 4 Novell NetWare
- 5 NonStop
- 6 OpenVMS
- 7 VMware
- 8 Linux
- 9 Solaris
- Installation roadmap
- Installing and configuring the disk array
- Installing and configuring the host
- Connecting the disk array
- Configuring disk array devices
- Configuring for use with Veritas Volume Manager 4.x and later
- 10 IBM AIX
- 11 Citrix XenServer Enterprise
- 12 Troubleshooting
- 13 Support and other resources
- A Path worksheet
- B Path worksheet (NonStop)
- C Disk array supported emulations
- D Using Veritas Cluster Server to prevent data corruption
- E Reference information for the HP System Administration Manager (SAM)
- F HP Clustered Gateway deployments
- Glossary
- Index
/dev/hd3 24576 11608 52% 38 0% /tmp
/dev/hd1 8192 7840 4% 17 1% /home
/dev/lv00 4792320 4602128 4% 16 1% /VG00 (OPEN-3)
/dev/lv01 4792320 4602128 4% 16 1% /VG01 (OPEN-3)
/dev/lv02 14401536 13949392 4% 16 1% /VG02 (OPEN-9)
4. Verify that the file system is usable by performing some basic operations (for example, file
creation, copying, and deletion) on each logical device.
Example
# cd /hp00
# cp /smit.log /hp00/smit.log.back1
# ls -l hp00
–rw-rw-rw- 1 root system 375982 Nov 30 17:25 smit.log.back1
# cp smit.log.back1 smit.log.back2
# ls -l
-rw-rw-rw- 1 root system 375982 Nov 30 17:25 smit.log.back1
-rw-rw-rw- 1 root system 375982 Nov 30 17:28 smit.log.back2
# rm smit.log.back1
# rm smit.log.back2
5. Use the df command to verify that the file systems have successfully automounted after a
reboot. Any file systems that were not automounted can be set to automount using the SMIT
Change a Journaled File System screen.
If you are using HACMP or HAGEO, do not set the file systems to automount.
Example
# df
File system 512-blocks free %Used Iused %Iused Mounted on
/dev/hd4 8192 3176 61% 652 31% /
/dev/hd2 1024000 551448 46% 6997 5% /usr
/dev/hd9var 8192 5512 32% 66 6% /var
/dev/hd3 24576 11608 52% 38 0% /tmp
/dev/hd1 8192 7840 4% 17 1% /home
/dev/lv00 4792320 4602128 4% 16 1% /hp00
/dev/lv01 4792320 4602128 4% 16 1% /hp01
/dev/lv02 14401536 13949392 4% 16 1% /hp02
HACMP and HAGEO do not provide a complete disaster recovery or backup solution and
are not a replacement for standard disaster recovery planning and backup/recovery
methodology.
114 IBM AIX