
HP StorageWorks Disk Array XP operating system configuration guide for OpenVMS XP24000, XP12000, XP10000, v01 (A5951-96136, June 2007)

Example
For an XP LUN with a CU of 2 and an LDEV of 59:
CU with LDEV appended = 259
259 hex = 601 decimal
The example LUN is presented to OpenVMS as $1$dga601.
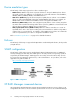
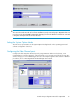
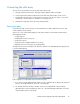
Once all paths are defined, use the SYSMAN utility on each OpenVMS system in the SAN to discover
the XP ports and LUNs just added.
For a single system:
$run sys$system:sysman io autoconfigure/LOG
For all the systems in an OpenVMS cluster:
$run sys$system:sysman
sysman> set environment/cluster
sysman> io autoconfigure/log
Now, verify the online status of the XP LUNs. Also, confirm that all expected LUNs are shown online.
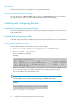
Verifying disk array device recognition
Verify that the host recognizes the disk array devices:
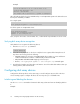
1. Enter the show device dg command:
$ show device dg
2. Check the list of peripherals on the host to verify the host recognizes all disk array devices. If
any devices are missing, check the following:
• CU:LDEV mapping to ensure the created OpenVMS device number is correct and doesn't
conflict with other device numbers or LUNs already created on the SAN
• LUN/CU:LDEV and HBA WWN mappings on the host port
• Run the $ run sys$system:sysman io autoconfigure/log command again
3. Record the disk numbers and other device information. You will need the disk numbers when you
format, partition, and mount the disks.
Configuring disk array devices
Configure the disk array devices in the same way you would configure any new disk on the host
server. Creating scripts to configure all devices at once may save you considerable time.
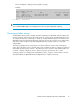
Initializing and labeling the devices
Use the initialize command to format each disk array volume and write an identifying label on
it:
Example
Installing and configuring OpenVMS for the XP disk array20