
HP XP P9500 Disk Array Configuration Guide (AV400-96496, May 2014)

7. To reserve space for the Hot Fix error correction feature, select Hot Fix and enter the amount
of space or percentage you want to reserve.
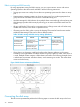
Mirrored partitions must be compatible in data area size. This means the new partition must
be at least the same size or slightly larger than the other partitions in the group. The physical
size (combined data and Hot Fix size) of the partition must be at least 100 KB larger, but no
more than 120 MB larger than the data size of the existing partitions in the mirror group.
8. To mirror the partition, select Mirror and select one of the following options:
• Create New Mirror. This option means you are making the partition capable of being
part of a mirror group. You do not actually create the group until you add another mirrored
partition to the partition you are creating.
• Existing Mirror Group. (If you select this option, also select the ID of the mirrored partition.)
This shows a list of existing mirror groups that are compatible in data area size. This
option lets you add this new partition to one of the mirror groups in the list.
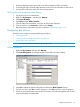
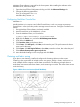
9. Select NSSPools on the Media tab, and select New….
The Create a New Pool screen appears.
10. On the Create a New Pool screen, enter the name for the new pool, and click Next.
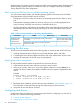
11. Select the disk to be included in the pool, and click Next.
12. On the Create Pool – Attribute Information screen, check Activate on Creation to make the
new pool active, and then click Finish.
13. Select a label for the partition (optional).
14. Click OK.
NetWare 6.5
1. Enter NSSMU at the server console.
2. In the main menu, select Partitions.
3. Press Insert, then select a device where you want to create a partition.
4. Select NSS as the partition type.
5. Enter the size of the partition in bytes (B), kilobytes (KB), megabytes (MB), or gigabytes (GB),
and then click OK.
Assigning the new devices to volumes
A volume can span as many as 32 devices, so you can assign more than one device to a volume.
The addition of new volumes to the NetWare server might require a memory upgrade. See the
NetWare documentation or contact Novell customer support.
NetWare 5.x
1. On the Available Disk Options screen, click NetWare Volume options and press Enter to
display the volume options.
The existing volumes are listed by volume name, and the volume options are displayed at the
bottom of the screen.
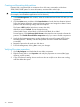
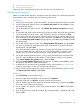
2. Execute the Add/View/Modify volume segments command by pressing the Ins or F3
key.
The Segment List of Volume Disk screen displays the existing devices by device number. The
Volume assignment column displays (free space) for each device that is not yet assigned to a
volume.
3. Execute the Make a volume assignment command as follows:
40 Novell NetWare