
HP XP P9000 Continuous Access Synchronous for Mainframe Systems User Guide

• Stop Performance Monitor before performing the initial copy to avoid overloading with TCP/IP
traffic.
• During this operation, you specify the fence level, which is a data protection option. For
important information the options, see “Fence Level options for I/O to the P-VOL after
suspension” (page 36) .
Procedure 9 To create initial copies:
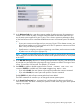
1. In Remote Web Console, click Actions > Remote Copy > Continuous Access Synchronous for
Mainframe > Pair Operation.
2. Change to Modify mode by clicking the icon.
3. In the tree for the Pair Operation window, select the CU grouping or CU in which the LDEV
or LDEVs are located that you want to pair.
4. From the list, select the LDEV or LDEVs to be paired. The volumes must be in Simplex status.
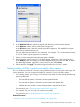
5. Right-click the selections and click Add Pair > Synchronous.
Note the following in the Add Pair(Synchronous) dialog box:
• The P-VOL field displays LDEV, CLPR number, and CLPR name.
- A pound symbol (#) at the end (00:00:3C #) indicates an external volume.
• If you selected more than one P-VOL, the P-VOL with the lowest LDEV ID is displayed.
6. Assign an S-VOL by selecting LDEV ID from the S-VOL list, left to right. If you selected multiple
volumes as P-VOLs, specify the S-VOL for the P-VOL that is displayed.
Volumes for the subsequent S-VOL are automatically assigned according to LDEV ID. If an
S-VOL is not available, you will have to create the pair individually. For an in-depth explanation,
see the bullet on creating multiple pairs in “Planning pairs and pair volumes” (page 33).
7. For RCU, select the remote system in which the paired S-VOLs are located.
8. For P-VOL Fence Level, select one of the following. Fence level specifies whether the main
system rejects write operations to the P-VOL.
• Data – The P-VOL is fenced if an update copy operation fails.
• Status – The P-VOL is fenced only if the main system is not able to change S-VOL status
to Suspended when an update copy operation fails.
• Never – The P-VOL is never fenced.
9. In the Initial Copy list, select one of the following:
• Entire Volume – To create the Cnt Ac-S Z pair relationship and copy the data from main
to remote volumes immediately. (Default)
• None – To create the Cnt Ac-S Z pair relationship but copy no data from main to remote
volumes. You must ensure that data in the P-VOL and S-VOL are identical when selecting
None.
10. Copy Pace – Type the maximum number of tracks to be copied during the initial copy. The
default value is 15.
• 3 is slow and is used to lower the impact to host I/O.
• 15 is a fast pace. Host I/O performance may be lowered.
11. From the Priority list, specify the scheduling order for the initial copy operation. The default
value is 32, and 1 to 256 can be specified.
Priority applies to those initial copies specified when Apply is clicked. Additional initial copies
specified after the operation begins are not started until the original pairs are completed.
When performing more initial copies than specified for Maximum Initial Copy Activities (during
configuration), see “Priority for initial copy operations and scheduling order” (page 38).
Creating pairs 67