
HP XP P9000 Configuration Guide (AV400-96525, November 2012)

10. Press Enter to create the Journaled File System.
The Command Status screen appears.
Wait for “OK” to appear on the Command Status line.
11. To continue creating Journaled File Systems, press the F3 screen. key until you return to the
Add a Journaled File System screen. Repeat steps 2 through 10 for each Journaled File System
to be created.
12. To exit SMIT, press the F10 key.
Mounting and verifying the file systems
Mount the file systems and verify that the file systems were created correctly and are functioning
properly.
1. Mount the file system. Enter:
mount mount_point_name
Example
# mount /vg01
2. Repeat step 1 for each new file system.
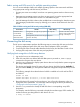
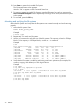
3. Use the df command to verify the size of the file systems. The capacity is listed in 512-byte
blocks. To list capacity in 1024-byte blocks, use the df –k command.
Example
# df
File system 512-blocks free %Used Iused %Iused Mounted on
/dev/hd4 8192 3176 61% 652 31% /
/dev/hd2 1024000 551448 46% 6997 5% /usr
/dev/hd9var 8192 5512 32% 66 6% /var
/dev/hd3 24576 11608 52% 38 0% /tmp
/dev/hd1 8192 7840 4% 17 1% /home
/dev/lv00 4792320 4602128 4% 16 1% /VG00 (OPEN-3)
/dev/lv01 4792320 4602128 4% 16 1% /VG01 (OPEN-3)
/dev/lv02 14401536 13949392 4% 16 1% /VG02 (OPEN-9)
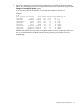
4. Verify that the file system is usable by performing some basic operations (for example, file
creation, copying, and deletion) on each logical device.
Example
# cd /hp00
# cp /smit.log /hp00/smit.log.back1
# ls -l hp00
–rw-rw-rw- 1 root system 375982 Nov 30 17:25 smit.log.back1
# cp smit.log.back1 smit.log.back2
# ls -l
-rw-rw-rw- 1 root system 375982 Nov 30 17:25 smit.log.back1
-rw-rw-rw- 1 root system 375982 Nov 30 17:28 smit.log.back2
# rm smit.log.back1
# rm smit.log.back2
78 IBM AIX