
HP XP P9000 Cache Partition User Guide (AV400-96477, August 2012)
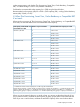

CLPR nameCLPR numberCLPR nameCLPR number
CLPR3030CLPR1414
CLPR3131CLPR1515
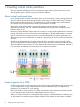
Partitioning cache
Cache partition work flows
Creating a CLPR
1. Create a CLPR (see “Creating a CLPR” (page 9)).
2. Migrate resources to the new CLPR (see “Migrating resources to and from a CLPR” (page 10)).
Removing a CLPR
1. Migrate resources from the CLPR that is to be removed (see “Migrating resources to and from
a CLPR” (page 10)).
2. Delete the CLPR (see “Deleting a CLPR ” (page 11)).
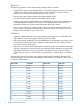
Creating a CLPR
Before creating a CLPR, review “Cache partitioning rules and guidelines” (page 7).
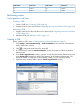
1. Click Settings > Environmental Setting > Partition Definition on the menu bar of the Remote
Web Console main window.
2. Click to change the mode from View to Modify.
3. In Cache Partition, open the Partition Definition window, and select a CLPR in the Partition
Definition tree.
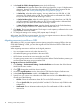
4. In the Cache Logical Partition window, right-click a CLPR from the Partition Definition tree and
select Create CLPR. This adds a cache logical partition to the Partition Definition tree. The
maximum number of CLPRs that can be manually created is 31 (not including CLPR0).
5. Select the newly created CLPR to open the Cache Logical Partition window.
Partitioning cache 9