
HP StorageWorks P9000 Data Exchange User Guide (T1620-96016, September 2010)


64-Bit Data Exchange Software
To install the 64-bit Data Exchange software on a UNIX-based platform:
1. Log in as root.
2. Set the CD-ROM on which the 64-bit Data Exchange is stored to the drive.
3. Mount it.
4. Check to see if the following directories currently exist. If they do not, create them as follows:
a. All Platforms: /usr, /usr/lib
b. Solaris: /usr/lib/sparcv9
c. HP-UX: /usr/lib/pa20_64
5. Move to the root directory.
6. Copy 64-bit FAL from the CD-ROM.
7. A file or directory can be viewed using the correct file name given at mounting. To view a
directory, use one of the following procedures according to platform.
Install 64-bit FAL after confirming a directory name and a file name by using the ls command.
• HP-UX (11.0):
#cpio -iBmuv <(MountPoint)/PROGRAM/FAL64/HP_UX/HP_UX.CPI
• Solaris (Solaris 7, 8, 9):
#cpio -iBmuv (MountPoint)/PROGRAM/FAL64/SOLARIS/SOLARIS.CPI
• AIX (AIX 4.3.3 ):
#cpio -iBmuv <(MountPoint)/PROGRAM/FAL64/AIX/AIX4/AIX.CPI
• Red Hat Linux AS3.0/IA64:
#cpio -iBmuv <(MountPoint)/PROGRAM/FAL64/LINUX/LINUX.CPI
8. Remove the CD-ROM from the drive.
9. Log out once and log in again
Installing Data Exchange on Windows
To install Data Exchange software on a Windows host:
1. If Data Exchange is already installed, uninstall it before installing the new version.
a. To uninstall Data Exchange version 01-01-25 or later, use the Windows Add/Remove
Programs utility.
b. To uninstall Data Exchange versions 01-01-24 and earlier, delete the folder that contains
the Data Exchange software components (fcu.exe, fal.obj, and dataset.h).
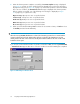
2. Insert the Data Exchange installation CD-ROM into the drive, and run setup.exe.
NOTE:
For Windows, if the Installed Directory has a directory name using a space character, enter the
following: <license key> fal.dll falmt.dll
Preparing for Data Exchange Operations62