
HP XP7 Command View Advanced Edition User Guide (TK981-96007, May 2014)
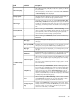

5. Click OK.
You can click the user group name to verify group membership (list of users) on the Users tab.
On the Resource Groups tab, you can verify the resource groups and roles specified during user
group creation. Add Resource Groups, Remove Resource Groups, and Edit Roles buttons allow
you to modify resources and access rights for the user group.
The new user group is displayed and a new private logical group is created.
TIP:
To delete user groups, select one or more user groups, and click Delete User Groups. Deleting a user
group deletes the associated private logical group and all logical groups that belong to that private
logical group. Deleting a user group does not delete related resource groups.
Related topics
• About user groups, page 73
• Editing a user group, page 93
• Assigning resource groups and roles to a user group, page 93
Editing a user group
As user information and membership in user groups change, you can update this information.
1. On the Administration tab, select User Groups.
2. Select the target user group and click Edit User Group.
3. Change the name of the user group, or the user who manages the user group.
Editing changes appear in the list in the User Groups tab.
Related topics
• About user groups, page 73
• About access control, page 67
• Creating user groups, page 92
• Assigning resource groups and roles to a user group, page 93
Assigning resource groups and roles to a user group
You can assign resource groups and roles to a user group.
1. Select the Administration tab and click on User Groups.
2. In the User Groups tab, click the name of the target user group.
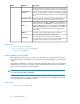
3. In the Resource Groups tab, click Add Resource Groups.
4. Set the roles to be assigned to the user group. The assigned resource groups and roles are
displayed in detail by clicking the link for the user group name.
User Guide 93