
HP XC System Software Installation Guide Version 3.2.1

connection on the head node, starts the MySQL service, and initializes the configuration and
management database.
1. Begin this procedure as the root user on the head node.
2. Change to the following directory:
# cd /opt/hptc/config/sbin
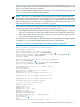
3. Start the system preparation process by invoking the cluster_prep command. An
additional command line option is required if the hardware configuration contains HP server
blades and enclosures or if you are adding planned (but not present) compute nodes to your
configuration.
CommandSituation
# ./cluster_prep
The hardware configuration does not contain HP server
blades and enclosures and you are not configuring
future planned compute nodes into the hardware
configuration
# ./cluster_prep --enclosurebased
The hardware configuration contains HP server blades
and enclosures, you are configuring future planned
compute nodes into the hardware configuration, or
both
Command output is similar to the following. Table 3-1 (page 54) describes each prompt and
provides information to help you with your answers.
IMPORTANT: Do not press Ctrl-c or Ctrl-d, enter the kill command, or use any other
abnormal termination method to terminate the cluster_prep utility.
If you terminate cluster_prep before it completes its processing, you must use the Kickstart
installation procedure to reinstall the head node.
The cluster_prep utility prepares the head node for the
automated discovery process. This utility is run during the initial
cluster configuration or any time your cluster is reconfigured.
If you reconfigure your cluster, you must run the discover
command after running the cluster_prep utility.
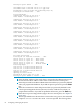
Do you want to continue? (yes/no) [n] y
Enter the prefix to assign to internal node names. The prefix
can contain up to 6 alphanumeric characters, and the last
character must be alphabetic. The default node prefix
is the letter "n":
Enter node naming prefix [n]: your_prefix
1
Enter the maximum number of nodes in this cluster [ ]: 16
2
Setting system name to n16 ... done
3
Please enter the Database Admin Password : your_password
Please re-enter password: your_password
Do you want to configure the external connection on the
head node? [y] Enter
External Ethernet device on the head node [eth1] Enter
IP address []: your_IPaddress
Netmask []: your_netmask
You have the option to provide an IPv6 address for the external
Ethernet connection.
You can enter an IPv6 address, press the [ ] keys to delete the
value shown, or press the Enter key to accept the value shown.
IPv6 address (optional) []: Enter
Gateway IP address []: your_IPaddress
62 Configuring and Imaging the System