
HP XC System Software Installation Guide Version 3.2
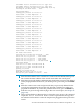

You can enter an IPv6 address, press the [ ] keys to delete the
value shown, or press the Enter key to accept the value shown.
IPv6 address (optional) []: Enter
Gateway IP address []: your_IPaddress
You have the option to override the system default MTU value.
You can enter 9000 to enable jumbo frames,
press the [ ] keys to delete the value shown and use the system default,
or press the Enter key to accept the value shown.
MTU value (optional) []: Enter
IP address for DNS name server [ ]: your_IPaddress
Provide one or more DNS domains to use for search paths or press the
Enter key to accept the default response.
Enter one domain name on a line, and after the last domain name, enter
a period (.) on a line by itself and press the Enter key.
Search path: [ ]southpole.com
.
4
[P]roceed, [R]etry: p
5
Restarting network ... done
1
Node prefix conventions are described in Table 3-1 (page 56). The internal node
naming scheme is described in “Internal Node Naming” (page 54). The default
node prefix is the letter n.
2
In this example, the maximum number of nodes supported by the interconnect
switch is 16. Enter the maximum number of nodes allowed by your interconnect
switch. If the system is configured with HP server blades, you are not prompted
for the maximum number of nodes.
3
The internal host name of the head node is based on the node naming prefix and
the maximum number of nodes in the system. Therefore, as shown in this example,
the head node host name is set to n16.
However, if the head node is an HP server blade, the head node is named based
on the node naming prefix and its physical location in the hardware configuration.
For example, if the head node is located in enclosure 1, bay 1, the head node is node
1.
4
Be sure to include a period (.) after the last domain name.
5
Enter the letter r to change a response. Otherwise, enter the letter p to continue.
4. Press Ctrl-Alt-Backspace to restart the X server to accommodate the head node host name
change.
5. Log back in to the system as the root user.
6. Click on the Linux for High Performance Computing splash screen to close it.
7. Complete this step only if you are using the virtual console and media on an HP server blade
head node.
You must reset the temporary cabling and settings you made to the Onboard Administrator.
Do one of the following, depending upon how you accessed the Onboard Administrator:
• If you accessed the Onboard Administrator through a connection to a public network,
return all cabling to its original configuration and press the reset button on the Onboard
Administrator.
• If you assigned a temporary static IP address to access the Onboard Administrator, do
the following:
a. Clear all enclosure bay IP addressing settings.
b. Use the Insight Display panel on the enclosure to set the Onboard Administrator
for DHCP.
64 Configuring and Imaging the System