
HP XC System Software Installation Guide Version 3.0


Appendix C Enabling telnet on iLO Devices
The procedure described in this appendix applies only to HP XC systems with nodes that use Integrated
Lights Out (iLO) as the console management device.
New nodes that are managed with iLO console management connections that have never been installed
with HP XC software may have iLO interfaces that have not been configured properly for HP XC operation.
In order for the discover command to discover the console ports and for the console management facility
(CMF) to function, the iLO devices must have telnet enabled.
Follow this procedure to enable telnet on iLO devices:
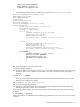
1. After the discover command fails, view the /etc/dhcpd.conf file to determine the console ports
connected to the nodes. You can identify console ports by the characters cp- in the host name. The
switch and port number are shown in a comment at the end of the entry. Make sure you are looking
at the correct switch to identify the console port.
# more /etc/dhcpd.conf
The top portion of this file looks similar to the following:
#Built by Blddhcpd in DiscoverTools.pm
ddns-update-style none;
deny unknown-clients;
allow bootp;
default-lease-time 480;
max-lease-time 480;
option xc-macaddress code 232 = string;
shared-network XC {
subnet 172.0.0.0 netmask 255.224.0.0 {
next-server 172.20.0.8;
filename = "/pxelinux.0";
host cp-n1 {
hardware ethernet 00:11:85:5c:1b:dc;
option host-name "cp-n1";
fixed-address 172.21.0.1;
# location "Level 2 Switch 172.20.65.4, Port 1";
}
host cp-n2 {
hardware ethernet 00:11:0a:30:e0:94;
option host-name "cp-n2";
fixed-address 172.21.0.2;
# location "Level 2 Switch 172.20.65.4, Port 2";
}
host cp-n3 {
hardware ethernet 00:11:0a:30:b0:bc;
option host-name "cp-n3";
fixed-address 172.21.0.3;
# location "Level 2 Switch 172.20.65.4, Port 3";
}
host cp-n4 {
hardware ethernet 00:11:0a:2f:8d:fc;
option host-name "cp-n4";
fixed-address 172.21.0.4;
# location "Level 2 Switch 172.20.65.4, Port 4";
}
2. Do one of the following:
• If you cannot find an entry corresponding to the new node, check the network connections. Make
repairs and rerun the discover command.
• If you do find an entry corresponding to the new node, note the IP address on the line that begins
with the string fixed-address, and proceed to step 3.
103