
HP XC System Software Administration Guide Version 3.2.1


22 Servicing the HP XC System
This section describes procedures for servicing the HP XC system. For more information, see the
service guide for your cluster platform.
This chapter addresses the following topics:
• “Adding a Node” (page 271)
• “Replacing a Client Node” (page 273)
• “Actualizing Planned Nodes” (page 274)
• “Replacing a System Interconnect Board in an HP CP6000 System” (page 277)
• “Software RAID Disk Replacement” (page 278)
• “Incorporating External Network Interface Cards” (page 281)
22.1 Adding a Node
The following procedure describes how to add one or more nodes in the HP XC system:
1. Log in as superuser on the head node.
2. Note the number of nodes currently on your system. You can determine that number with
the following command:
# shownode all | wc -l
3. Prepare the new node hardware as described in the HP XC System Software Hardware
Preparation Guide.
4. Cable the new node (or nodes) into the system. See the HP XC System Software
documentation for your system for more information.
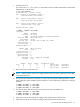
5. Start the automatic discovery of the new node or nodes into your system and add them to
the configuration and management database (CMDB).
• For blade servers, use the following commands:
# cd /opt/hptc/config/sbin
# ./discover --enclosurebased --nodesonly
• For non-blade servers, use the following commands:
# cd /opt/hptc/config/sbin
# ./discover --addnode options
See discover(8) to determine which additional options are appropriate for your system.
6. Verify that any new nodes have been added to your system by running the following
command and compare it with the result from Step 2:
# shownode all | wc -l
7. Disable dynamic disk partitioning if both these conditions apply, otherwise skip this step:
• The added node is of a type different from the other nodes.
• The added node's disk size is smaller than other disks in the HP XC system.
By default, the HP XC system uses dynamic disk processing to automatically resize and
partition the disk on nodes to be imaged. This is the prefered and supported method for
imaging nodes.
Follow thse steps to disable dynamic disk partitioning:
1. Use the text editor of your choice to edit the
/etc/systemimager/systemimager.conf file on the head node.
2. Search for the following text:
DYNAMIC_DISK_PROCESSING = TRUE
3. Change the text from TRUE to FALSE.
22.1 Adding a Node 271