
HP XC System Software Administration Guide Version 3.1


3. Determine whether you want to mount this file system over the administration network or over the
system interconnect.
As a general rule, specify the administration network for administrative data and the system
interconnect for application data.
4. Edit the /hptc_cluster/etc/fstab.proto file as follows:
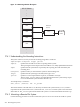
a. Locate the node designator that specifies the node or nodes that will mount the file system.
Optionally insert a comment regarding why you are changing this file, for example:
# Mount /scratch (from n60) onto n61, n62, and n63
If the node designator does not exist, create it by adding a line similar to this one:
#% n[60-63]
Note:
Be sure to specify the node that exports the file system and the nodes that import the file system.
b. Enter the fstab information for mounting the file systems, specifying the node that exports the
file system with the hostaddr parameter:
/dev/sdb1 /scratch csys hostaddress=n60,_netdev
c. Save the file.
Example 17-2 (page 207) shows the fstab.proto file after editing for internal file system
mounting.
5. Create the /scratch mount point on each node (including the exporting node) if the mount point
does not already exist:
# cexec -w n[60-63] "mkdir /scratch"
6. Restart the cluster_fstab service on each node:
# cexec -a "service cluster_fstab restart"
7. Verify the internal file system mounting by entering the following command, which ensures that the
file system is mounted on the nodes:
# cexec -a "mount | grep /scratch"
n62: 192.168.0.60:/scratch on /scratch type nfs
(rw,hard,intr,bg,rsize=8192,wsize=8192,addr=192.168.0.60)
n61: 192.168.0.60:/scratch on /scratch type nfs
(rw,hard,intr,bg,rsize=8192,wsize=8192,addr=192.168.0.60)
n63: 192.168.0.60:/scratch on /scratch type nfs
(rw,hard,intr,bg,rsize=8192,wsize=8192,addr=192.168.0.60)
n60: /dev/sdb1 on /scratch type ext3 (rw)
Note:
The output shown here is edited for clarity. There are actually four lines of output from the command.
206 Mounting File Systems