
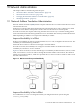
HP XC System Software Administration Guide Version 3.1


10.2 Installing and Distributing Software Patches
The following is a generic procedure for installing software patches:
1. Log in as superuser (root) on the head node.
2. Use the rpm command to install the software package on the head node:
# rpm -Uvh package.rpm
The name of the software package usually contains a revision number and a designator for the
hardware platform: either x86_64 for the CP3000 and CP4000 systems or ia64 for the CP6000 systems.
3. Use the updateimage command to update the golden image:
# updateimage --gc `nodename` --no-netboot
4. Use the setnode command to set up all the nodes to reimage:
# setnode --resync all
NOTE: If you need to reimage only a subset of the nodes, specify those nodes (as a nodelist parameter)
in the setnode command. For example:
# setnode --resync n[1-7]
5. If your system has been configured for improved availability, enter the transfer_from_avail
command:
# transfer_from_avail
6. Enter the stopsys command to shut down the HP XC system. If necessary, you can specify a delay
(in minutes) with the --delay option:
# stopsys --delay 5
7. Restart the HP XC system nodes. Specify the --image_and_boot option so that the nodes are imaged
before booting.
# startsys --image_and_boot
8. If your system has been configured for improved availability and the nodes that provide availability
have been reimaged, enter the transfer_to_avail command:
# transfer_to_avail
System patch updates can be either simple or complex, depending on the RPMs to be updated.
Simple patch update
A simple patch update does not require you to run the cluster_config
utility.
Some simple patch updates require that you reboot the head node. Many
do not. You are advised accordingly in the instructions for the individual
patch.
Complex patch update
A complex patch update requires you to run the cluster_config utility.
A complex patch update usually requires that you reboot the head node.
130 Distributing Software Throughout the System