
HP XC System Software Administration Guide Version 3.0


6. Update the configuration and management database:
# reset_db
7. Restart and initialize the cmdb with the cluster_prep command:
# /opt/hptc/config/sbin/cluster_prep
8. Execute the discover command to discover network components:
# /opt/hptc/config/sbin/discover --system
Note
You may need to use other options to the discover command, depending on your system. See
discover(8).
9. Run the cluster_config utility:
# /opt/hptc/config/sbin/cluster_config
The cluster_config utility identifies the new role from the roles_services.ini file and makes
it available to be assigned on any of the nodes.
Be sure to use the analyze command and review the output. Ensure that the role is assigned the correct
number of servers. If the assigned number of servers is insufficient, edit the service.ini file accordingly
and repeat from step 6.
For information about the cluster_config utility, see the
HP XC System Software Installation Guide
.
10. Reimage the applicable node or nodes. This is described in Chapter 8.: Distributing Software Throughout
the System (page 79).
Global System Services
Some system services need to run on all nodes. When the golden image is updated from the golden client,
the list of system services that are started automatically on each client is based on a template file,
/opt/hptc/systemimager/etc/chkconfig.map.
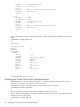
Entries in the chkconfig.map file indicate if the named service is to be turned on or turned off on all the
nodes in an HP XC system at a given run level. The following entry describes the disposition of the crond
service:
crond 0:off 1:off 2:on 3:on 4:on 5:on 6:off
The output of the chkconfig --list command displays data in the same format.
For information on global system services from the perspective of updating the golden image, see “Maintaining
Service Configuration Globally” (page 88) .
Global System Services 53