HP Workgroup System and XC Software Installation Guide Version 1.
© Copyright 2008 Hewlett-Packard Development Company, L.P. Confidential computer software. Valid license from HP required for possession, use or copying. Consistent with FAR 12.211 and 12.212, Commercial Computer Software, Computer Software Documentation, and Technical Data for Commercial Items are licensed to the U.S. Government under vendor's standard commercial license. The information contained herein is subject to change without notice.
Table of Contents About This Document.........................................................................................................9 Intended Audience.................................................................................................................................9 Document Organization.........................................................................................................................9 Typographic Conventions.....................................................
6 Troubleshooting............................................................................................................41 6.1 Unable to Manually Set IP Addresses for the iLOs.........................................................................41 6.2 Changing External IP Addresses.....................................................................................................41 6.3 Lost Connection to the iLO........................................................................................
List of Figures 1-1 1-2 1-3 3-1 3-2 3-3 3-4 3-5 3-6 3-7 4-1 5-1 C-1 C-2 C-3 Example Front View......................................................................................................................11 Enclosure Bay Numbering............................................................................................................12 Example Rear View.......................................................................................................................
List of Tables 2-1 B-1 B-2 6 HP BladeSystem c-Class Firmware and Management Tools Upgrades.......................................14 HP Workgroup System Specifications..........................................................................................47 Thermal Stabilization Specification...............................................................................................
List of Examples 5-1 5-2 5-3 6-1 6-2 6-3 Sample XC.lic File......................................................................................................................30 cluster_config Command Output 1.......................................................................................32 cluster_config Command Output 2.......................................................................................33 Contents of network-scripts File.........................................................
About This Document This document describes how to set up the hardware and install the XC software on your HP Workgroup System. IMPORTANT: This document assumes that you are installing the XC Software Version 3.2.
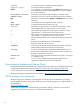
Command Computer output Ctrl+x ENVIRONMENT VARIABLE [ERROR NAME] Key Term User input Variable [] {} ... | WARNING CAUTION IMPORTANT NOTE A command name or qualified command phrase. Text displayed by the computer. A key sequence. A sequence such as Ctrl+x indicates that you must hold down the key labeled Ctrl while you press another key or mouse button. The name of an environment variable; for example, PATH. The name of an error, usually returned in the errno variable. The name of a keyboard key.
1 HP Workgroup System Overview The HP Workgroup System is delivered to you factory assembled and ready for deployment. HP Workgroup System solutions offer a choice of HP ProLiant c-Class BladeSystem half-height server blades with either Intel® Xeon™ or AMD Opteron™ processors. One server blade in the configuration is designated as the head node, which you can configure separately from the remaining server blades (compute nodes) in the enclosure.
IMPORTANT: Be sure there is a blade in Bay 1. See Figure 1-2 for enclosure bay numbering. Figure 1-2 Enclosure Bay Numbering Figure 1-3 shows an example rear view of the HP Workgroup System. Figure 1-3 Example Rear View The following list describes the callouts in Figure 1-3: 1. 2. 3. 4. 5. 6. 7. 8. 9. 10.
2 Hardware Prerequisites Gather the following information before starting the installation process. HP recommend that you download all device drivers, firmware, and documentation to your laptop before you begin the software installation process. 2.
• • For information on displaying the installed version of firmware, see the service guide for the hardware component. For the supported firmware versions, see the HP XC System Software: Master Firmware Tables Version 3.2.1 available online at: http://docs.hp.com/en/A-XCFM3-21A/index.html To upgrade firmware, follow these steps: 1. Go to the web address specified in Table 2-1 to download the firmware. 2. For information on how to upgrade firmware, see the service guide for the hardware component. .
3 Hardware Setup For more information about the HP Workgroup System specifications and thermal stabilization, see Appendix B (page 47). 3.1 Unpack the Enclosure To unpack and remove the HP Workgroup System from a pallet, follow these steps: 1. Move the pallet to the installation location and leave several feet of space to move around the pallet. NOTE: Carton graphics provide instructions on how to unpack the HP Workgroup System and to open the top of the box first. 2. Open the top of the cardboard box.
5. Remove the front section of the bottom cushion (Callout 2) and the ramp. (callout 1, Figure 3-3) Figure 3-3 Removing the Ramp and Front Cushion 6. Attach the ramp to the plywood deck using the hook-and-loop. (Callout 1, Figure 3-4) NOTE: Box clamps must be folded out of the way to lay the ramp down. Figure 3-4 Attaching the Ramp WARNING! The HP Workgroup System weighs 300+ pounds. To avoid injury, you might require a second person to assist you with this step. 7.
Figure 3-5 Rolling the Unit Down the Ramp Figure 3-6 Rolling the Unit to the Installation Location 8. Plug the unit into a power source. 3.2 Installing and Starting Up the Hardware Familiarize yourself with the back of the c3000 enclosure and identify the OA interface port and the HP GbE2c Ethernet switch. See Figure 1-3 (page 12). Verify that there is a blade in bay 1. See Figure 1-2 (page 12) to identify bay numbers.
Figure 3-7 Interconnect Switch The following list describes the callouts in Figure C-1: 1. Port 20 RJ-45 connector for 10/100/1000 Mb uplink 2. Port 21 RJ-45 connector for 10/100/1000 Mb uplink 3. Port 22 RJ-45 connector for 10/100/1000 Mb uplink 4. Port 23 RJ-45 connector for 10/100/1000 Mb uplink 5. Port 24 RJ-45 connector for 10/100/1000 Mb uplink 2. 3. 4. Connect a cable from your laptop to the switch port 21. Callout 2 Figure C-1 Verify that no external network is connected to the switch.
d. e. For Bay 1, specify the IP addresses 172.31.15.1. Click Autofill to populate the remaining IP addresses. Wait 60 seconds for the assignments to take effect, then click Apply to save your settings. 3.2.2 Setting Boot Order To set the boot order for the head node and compute nodes, assuming Bay 1 is the head node, follow these steps: 1. 2. 3. In the left frame of the OA browser window, click the plus sign (+) next to Device Bays to display the list of nodes contained in the enclosure.
NOTE: The OA automatically creates user accounts for itself (prefixed with the letters OA) to provide single sign-on capabilities. Do not remove these accounts. The OA also creates iLO accounts on each blade for its own use. 3.2.4 Enabling Telnet Access 1. 2. Under the hardware model, click iLO. In the body of the main window, click Web Administration to open the iLO2 utility in a new window. NOTE: 3. 4. 5. 6. Turn off popup blocking so the window can open. In the new window, click Administration.
6. 7. 8. Use the virtual power functions to turn off power to the server blade. Close the iLO2 utility web page. Repeat this procedure from every active OA and make the same settings for each server blade in each enclosure. 3.
4 Software Prerequisites Have the following information ready before starting the installation process. Because it is assumed that you will not have an external network connection during the XC Software installation process, we recommend that you download all passwords, the XC.lic file, device drivers, firmware, XC patches, and documentation to your laptop before you begin the software installation process. 4.
NOTE: An internal DVD drive is included in the HP Workgroup System enclosure. 4.2 Downloading XC Software Patches For each supported version of the HP XC System Software, HP releases all Linux security updates and HP XC software patches on the HP IT Resource Center (ITRC) website. To determine if software patches are available, go to the product-specific location on the ITRC.
If you have not received the license key file, contact your HP representative. 4.4 Associating the Enclosure DVD to the Head Node To associate the enclosure DVD to the head node (Bay 1), follow these steps: 1. 2. 3. 4. 5. From the OA left navigation frame, go to Enclosure Settings. (Figure 4-1) Go to DVD drive. Check 1. Choose DVD. Connect to the enclosure DVD. Figure 4-1 DVD Drive 4.
5 XC Software Installation For more details on the following steps, see the HP XC System Software Installation Guide, Section 2.3.2. NOTE: The XC Software installation process may take as long as two hours to complete. 5.1 Booting the DVD 1. Start the installation, leaving the browser on the laptop connected to the OA. NOTE: This document assumes that the internal DVD drive will be used. However, the boot process can be much faster if you use an external drive attached to the head node with a dongle. 2.
5.2 Running the cluster_prep Command IMPORTANT: Some HP XC patches might need to be run before cluster_prep. Check the Readme file of all patches for more details. IMPORTANT: If you are restarting the cluster_prep procedure, you must remove the database on the headnode with the # reset_db command. NOTE: You can access the head node by using the IRC or by using ssh with PuTTY to connect to the IP address of the head node. To run the cluster_prep command to prepare the system, follow these steps: 1.
NOTE: Enter the letter R to change a response. Restarting network ... done 5.3 Installing Patches from Your Laptop To install the XC Software patches from your laptop, follow these steps: 1. Use the IRC to mount the directory with the XC Software patches that you downloaded on your laptop earlier in “Downloading XC Software Patches” (page 24). • Click on the IRC Virtual Media icon on the ILO2 tab at the top of the screen (see Figure 5-1) and browse to select the folder with the XC patches.
6. To install the patches, change into each directory using cd. Follow the instructions in the Readme file. For more information on how to install the patches, see the README file in each directory. 5.4 Putting the License Key File in the Correct Location The license key information must already be saved into a file named XC.lic on your laptop. See “Copying the XC.lic File to Your Laptop” (page 24). NOTE: The sample XC.
3. Enter the following command: # cd /opt/hptc/config/sbin 4. Enter the following command: # ./discover --enclosurebased --single --ic=AdminNet 5. Enter the following responses as indicated. For more information, see Section 3.6.3 in the HP XC System Software Installation Guide.
Example 5-2 cluster_config Command Output 1 Given that there are # nodes in this cluster, enter the number of NFS daemons that shall be configured to support them [8]: Enter Enter the IP address or host name of the first external NTP server or leave blank to use the system clock on the NTP server node: Enter Would you like to enable web based monitoring? ([y]/n): y Enter the password for the 'nagiosadmin' web user: New password: Test1234 Re-type new password: Test1234 Adding password for user nagiosadmin I
Example 5-3 cluster_config Command Output 2 [O]k, [R]especify Interfaces: O Interfaces over which traps will be accepted: loopback Admin [O]k, [R]especify Interfaces: Would you like to create a self-signed certificate for the Apache server? ([y]/n): n Do you want to configure SLURM? (y/n) [y]: n SLURM configuration complete. Press 'Enter' to continue: Enter Do you want to install LSF now? (y/n) [y]: Enter There are two types of LSF available to install: 1.
The Golden Image will be created next. [P]roceed, [Q]uit: P CAUTION: Do not interrupt or stop the golden image creation. Do not browse or touch files. Doing so corrupts the golden image. If you corrupt the golden image, use the following command to remove the base image file (/var/lib/systemimager/images/base_image) to recover from a corrupted golden image: # si_rmimage base_image Restart the cluster_config process. 5.
2. Enter the following command: # manage_enclosure listtrap [root@n1 sbin] manage_enclosure listtrap n-enc09CN8734016G: 172.31.15.240 [root@n1 sbin]# 5.9 LSF Post-Configuration Tasks To finish the configuration, follow these steps: 1. 2. Login as root user on the head node. Set up the LSF environment by sourcing the LSF file as follows: # . /opt/hptc/lsf/top/conf/profile.lsf 3. Verify that the LSF profile file has been sourced by finding an LSF command: # which lsid [root@n1 sbin]# .
# lsid Platform LSF HPC 6.2 for SLURM, LSF_build_date Copyright 1992-2005 Platform Computing Corporation My cluster name is hptclsf My master name is lsfhost.localdomain 2. Verify that the lsf partition exists and all nodes are in the idle state: # sinfo PARTITION AVAIL TIMELIMIT NODES STATE NODELIST lsf up infinite 8 idle n[1-8] 3. Confirm that the ncpus value matches the expected total number of available processors: # lshosts HOST_NAME type model lsfhost.loc SLINUX6 Opteron8 4.
• The run number, which represents the number of times the OVP has been run. The run number is not included for the first run. For example, the log file name ovp_ n16_070607.log indicates that this is the first run of the OVP on July 06, 2007, on head node n16. 5. For more information about troubleshooting failed test results, see HP XC System Software Installation Guide.
Slurm Monitor Slurm Status Supermon Metrics Monitor Switch Switch Data Collection Syslog Alert Monitor Syslog Alerts System Event Log System Event Log Monitor System Free Space Totals: 1-Ok 10-Ok 1-Ok 2-Ok 1-Ok 1-Ok 10-Ok 9-Ok 1-Ok 10-Ok 115-Ok 0-Warn 0-Warn 0-Warn 0-Warn 0-Warn 0-Warn 0-Warn 1-Warn 0-Warn 0-Warn 1-Warn 0-Crit 0-Crit 0-Crit 0-Crit 0-Crit 0-Crit 0-Crit 0-Crit 0-Crit 0-Crit 0-Crit 0-Pend 0-Pend 0-Pend 0-Pend 0-Pend 0-Pend 0-Pend 0-Pend 0-Pend 0-Pend 0-Pend 0-Unk 0-Unk 0-Unk 0-Unk 0-Unk 0
# export SYS_CHECK_SYSWIDE=1 # sys_check > /tmp/filename.html By default, the sys_check utility creates the report in HTML format, but there is an option to create a text version. You can redirect the output of the sys_check report to the directory and file name of your choice. For more information about this utility and its options, see the HP XC System Software Administration Guide and sys_check(8). 5.
>> >> >> >> >> 6. VLAN VLAN VLAN VLAN VLAN 2 2 2 2 2 add add add add ena 7 8 21 23 Assuming that the switch ssh or telnet management interface address has been assigned to IP interface if 1, add that to the VLAN with the following commands: >> VLAN 2 /cfg/l3/if 1 >> IP Interface 1 # vlan 2 7. Enter / at the CLI prompt, apply, and save the configuration as follows: >> apply >> save 8.
6 Troubleshooting 6.1 Unable to Manually Set IP Addresses for the iLOs 1. 2. 3. 4. Verify that the iLOs are set to DHCP enabled. Power down the node. Then power it on and watch the monitor as the system boots. Early in the boot process, a message appears on the screen that says "F8 to configure". Press F8. Follow the configuration menu to find the DHCP setting and disable it. 6.2 Changing External IP Addresses The netinfo file is only read the first time cluster_config runs.
Example 6-2 Modify Database 4. (Optional) Edit the file /etc/sysconfig/netinfo to reflect the correct external network information and MAC address. Example 6-3 Sample netinfo File 5. 6. Run the configuration scripts with the command service nconfig nconfigure. Restart the network with the command service network restart. 6.3 Lost Connection to the iLO If iLO2 is not responding to the browser, click Reset on the Diagnostic page of the iLO 2 browser interface. 6.
6.5 Lost Terminal Window When in the IRC If a terminal window fails to open in the IRC, press CTL ALT Backspace. This will take you back to the login screen. After you login, you can open up a terminal window. 6.
A Additional Software Setup Information To change the iLO default user name and password 1. 2. Under the hardware model, click iLO. In the body of the main window, click the Web Administration link to open the Integrated Lights-Out 2 utility in a new window. You might have to turn off popup blocking for this window to open. 3. In the new window, click the Administration tab. 4. In the left frame, click the User Administration link. 5.
B Additional Hardware Setup Information B.1 HP Workgroup System Specifications Table B-1 HP Workgroup System Specifications Size1 Height 54.1 cm (21.20 in) Width 34.24 cm (13.48 in) Depth 87.45 cm (34.43 in) Weight 2 87.09 kg (192 lb) to 155 kg (342 lb) depending on the configuration Power Requirements 1 C13/C14 power cords connected directly to low-line wall outlets Operating Temperature Range3 10°C to 35°C (50°F to 95°F) Space and Air Flow 4 63.5 cm (25 in) front 76.2 cm (30 in) rear 121.
Table B-2 Thermal Stabilization Specification (continued) Ambient Shipping Temperature Range Ambient Shipping Temperature Range Minimum Stabilization Time (°C) (°F) 48 -30 to -21 -22 to -5 4 hours -40 to -31 -40 to -21 5 hours Additional Hardware Setup Information
C IP Addresses on a Corporate Network Use this method if you have access to the corporate network and a DHCP server providing IP addresses. In order to use this process, the iLOs must be set to DHCP enabled. C.1 Cabling 1. 2. Power off the enclosure. Connect the RJ45 CAT5 patch cable from the OA1 interface port to port 24 of the GigE switch. (Figure C-1) See Figure 1-3 (page 12) for the exact location of the interconnect switch. (Callout 2.
Figure C-3 OA IP Address On the warning page, click Continue to this website. 5. 50 Enter the Administrator user name and the password supplied with the HP Workgroup System.
D Configure sendmail LSF requires a mail program to send job output to users who submit jobs and to send administrative messages to the LSF administrator. By default, LSF uses the sendmail mail program. The sendmail service is installed by default on the head node in /usr/lib/sendmail, but you must configure sendmail to meet your site requirements.
Consult any third-party Linux system administration reference manual if you need more information about configuring sendmail. To use a mail program other than sendmail, set the LSB_MAILPROG variable in the /opt/ hptc/lsf/top/conf/lsf.conf file to the appropriate mail program after the system configuration is complete.
Glossary A administration network The private network within the HP XC system that is used for administrative operations. B base image The collection of files and directories that represents the common files and configuration data that are applied to all nodes in an HP XC system. branch switch A component of the administration network. A switch that is uplinked to the root switch and receives physical connections from multiple nodes.
iLO2 The next generation of iLO that provides full remote graphics console access and remote virtual media. See also iLO. image server A node specifically designated to hold images that will be distributed to one or more client systems. In a standard HP XC installation, the head node acts as the image server and golden client. Integrated Lights Out See iLO. interconnect A hardware component that provides high-speed connectivity between the nodes in the HP XC system.
MySQL A relational database system developed by MySQL AB that is used in HP XC systems to store and track system configuration information. N NAT Network Address Translation. A mechanism that provides a mapping (or transformation) of addresses from one network to another. This enables external access of a machine on one LAN that has the same IP address as a machine on another LAN, by mapping the LAN address of the two machines to different external IP addresses. Network Address Translation See NAT.
S server blade One of the modules of an HP BladeSystem. The server blade is the compute module consisting of the CPU, memory, I/O modules and other supporting hardware. Server blades do not contain their own physical I/O ports, power supplies, or cooling. SLURM backup controller The node on which the optional backup slurmctld daemon runs. On SLURM failover, this node becomes the SLURM master controller. SLURM master controller The node on which the slurmctld daemon runs.
Index A administrative network configuring VLAN for, 39 testing, 36 B backup CMDB, 38 bad golden image, 42 boot order, 19 C cluster_config, 31 cluster_prep, 28 CMDB backing up, 38 documentation, 38 compute node testing, 36 configuration and management database (see CMDB) configuration data creating baseline report, 38 configuring VLANs, 39 CPU usage testing, 36 XC.
X XC installation, 27 XC license, 24 XC patches, 24 58 Index